18. Admin Panel Setup
The Admin Panel is a Laravel 12 application. Make sure your server meets the requirements in Server Requirement, then upload the Admin Panel package to your domain or subdomain and extract it.
18.1. Upload the files
18.1.1. Connect over FTP/SFTP. Use a client such as FileZilla with your server IP, username and password — port 21 for FTP, port 22 for SFTP.
18.1.2. Transfer the ZIP file to the target path on the server, for example /var/www/html.
18.1.3. Extract it from the server terminal, or with the cPanel File Manager:
unzip your-application.zip
18.1.4. Point the domain’s document root at the project’s public/ folder.
18.2. Create the database
The admin panel uses MySQL only for panel authentication (users, roles, permissions), sessions and jobs — every piece of platform data lives in Firestore. Create a database and user from your control panel, then import the supplied .sql file into it (step 18.3.6).
Each panel needs its own database. The Admin, Restaurant and Website panels ship with a separate .sql file each, so create three databases — for example foodie_admin, foodie_restaurant and foodie_web — and import the matching file into each one. They all share the same Firebase project; only MySQL is per-panel.
18.2.1. Open MySQL Databases in cPanel.
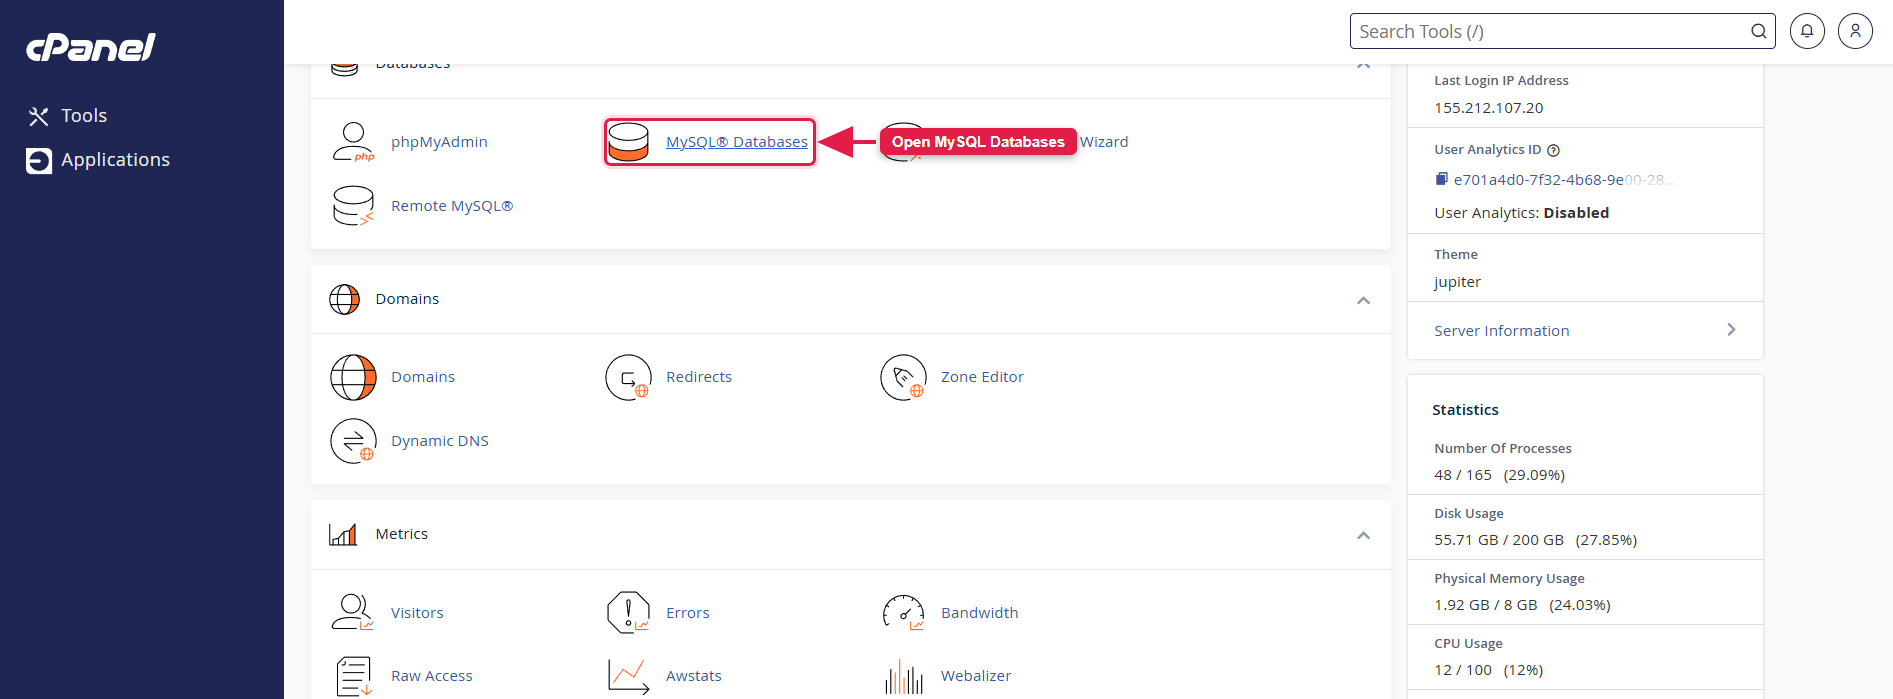
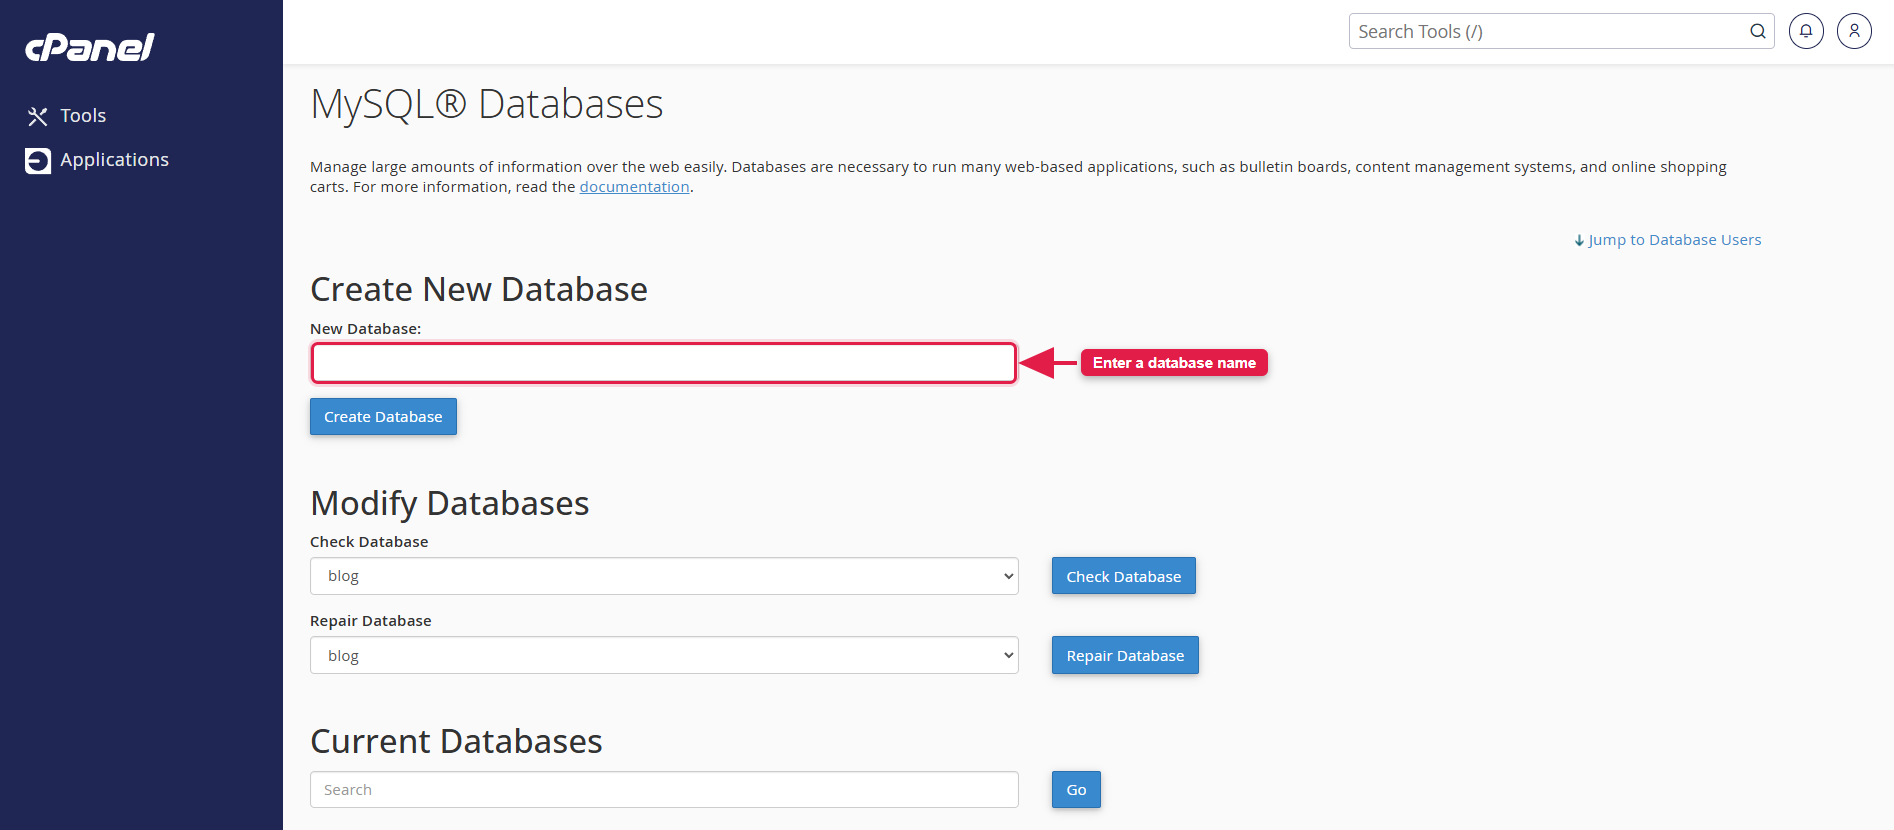
18.2.2. Enter a name and create the database.
18.2.3. Create a database user with a strong password.
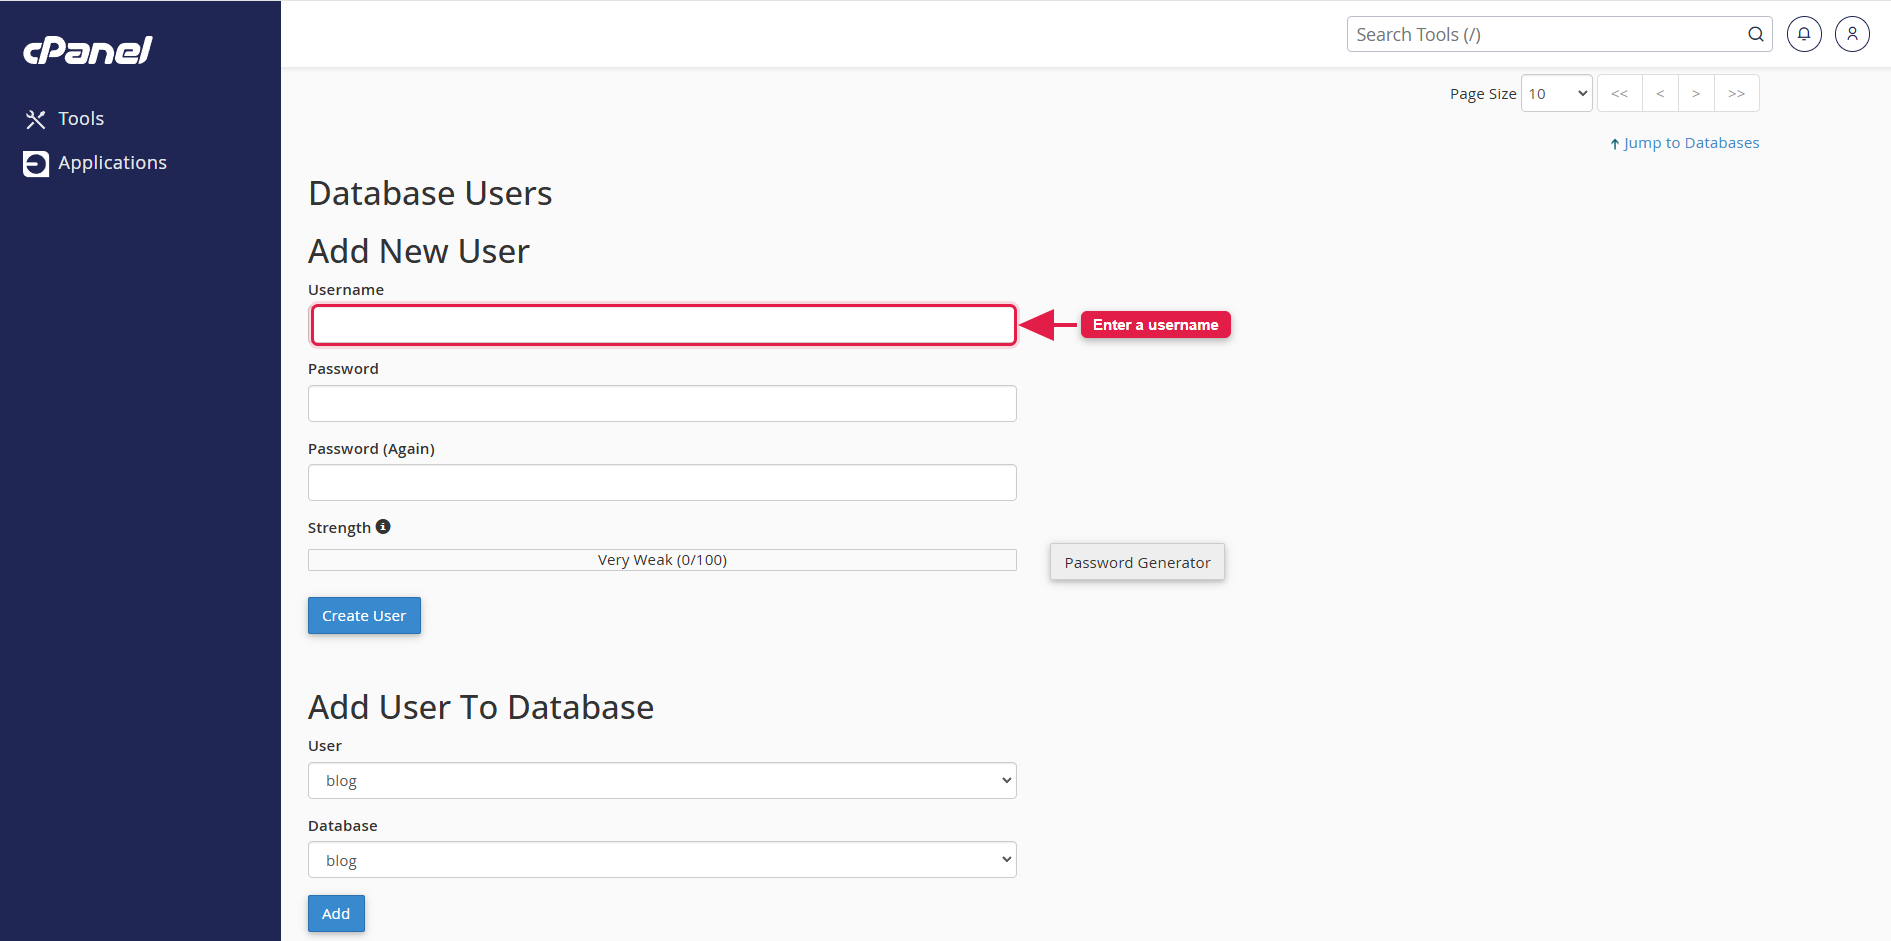
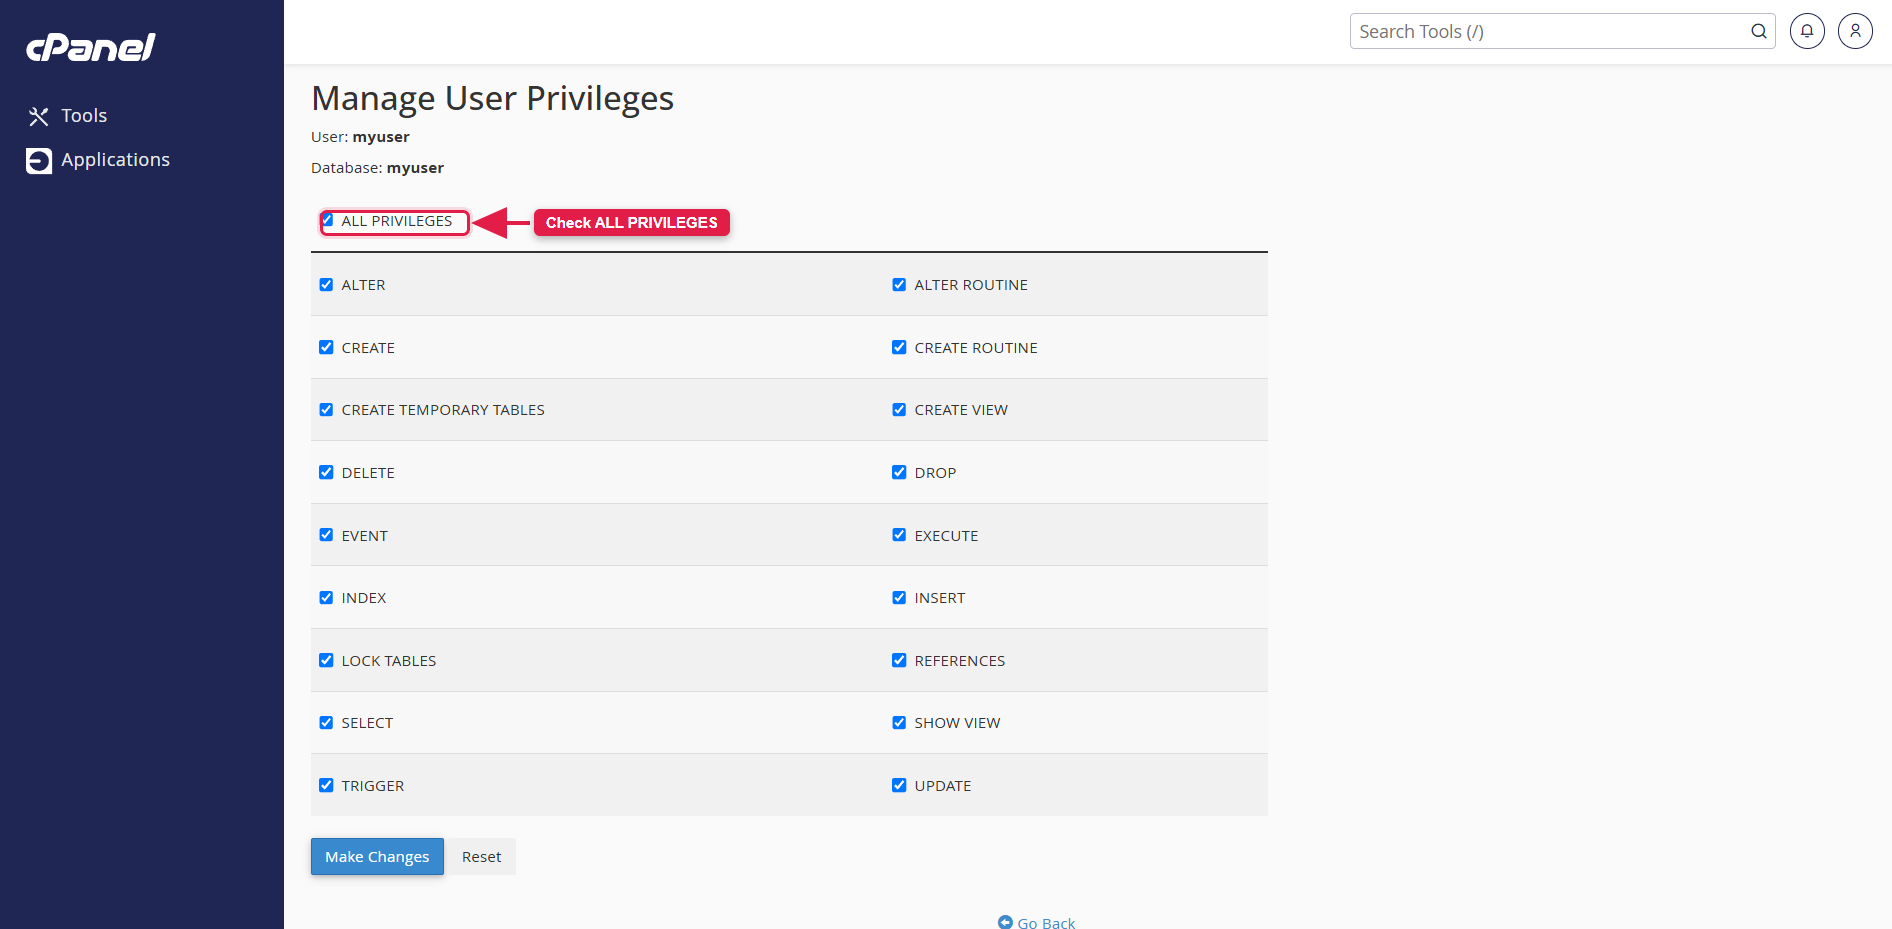
18.2.4. Add the user to the database, grant ALL PRIVILEGES, and click Make Changes.
18.3. Configure the panel
18.3.1. Install the dependencies and generate the application key:
composer install
cp .env.example .env
php artisan key:generate
18.3.2. Edit .env and set the database connection and your Firebase web app credentials (copied in step 14.4):
APP_NAME=Foodie
APP_URL=https://admin.yourdomain.com
DB_DATABASE=your_database
DB_USERNAME=your_db_user
DB_PASSWORD=your_db_password
# Firestore named database — '(default)' unless you created a named one
FIREBASE_PROJECT_DB=(default)
FIREBASE_APIKEY=
FIREBASE_AUTH_DOMAIN=
FIREBASE_DATABASE_URL=
FIREBASE_PROJECT_ID=
FIREBASE_STORAGE_BUCKET=
FIREBASE_MESSAAGING_SENDER_ID=
FIREBASE_APP_ID=
FIREBASE_MEASUREMENT_ID=
# Absolute path to the Node binary — used by the scheduled scripts
NODE_PATH=''
# Timezone
APP_TIMEZONE='Asia/Kolkata'
FIREBASE_PROJECT_DB must be identical in all three panels. Use (default) unless you deliberately created a named Firestore database. A mismatch is the most common cause of “data shows in one panel but not the other”.
18.3.3. Place the Firebase service account file at storage/app/firebase/credentials.json. It is required for server-side ID-token verification, for sending push notifications, and by the scheduled scripts.
18.3.4. Install the Node modules the scheduled scripts need, from the panel root:
npm install
18.3.5. Set NODE_PATH in .env to the absolute path of your
Node binary — see Installing Node.js & npm.
18.3.6. Import the panel’s database. Each panel ships with its own .sql file inside the package — import it into the database you created in step 18.2. Do not run php artisan migrate; the supplied .sql file already contains the tables and the default data.
Using phpMyAdmin / cPanel: open phpMyAdmin, select your database from the left-hand list, open the Import tab, choose the panel’s .sql file and click Go.
Using the command line:
mysql -u your_db_user -p your_database < admin_panel.sql
18.3.7. Set writable permissions on the runtime folders:
chmod -R 755 storage bootstrap/cache
18.4. Import the demo data
The panel reads its configuration from Firestore, so before your first login import the supplied Firestore collections — see Firestore Database Collection Import / Export. They contain the settings documents, currencies, email templates, CMS pages and the sample catalog.
Two imports, two places. The .sql file (step 18.3.6) sets up MySQL — the panel’s login accounts, roles and permissions. The Firestore import sets up the platform data the panel displays. Both are needed before the panel is usable.
18.5. Log in
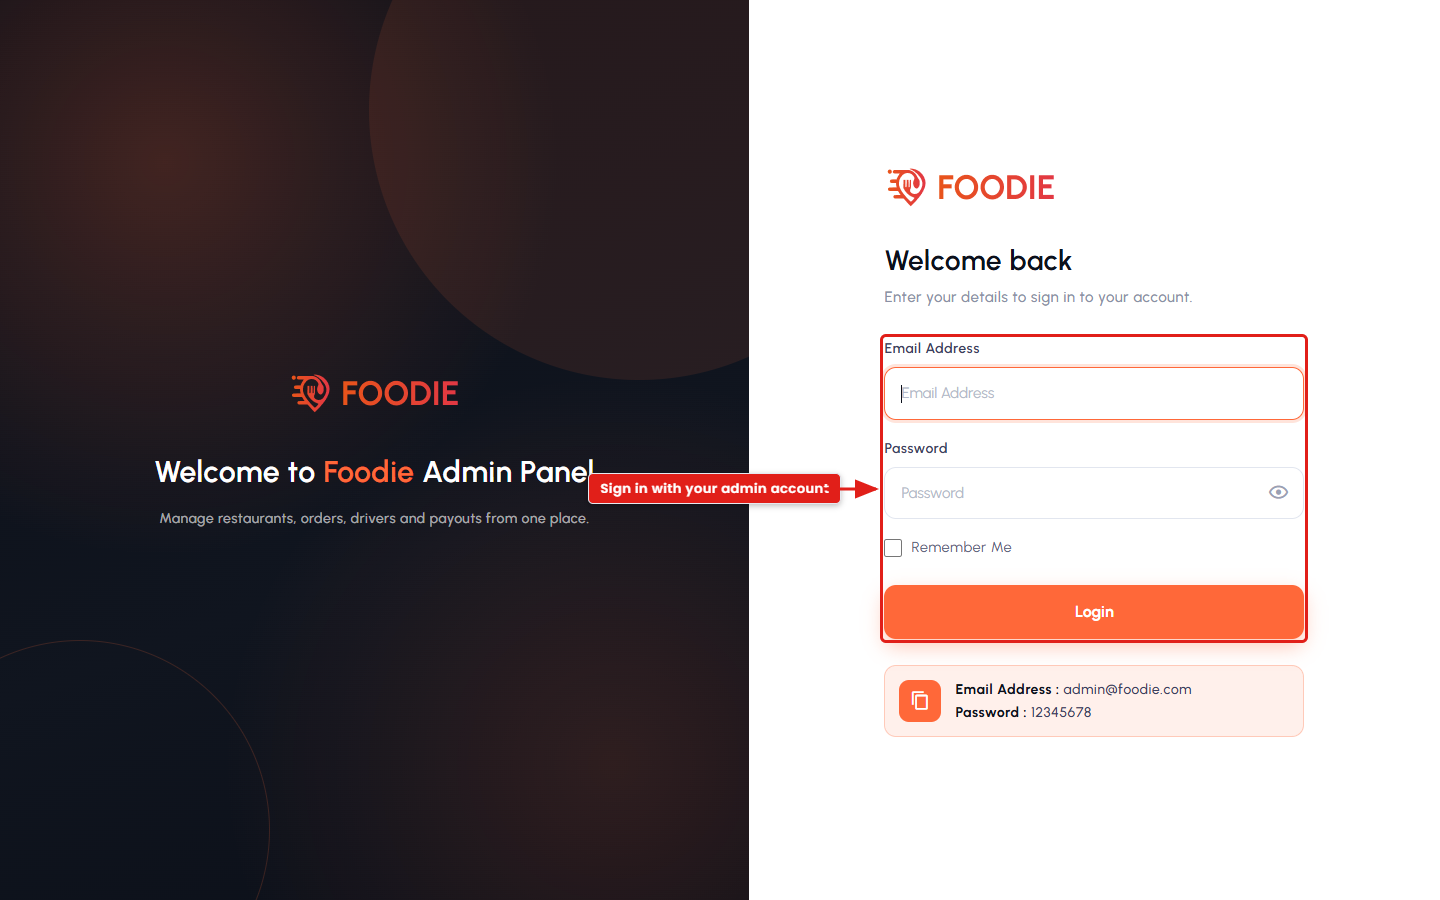
Open the panel at your domain, for example https://admin.yourdomain.com, and sign in with the default account that came with the imported .sql file:
Email:    admin@foodie.com
Password: 12345678
18.6. Map configuration
Choose your map provider under Settings → Map Settings and paste your Google Maps API key — see Create Google Map API Key.
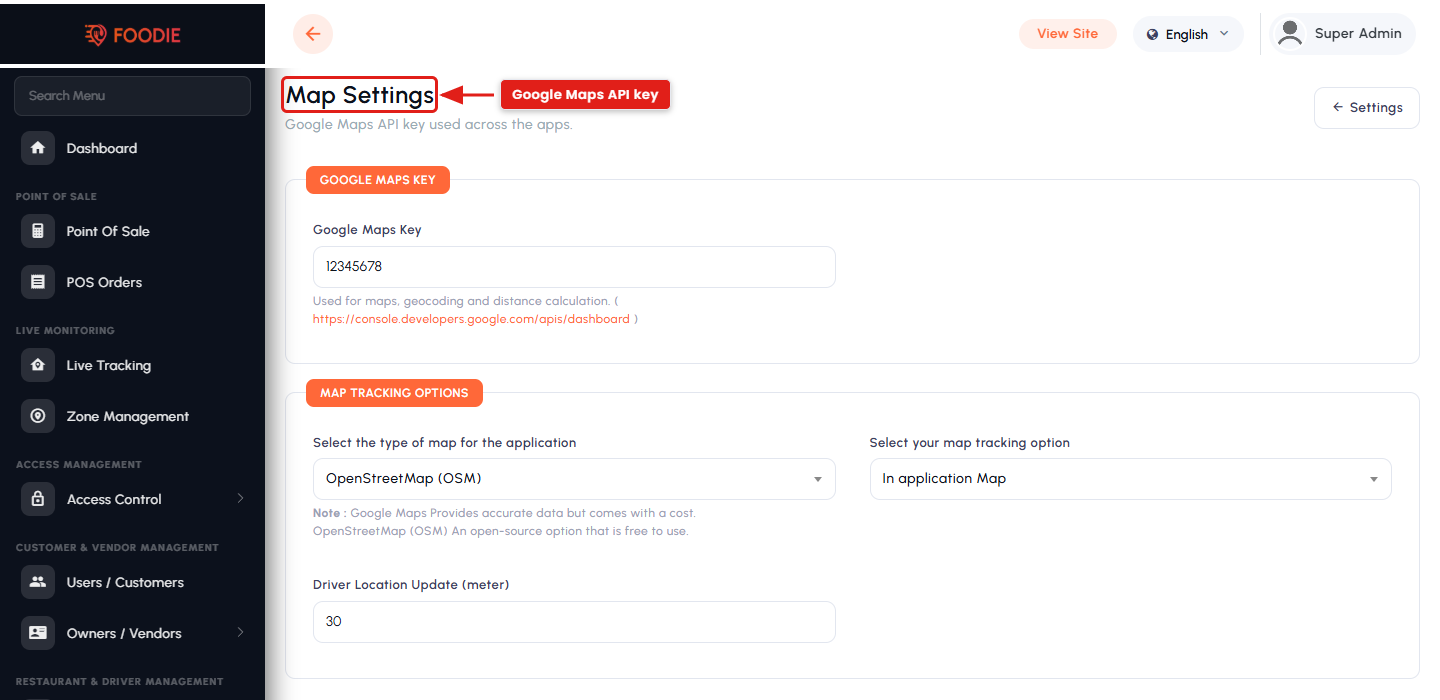
Google Maps is recommended for accurate location, search and delivery-distance results.
18.7. Notification settings
Push notifications are delivered through Firebase Cloud Messaging (FCM). Connect the panel to FCM as follows:
1. Generate the Firebase credentials file
- Open the Firebase console and select your project.
- Go to Project Settings → Service accounts.
- Click Generate new private key — a JSON file downloads (for example
firebase-adminsdk-xxxxx.json). - Keep this file safe; it grants administrative access to your Firebase project.
2. Upload it in the admin panel
- Log in to your Foodie Admin Panel.
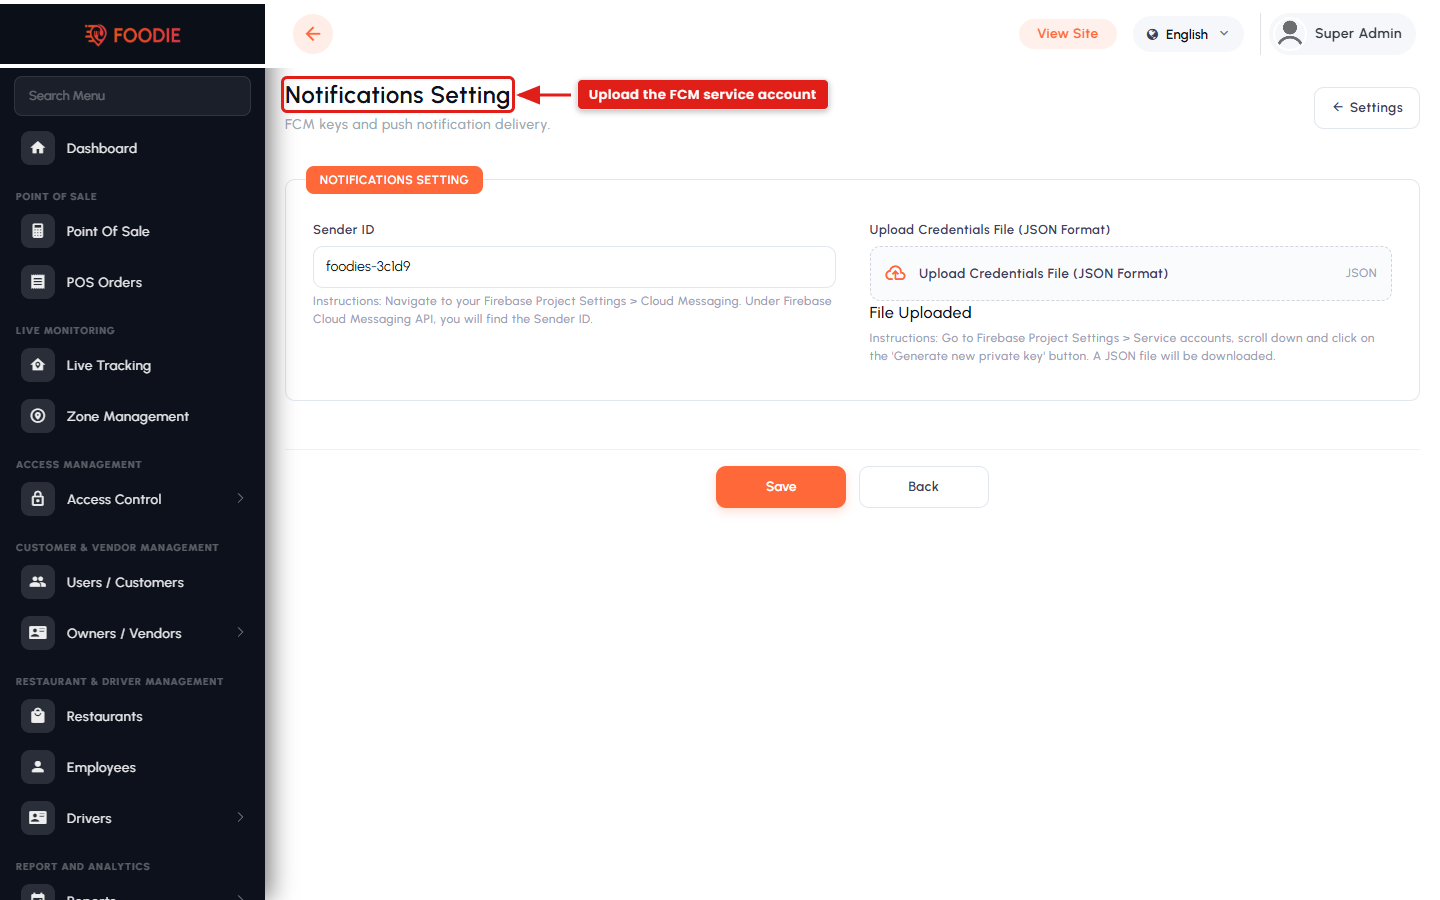
- Go to Settings → Notification Settings.
- Upload the JSON file and enter the Sender ID from Project Settings → Cloud Messaging.
3. Save and verify
- Click Save. The panel now sends push through Firebase.
- Place a test order from the User App; the restaurant and the assigned driver should receive a push notification immediately, and the customer should receive the status updates (accepted, picked up, on the way, delivered).
18.8. AI settings
Open Settings → AI Settings and paste your OpenAI API key.
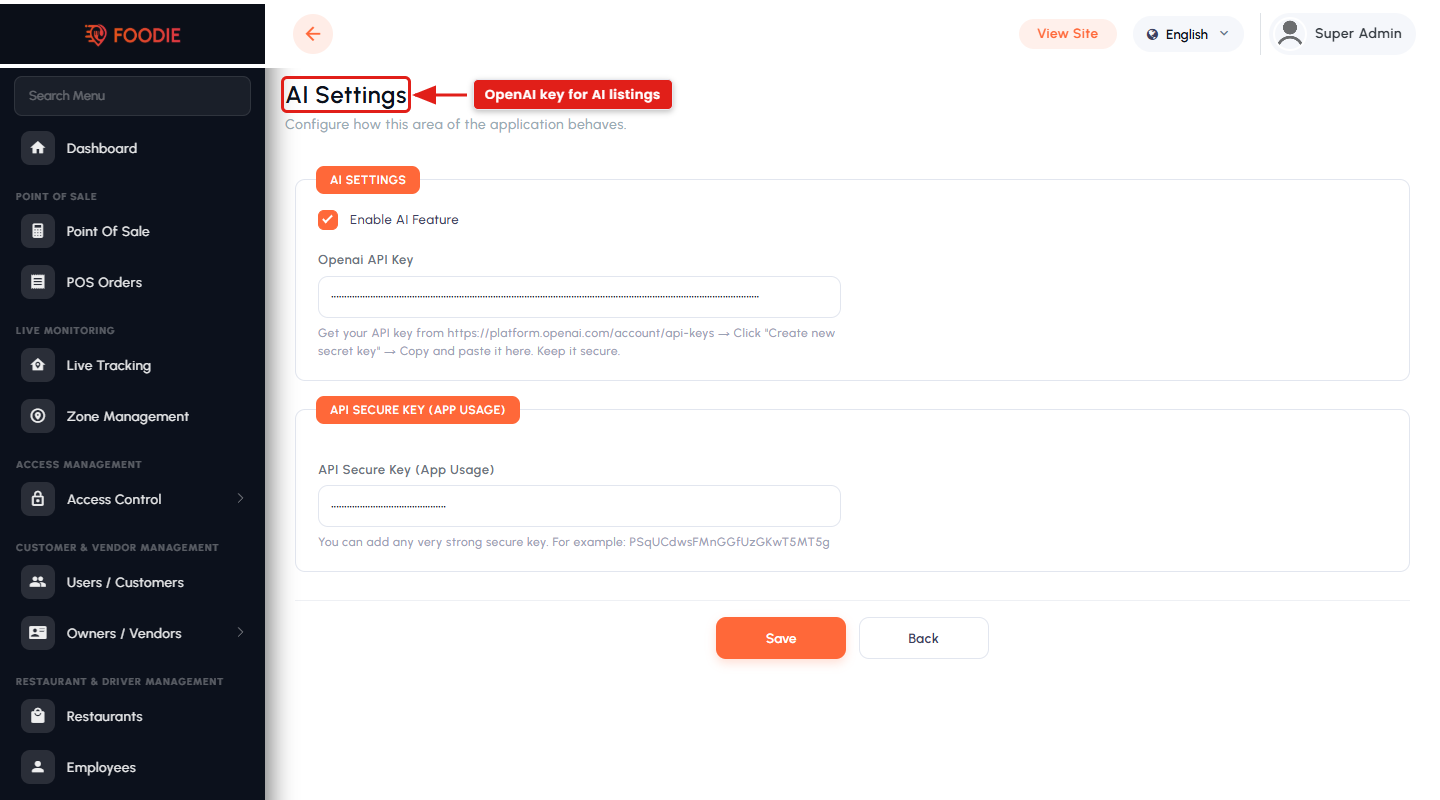
With AI enabled, a food item can be generated from its image plus a title and short description — the model returns an expanded description, specifications, variations and other attributes, which speeds up menu creation and keeps listings consistent.
The API secure key used by the mobile apps for AI features is set under Settings → Global Settings.