Foodie | UberEats Clone — Multi-Restaurant Food Delivery Platform
Foodie is a complete multi-restaurant food ordering and delivery platform. Customers browse nearby restaurants, order food for delivery, takeaway or dine-in, and track the driver live on a map. This document covers the complete setup of the Admin Panel, the Restaurant (Vendor) Panel, the Website (Customer) Panel and the three mobile applications.
- Product: Foodie — UberEats Clone, Multi-Restaurant Food Delivery
- Admin Panel: Laravel 12 / PHP 8.2 (Firebase Firestore backend)
- Restaurant Panel: Laravel 12 / PHP 8.2 (Firebase Firestore backend)
- Website Panel: Laravel 12 / PHP 8.2 (Firebase JS SDK)
- Mobile Apps: User App, Restaurant App and Delivery Man / Driver App — Flutter (Android & iOS)
- Backend: Google Firebase — Firestore, Storage, Authentication & Cloud Messaging
1. Introduction
Foodie is a modern, scalable food-delivery marketplace. Restaurants publish their menus, customers order for delivery, takeaway or dine-in, and drivers pick up and deliver each order while everyone follows the progress in real time. The platform is built on secure, modern technologies:
- Admin Panel — Laravel 12 / PHP 8.2 for full marketplace management.
- Restaurant (Vendor) Panel — Laravel 12 panel where restaurant owners and their employees manage menus, orders, POS, coupons and payouts.
- Website (Customer) Panel — Laravel 12 customer-facing ordering website.
- Mobile Applications — three Flutter apps for Android & iOS:
- User App — customers browse restaurants, order and track delivery.
- Restaurant App — owners accept and manage orders on the move.
- Delivery Man / Driver App — drivers receive, pick up and deliver orders.
- Google Firebase — Firestore stores all platform data; Storage holds images and documents; Authentication handles sign-in; and Cloud Messaging (FCM) delivers push notifications.
All clients (Admin, Restaurant, Website and Mobile) share a single Firebase project, so data stays consistent in real time across the whole platform.
Important — third-party services & costs: Foodie integrates several external services operated by third parties that may incur their own charges, separate from this product:
- Payment gateways (Stripe, PayPal, Razorpay, Paystack and others) charge their own transaction/processing fees and may require account approval.
- Google Firebase (Firestore, Storage, Authentication, Cloud Messaging, Cloud Functions) is free up to Google quotas; usage beyond the free tier is billed by Google. Cloud Functions require the Blaze (pay-as-you-go) plan.
- Google Maps Platform requires a billing-enabled Google Cloud account; map, places and directions usage is billed by Google beyond the free monthly credit.
- OpenAI is billed per request if you enable the AI food-listing features.
- SMS / phone OTP and other messaging providers may charge per message.
You are responsible for creating and funding these third-party accounts. Please review each provider's current pricing before going live.
Key Features
Customer Experience
- Sign up / log in via email & password, phone number (OTP) or Google.
- Browse nearby restaurants by zone, category, cuisine and filters; search foods and restaurants.
- Three ordering modes — Delivery, Takeaway and Dine-In (table booking).
- Cart with add-ons, variants and item attributes; order notes; scheduled orders; driver tips.
- Favourites, trending, offers, re-order and a delivery-address book.
- Live order tracking on the map, real-time status updates and push notifications.
- Wallet, gift cards, cashback, coupons and multi-currency support.
Restaurant / Vendor Management
- Dedicated restaurant panel with dashboard, earnings and order flow.
- Menu management — categories, foods, add-ons, attributes and availability, plus import from the admin global menu and bulk CSV import.
- Point of Sale (POS) for walk-in and counter orders, with a separate POS order list.
- Dine-in / table-booking history, restaurant coupons and advertisements.
- Self delivery — restaurants can manage their own deliverymen instead of using the platform driver pool.
- Employee management with per-employee roles and permissions.
- Payouts, withdrawal methods and wallet transactions.
- Subscription plans — buy, change and review subscription history.
Driver & Delivery
- Driver onboarding with document verification and admin approval.
- Order assignment by broadcast or sequential dispatch.
- Live "God's Eye" map showing drivers and in-flight orders.
- Driver payouts, payout requests and wallet transactions.
Platform Administration
- Role-based admin users with granular per-menu permissions.
- Service zones that define exactly where the platform operates.
- Sales and tax reports with restaurant / driver / date filters and XLS, CSV and PDF export.
- Customer, vendor, restaurant, driver and employee management.
- Document types and a verification workflow for vendors and drivers.
- Admin-side POS and order management, including printable order slips.
Monetization
- Commission, subscription or hybrid business models.
- Vendor subscription plans with feature limits and history.
- Platform fee, packaging charge, delivery charge and country-wise taxes.
- Coupons, cashback, gift cards and paid advertisements.
- 20+ integrated payment gateways plus Cash on Delivery and an in-app wallet.
Content & Communication
- Home banners, footer template, CMS pages and onboarding screens.
- General and dynamic push notifications, plus editable email templates.
- Built-in chat between admin, customers, vendors and drivers, with a support-history log.
- Multi-language interface (English and Arabic ship by default) with RTL support.
AI Features
- OpenAI-powered food listing — generate descriptions, specifications and attributes from a food title and image.
- Available in both the Admin Panel and the Restaurant Panel, configured from Settings → AI Settings.
2. Basic Requirements
Foodie ships as six applications — three Flutter mobile apps (the User App, the Restaurant App and the Delivery Man / Driver App) and three Laravel web panels (the Admin Panel, the Restaurant Panel and the Website Panel) — all powered by Google Firebase. What you need depends on which part you are setting up.
For the Mobile Apps
- The Flutter SDK and an IDE (VS Code or Android Studio).
- Android Studio (Android SDK) to build for Android, and a Mac with Xcode to build for iOS.
- Basic knowledge of Flutter / Dart — only if you want to customise the apps.
- A separate package name / bundle ID and store listing for each of the three apps.
Full steps are in App Documentation → Setting up Flutter.
For the Web Panels (Admin, Restaurant & Website)
- A server (a real server / cPanel recommended) running PHP 8.2+,
MySQL / MariaDB and Apache or NGINX with
mod_rewrite. - Composer (PHP dependencies) and Node.js (Firebase CLI and the scheduled scripts).
- An SSL certificate — Firebase Authentication and payment callbacks require HTTPS.
- A cron job for Laravel's scheduler (auto-cancel and scheduled-order notifications).
- Basic knowledge of PHP / Laravel — only if you want to customise the panels.
Full server details are in Web Documentation → Server Requirement.
Shared Services (used by all parts)
- A Firebase project on the Blaze plan — Firestore, Storage, Authentication, Cloud Messaging and Cloud Functions.
- A Google Maps API key with Maps, Places, Geocoding and Directions enabled.
- At least one payment gateway account (or Cash on Delivery only, to start).
- Basic familiarity with Google Cloud & Firebase.
3. Setting up Flutter
Foodie includes three Flutter (Dart) applications — the User App, the Restaurant App and the Delivery Man / Driver App. Each is a separate project with its own source folder, package name and store listing, but they share one Firebase project and the setup below is identical for all three: install Flutter once, then repeat sections 4–10 for each app. The official reference is docs.flutter.dev, but you should not need it to complete this guide.
3.1. System Requirements
- OS: Windows 10/11 (64-bit), macOS, or Linux. iOS builds require macOS + Xcode.
- Disk space: ~2.8 GB for the Flutter SDK (plus your IDE / Android Studio).
- Tools: Git, and PowerShell 5.0+ on Windows.
3.2. Install the Flutter SDK
- Download the SDK for your platform from docs.flutter.dev.
- Extract it to a path without spaces — for example
C:\src\flutteron Windows, or~/development/flutteron macOS/Linux. - Add the
flutter/binfolder to your systemPATHso thefluttercommand works from any terminal.
3.3. Install the Platform Toolchains
- Android: install Android Studio, then open the SDK
Manager and install the Android SDK, the SDK Command-line Tools and the Platform Tools.
Accept the licences with
flutter doctor --android-licenses. - iOS (macOS only): install Xcode from the App Store, run
sudo xcodebuild -runFirstLaunch, then install CocoaPods withsudo gem install cocoapods.
3.4. Verify the Installation
Run the doctor command and fix anything it reports:
flutter doctor -v
Every item that matters for your target platform should show a green check.
3.5. Install the IDE Plugins
- VS Code: install the Flutter and Dart extensions.
- Android Studio: install the Flutter plugin (it pulls in Dart).
3.6. Open the Foodie Project
Unzip the application source, open the folder in your IDE, and fetch the dependencies:
flutter pub get
3.7. Run the App
Start an emulator/simulator or connect a physical device, then run:
flutter devices
flutter run
Hot reload (r in the terminal) applies code changes instantly while the app keeps running.
4. Changing the Package Name & Bundle ID
The package name (Android) and bundle identifier (iOS) uniquely identify an app on the stores. Use reverse-domain form, and give each of the three apps its own identifier — they are published as three separate listings and registered as three separate apps in Firebase:
com.yourcompany.foodie            ← User App
com.yourcompany.foodie.restaurant ← Restaurant App
com.yourcompany.foodie.driver     ← Delivery Man / Driver App
Change the identifier before registering the app in Firebase, because the Firebase config files are tied to it. The steps below apply to one app — repeat them in each of the three project folders.
4.1. Change the Android package name
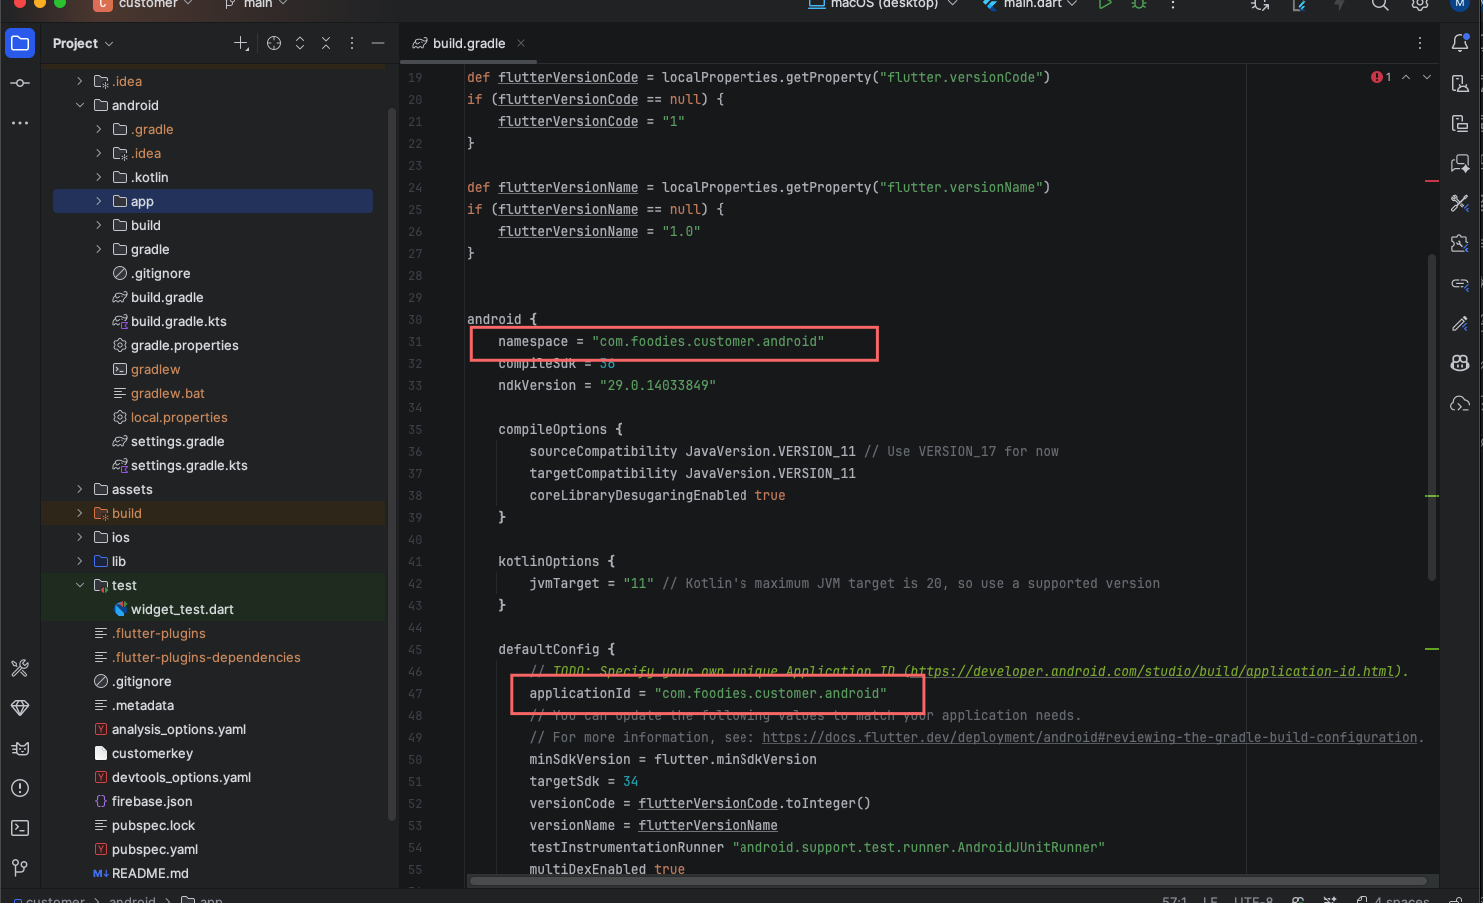
On current Flutter versions the identifier lives in android/app/build.gradle, not in the
manifest. Open that file and change both values:
android {
    namespace = "com.yourcompany.foodie"
    ...
    defaultConfig {
        applicationId = "com.yourcompany.foodie"
        ...
    }
}
namespace— the package the generatedRclass andMainActivitybelong to.applicationId— the identifier Google Play and Firebase key off. This is the one that must match yourgoogle-services.json.- On older projects the same value also appears as the
packageattribute of the<manifest>tag inandroid/app/src/main/AndroidManifest.xml(and in thedebug/profilevariants) — update it there too if your copy still has it.
4.2. Update the Android source-code references
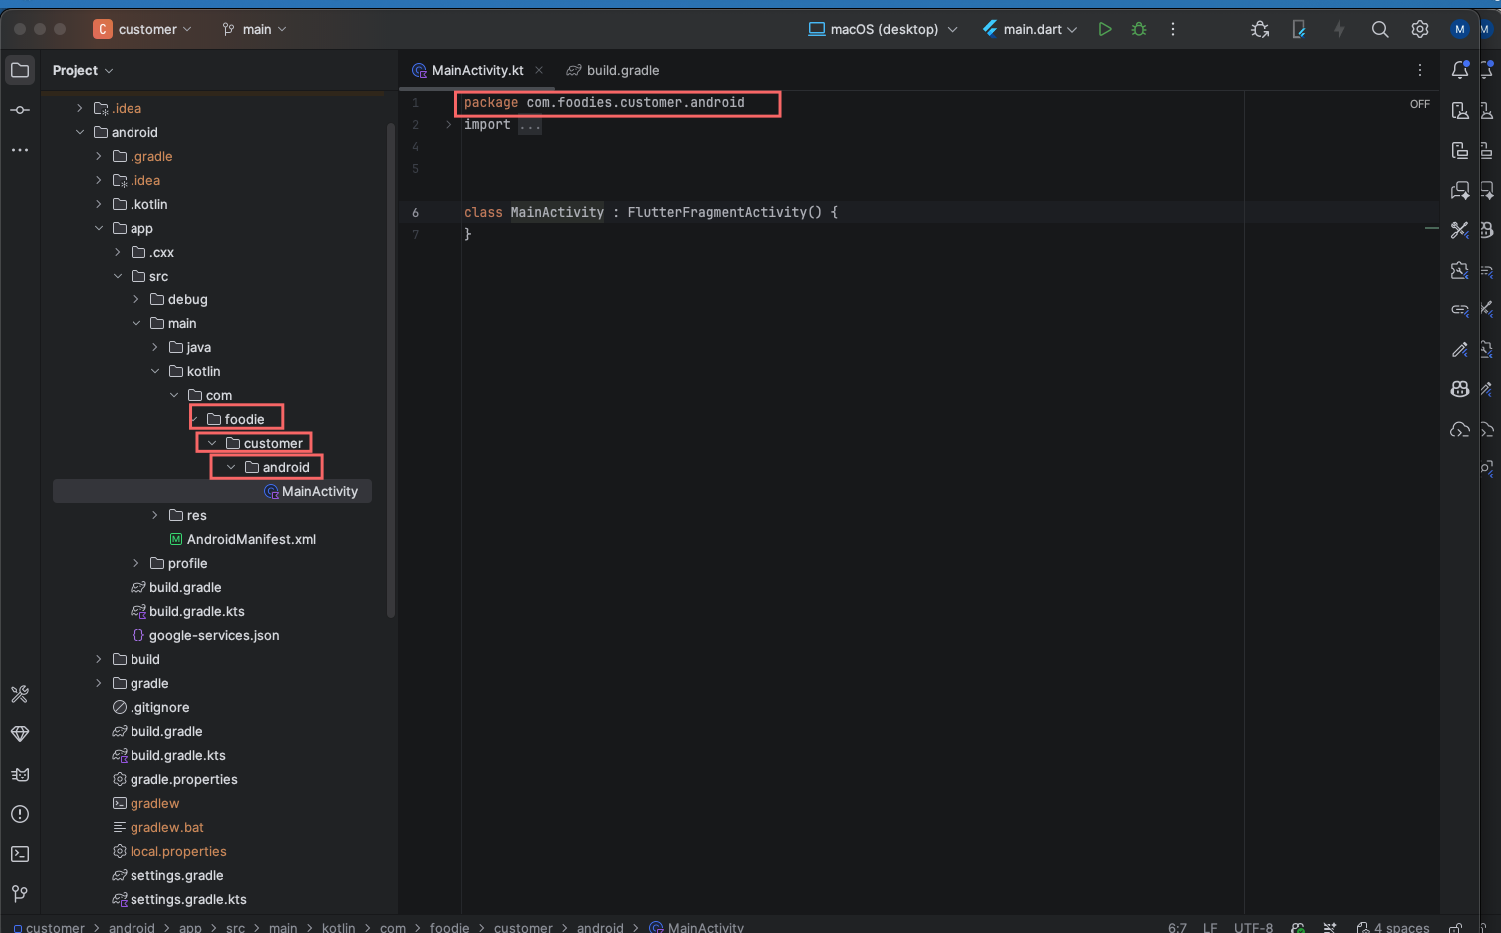
Rename the folders under android/app/src/main/kotlin/ (or .../java/) to match the
new package, and update the package declaration at the top of MainActivity.kt /
MainActivity.java.
4.3. Change the iOS bundle identifier
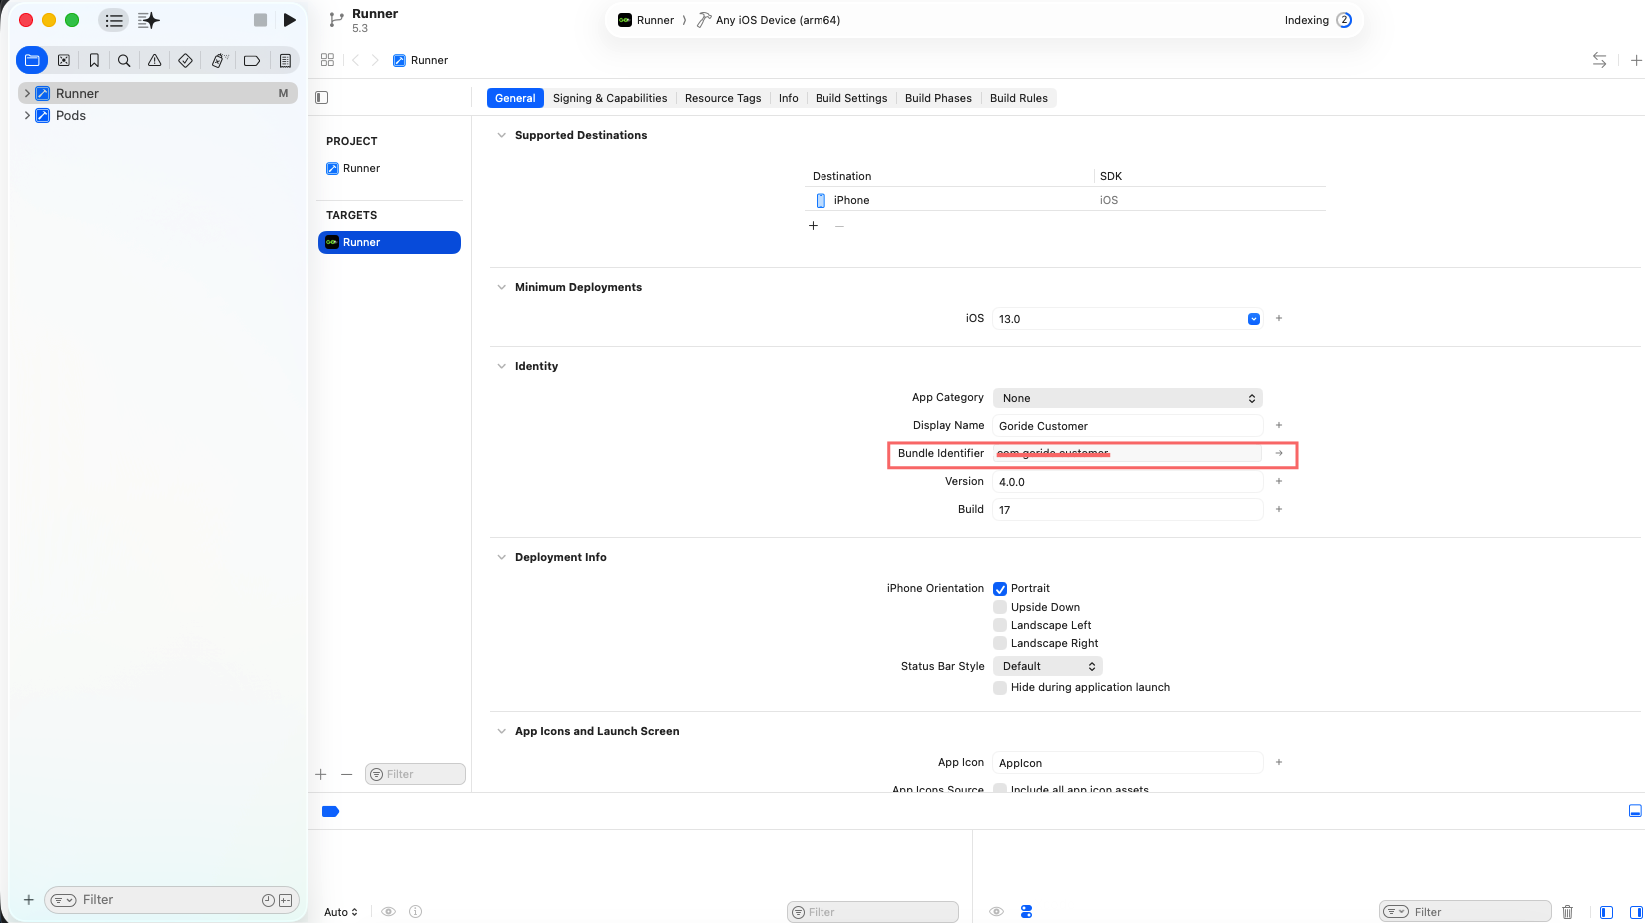
- Open
ios/Runner.xcworkspacein Xcode. - Select the Runner project → Runner target → General.
- Set Bundle Identifier to your new identifier.
Tip: After renaming, run flutter clean followed by
flutter pub get, and download fresh google-services.json /
GoogleService-Info.plist files for the new identifiers (see
Firebase Setup (Mobile)).
5. Changing the Launcher Icon
5.1. Prepare your new icons
Start from a single square PNG at 1024×1024, with no transparency for iOS.
- Android: replace
ic_launcher.pnginside eachandroid/app/src/main/res/mipmap-*folder (mdpi, hdpi, xhdpi, xxhdpi, xxxhdpi), keeping the same file names and sizes. - iOS: replace the
AppIconimage set inios/Runner/Assets.xcassets(open the project in Xcode and drop the sizes in).
5.2. Flutter launcher-icon package (recommended)
Generating every size by hand is error-prone. Add the helper package to pubspec.yaml:
dev_dependencies:
  flutter_launcher_icons: ^0.13.1

flutter_launcher_icons:
  android: "launcher_icon"
  ios: true
  image_path: "assets/icon/icon.png"
Then generate all sizes at once:
flutter pub get
dart run flutter_launcher_icons
6. Changing the App Name
This is the name shown under the launcher icon on the device.
6.1. For Android
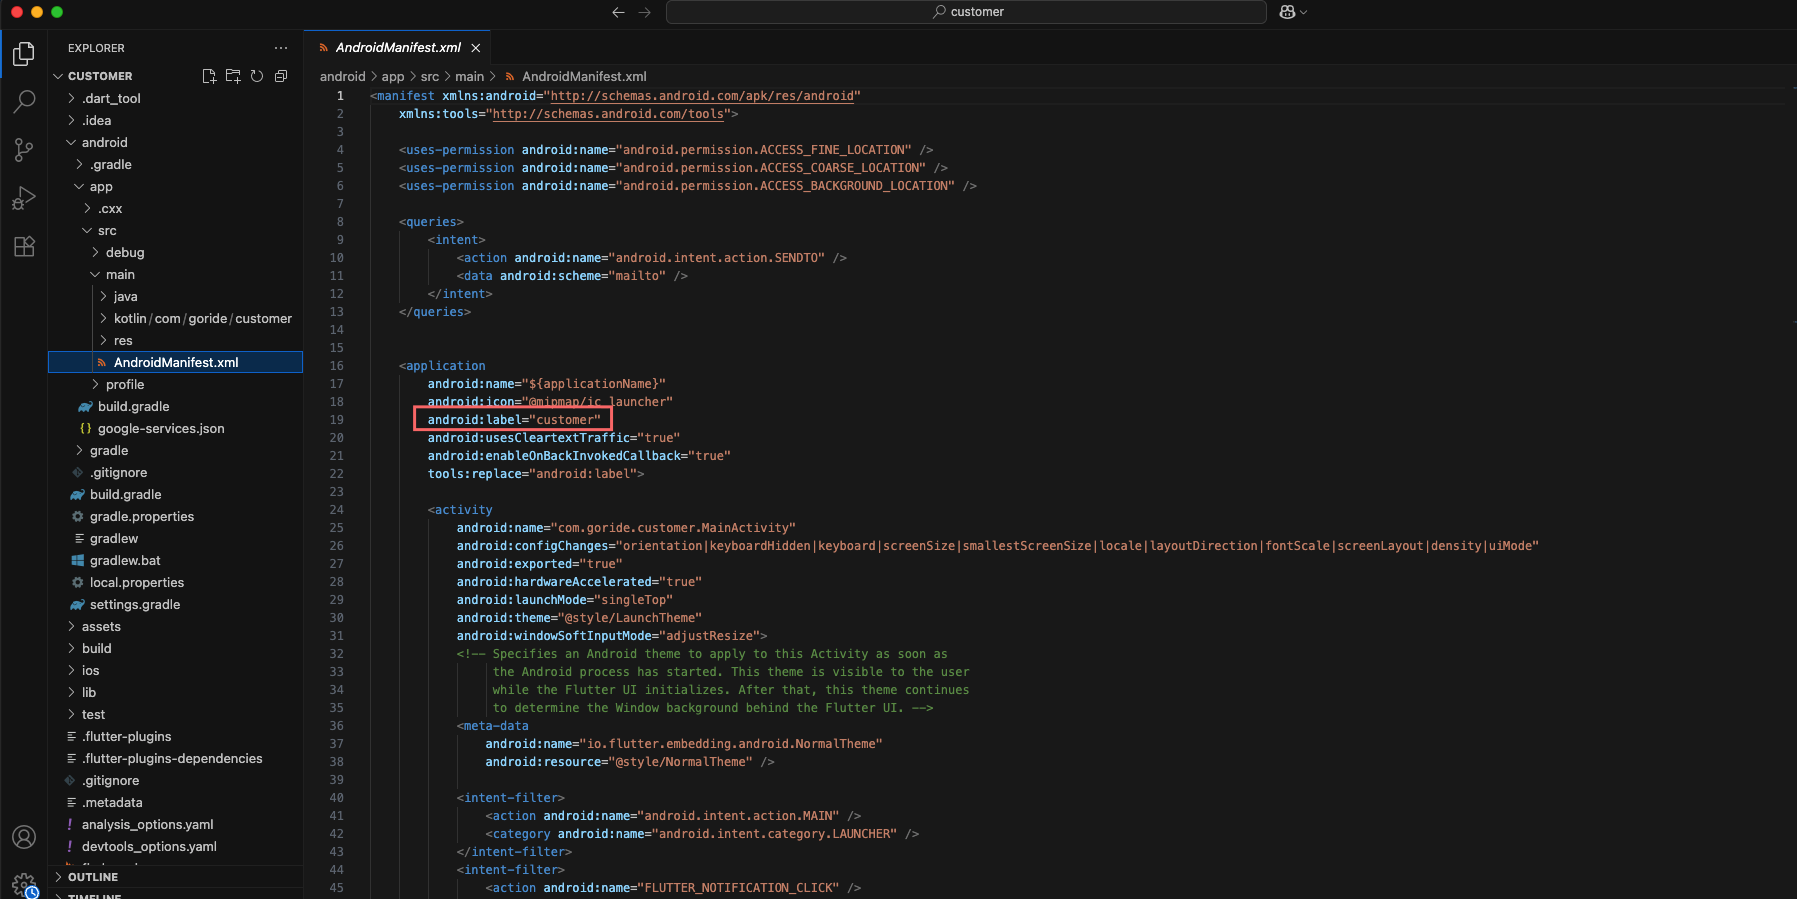
Open android/app/src/main/AndroidManifest.xml, find the <application> tag
and change android:label:
<application android:label="Your App Name" ... >
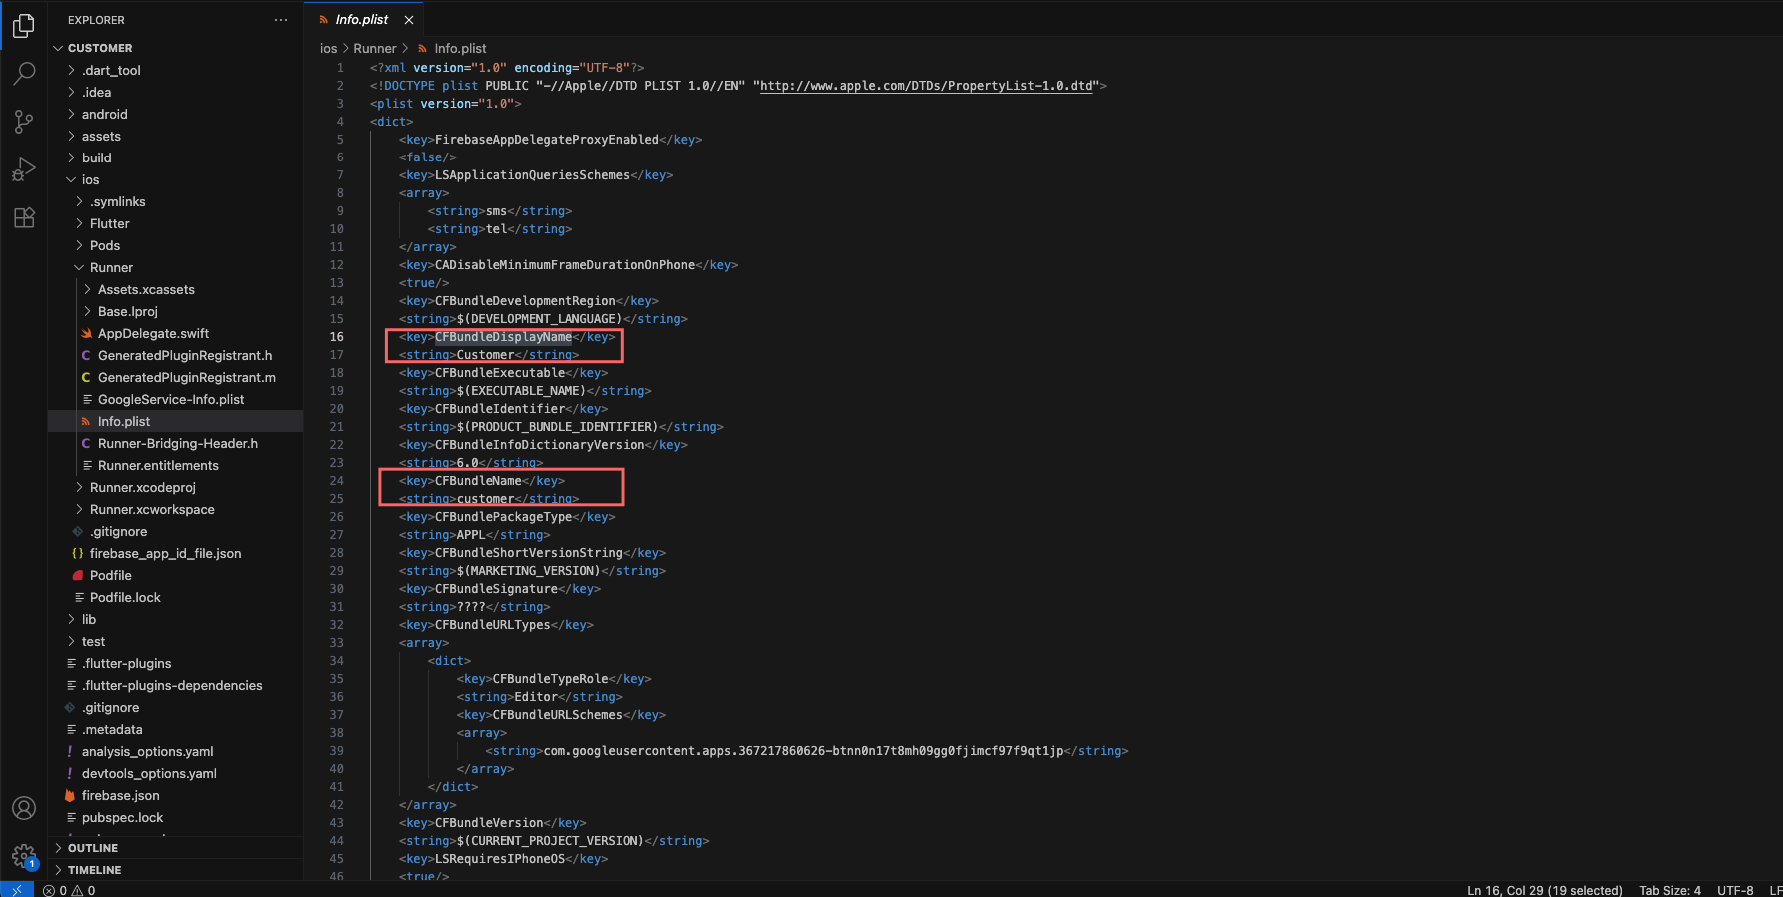
6.2. For iOS
Open ios/Runner/Info.plist and set both display keys:
<key>CFBundleDisplayName</key>
<string>Your App Name</string>
<key>CFBundleName</key>
<string>Your App Name</string>
7. Google Maps API Key (Flutter)
The apps use Google Maps for restaurant locations, address selection and live driver tracking. Create the key first — see Create Google Map API Key — then add it to both platforms.
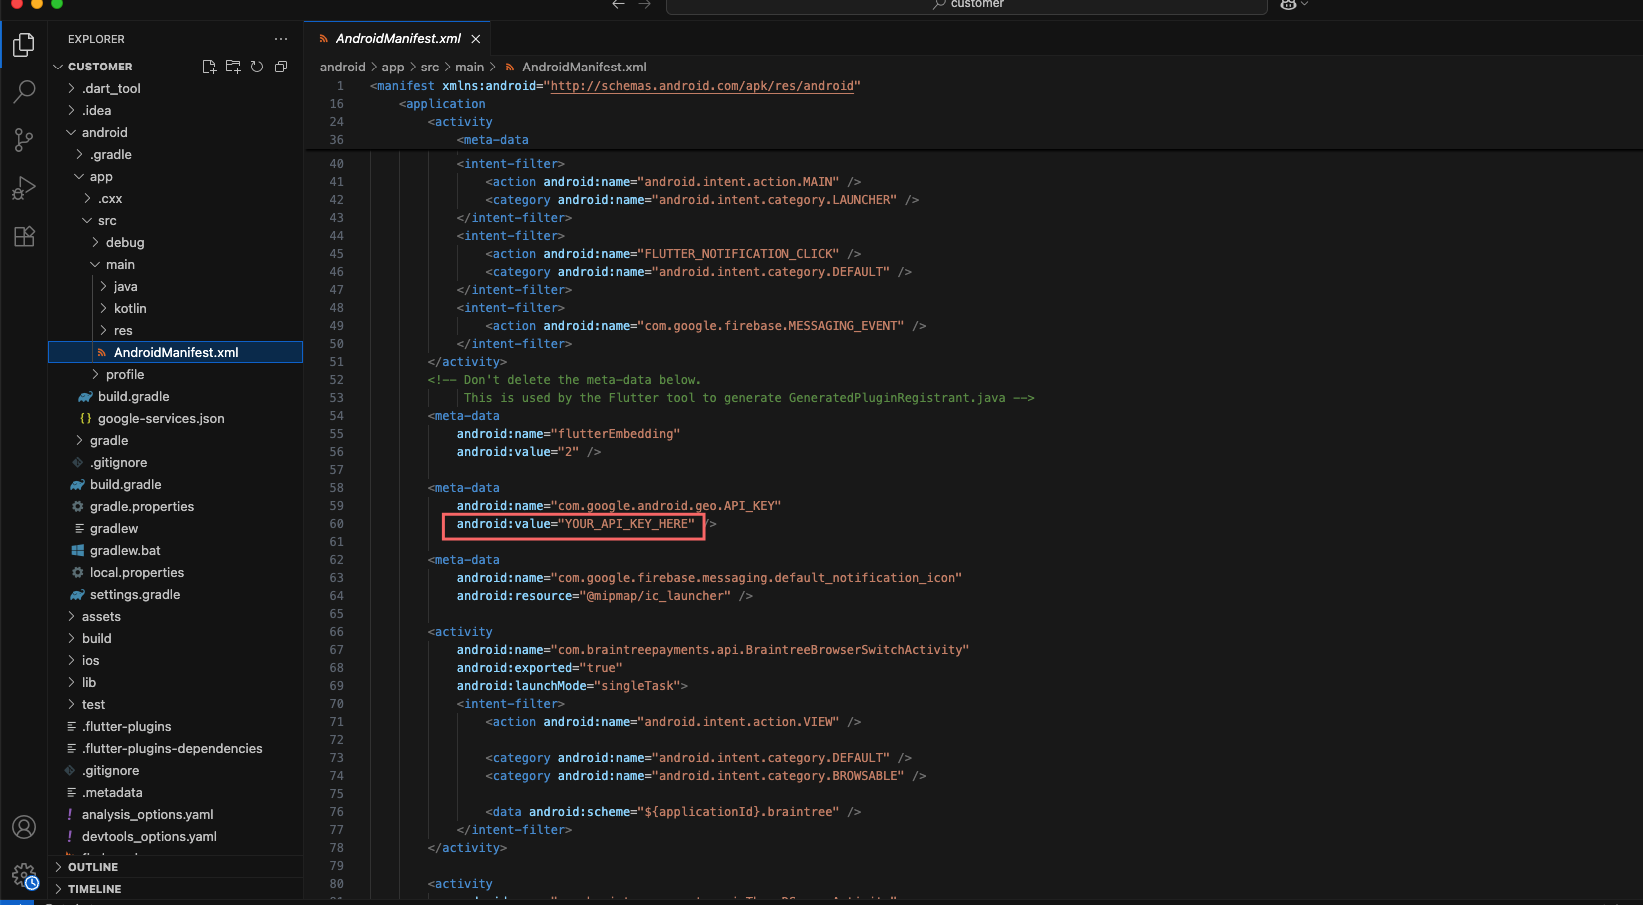
7.1. For Android
Open android/app/src/main/AndroidManifest.xml and set the key inside the
<application> element:
<meta-data
    android:name="com.google.android.geo.API_KEY"
    android:value="YOUR_API_KEY_HERE"/>
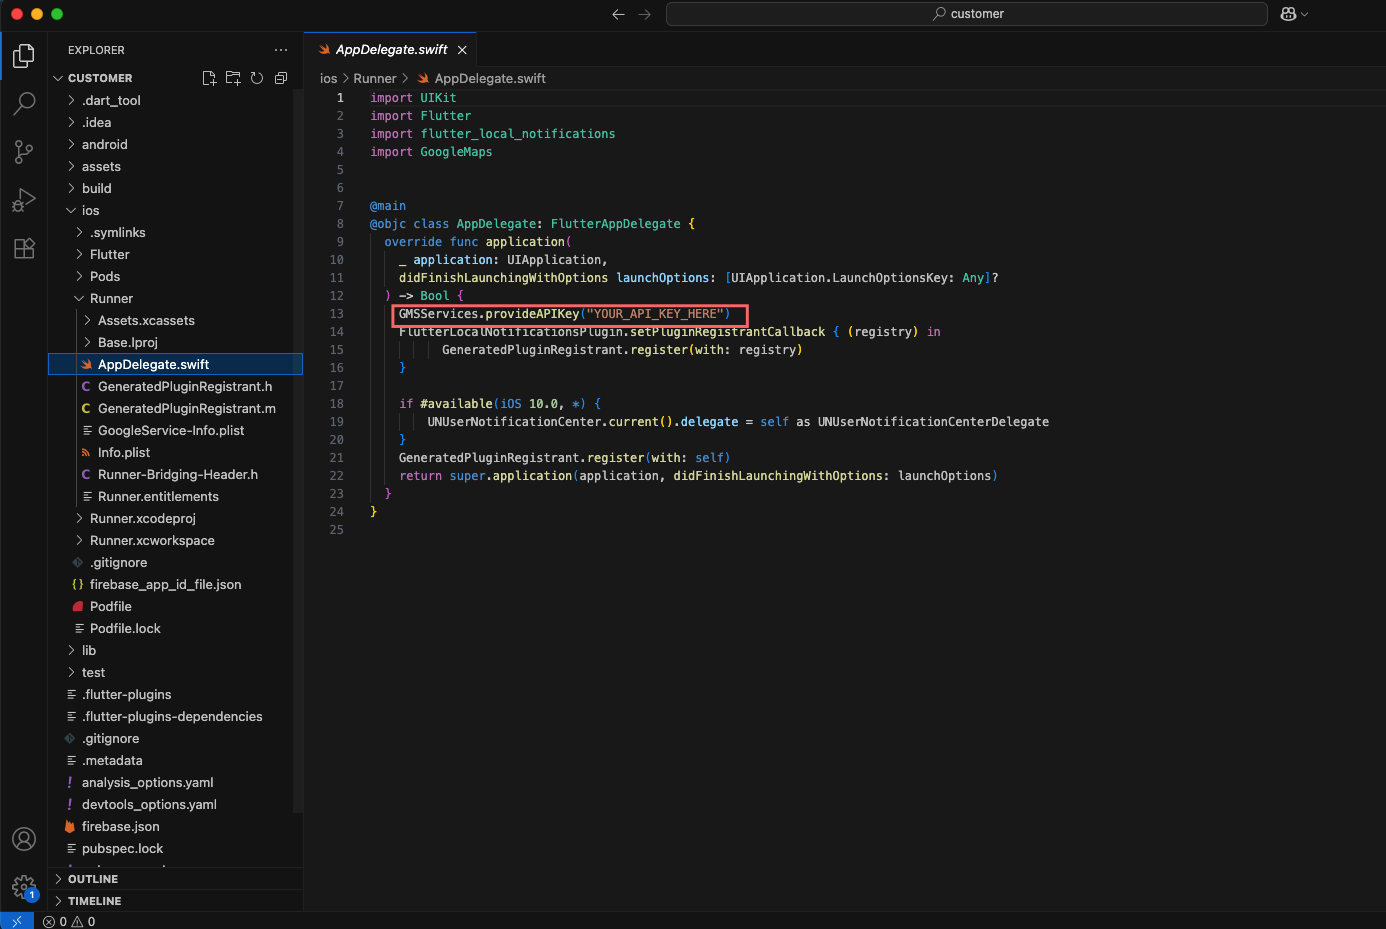
7.2. For iOS
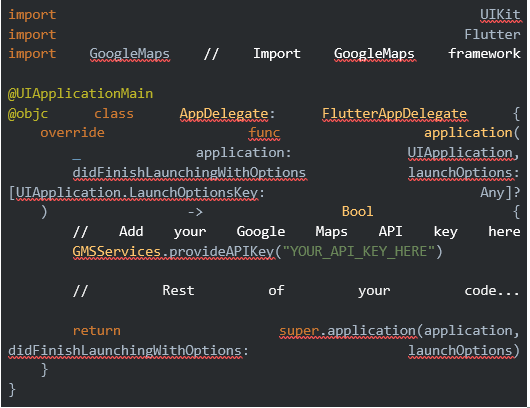
Open ios/Runner/AppDelegate.swift and set the key in
didFinishLaunchingWithOptions:
GMSServices.provideAPIKey("YOUR_API_KEY_HERE")
Rebuild the app after changing the key on either platform.
8. Firebase Setup (Mobile)
All three apps — User, Restaurant and Driver — talk to the same Firebase project as the web panels. Create the project first — see Create Firebase Project — then register every app inside it.
Six registrations, one project. Each app needs its own Android and iOS
entry, so a full Foodie setup registers six apps in the one Firebase project:
User (Android + iOS), Restaurant (Android + iOS) and Driver (Android + iOS). Each produces its own
google-services.json / GoogleService-Info.plist — keep them
straight, as they are not interchangeable.
8.1. Register the apps
Repeat this for each of the three apps:
- Open the Firebase console and select your project.
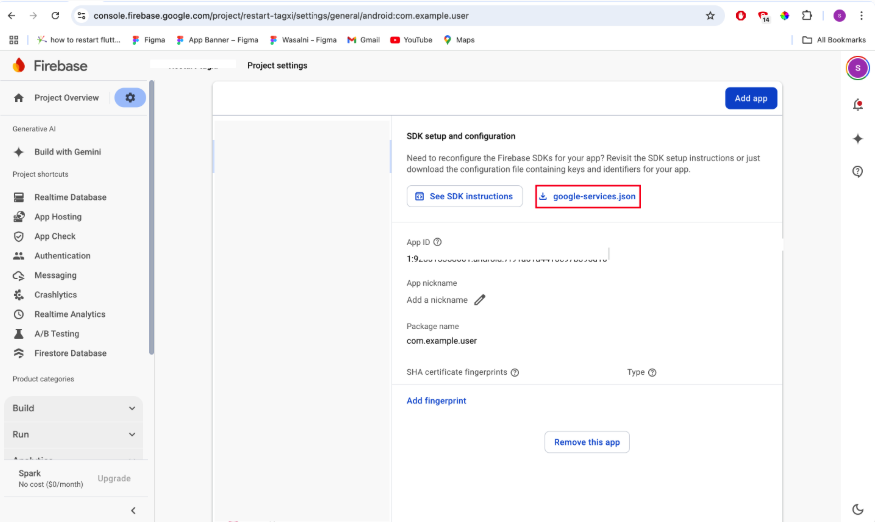
- Click Add app → Android and enter that app's package name; add its SHA-1 and
SHA-256 fingerprints (see Generate SHA Keys) — these are
required for Google and Phone sign-in. Download
google-services.json. - Click Add app → iOS and enter that app's bundle identifier. Download
GoogleService-Info.plist. iOS does not need SHA fingerprints.
8.2. Place the config files
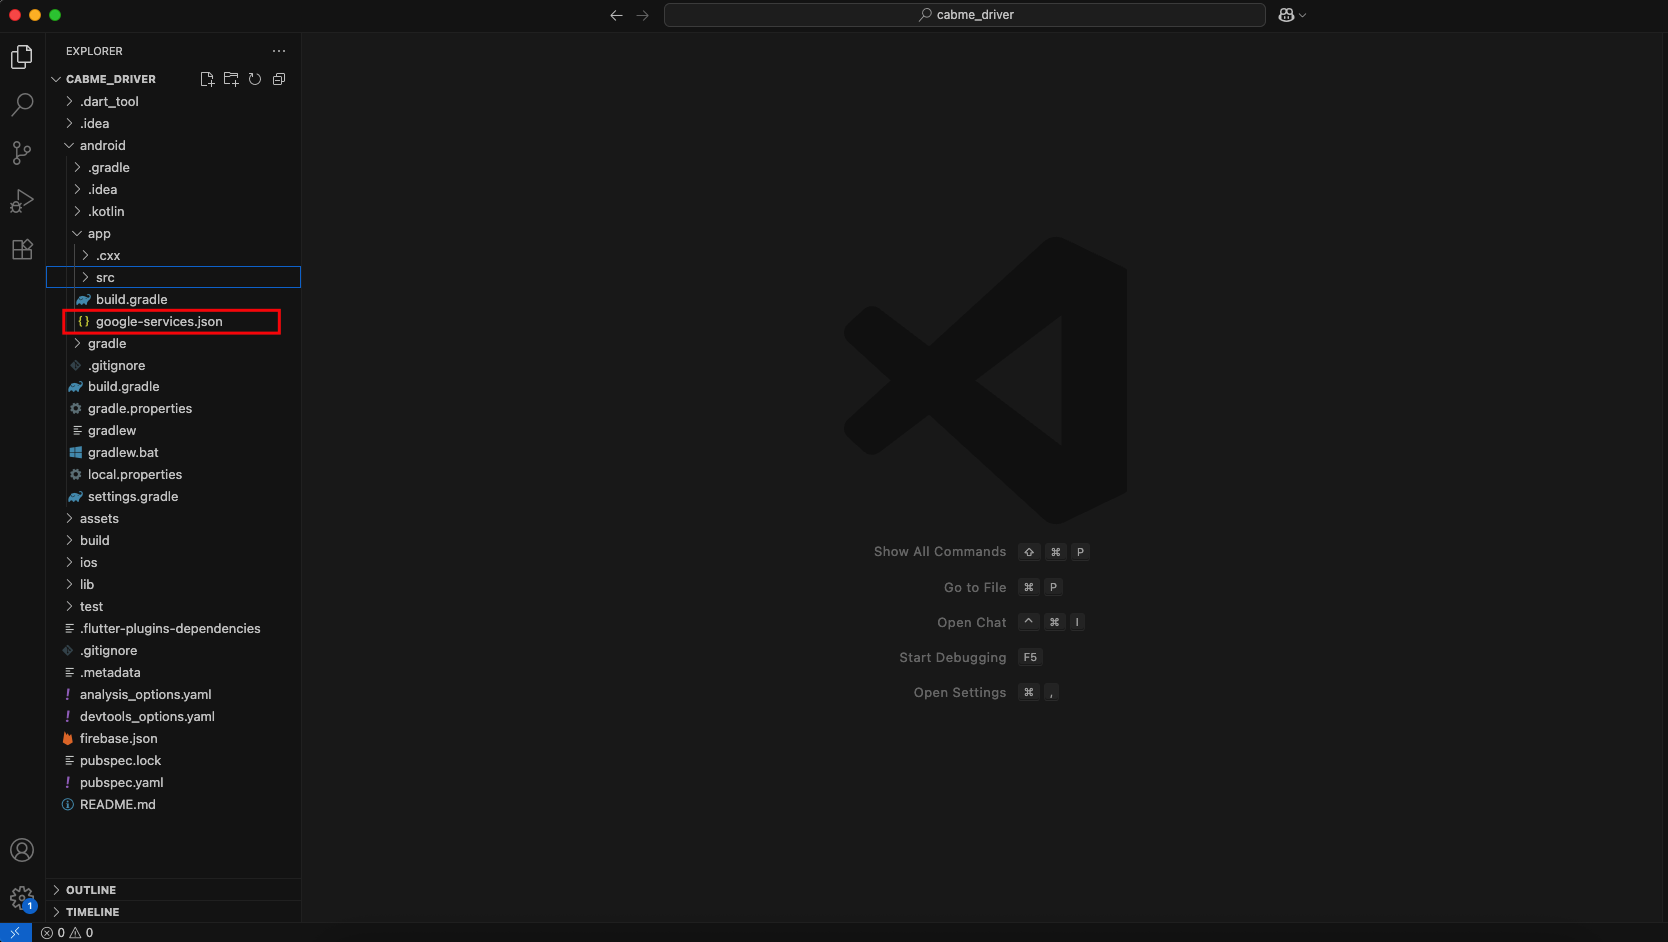
- Android: put
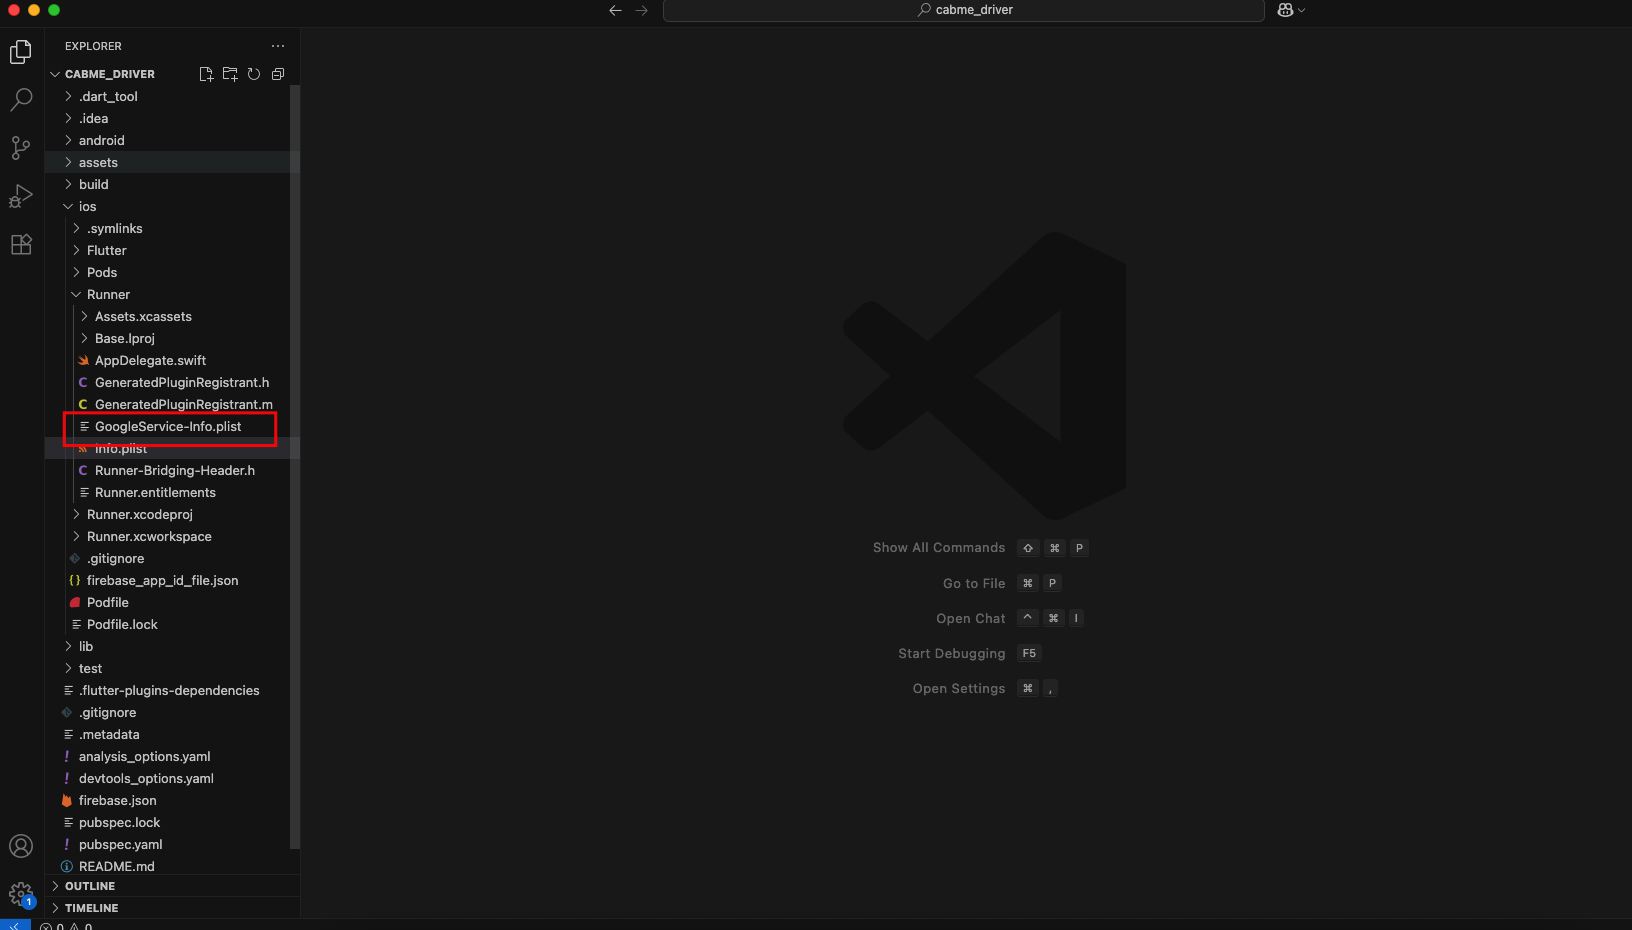
google-services.jsoninandroid/app/. - iOS: open
ios/Runner.xcworkspacein Xcode and dragGoogleService-Info.plistinto the Runner group (tick "Copy items if needed").
8.3. Configure with the FlutterFire CLI (alternative)
Instead of downloading the files by hand, you can let the FlutterFire CLI generate
lib/firebase_options.dart for both platforms:
npm install -g firebase-tools
firebase login
dart pub global activate flutterfire_cli
flutterfire configure --project=YOUR_PROJECT_ID
The CLI writes a firebase_options.dart holding the per-platform configuration, which
main.dart passes to Firebase.initializeApp():
import 'package:firebase_core/firebase_core.dart';
import 'firebase_options.dart';

void main() async {
  WidgetsFlutterBinding.ensureInitialized();
  await Firebase.initializeApp(
    options: DefaultFirebaseOptions.currentPlatform,
  );
  runApp(MyApp());
}
8.4. Firebase dependencies
The Firebase plugins the app uses are already declared in pubspec.yaml — Core, Auth,
Firestore, Storage and Messaging. Just fetch them:
flutter pub get
dependencies:
  flutter:
    sdk: flutter
  firebase_core: ^3.6.0
  firebase_auth: ^5.3.1
  cloud_firestore: ^5.4.4
  firebase_storage: ^12.3.4
  firebase_messaging: ^15.1.3
8.5. Enable the sign-in providers
In the Firebase console open Authentication → Sign-in method and enable the providers Foodie uses:
- Email/Password — standard customer, vendor and admin sign-in.
- Phone — OTP login (requires the SHA fingerprints on Android).
- Google — used by the apps and both web panels.
- Apple — required by Apple if you offer other social logins on iOS.
Then open Authentication → Settings → Authorized domains and add the domains of your Website Panel and Restaurant Panel.
9. Generate SHA-1 & SHA-256 Keys
SHA fingerprints are required for Google Sign-In and Phone (OTP) authentication on Android. Add the fingerprints for both your debug keystore (for testing) and your release keystore (for the Play Store build).
9.1. Using Gradle (recommended)
From the android folder of the project:
# macOS / Linux
./gradlew signingReport

# Windows
gradlew signingReport
The report lists the SHA-1 and SHA-256 values for each build variant.
9.2. Using Keytool
# Debug keystore
keytool -list -v -alias androiddebugkey -keystore ~/.android/debug.keystore
# Password: android

# Release keystore
keytool -list -v -keystore path/to/your-release-key.jks -alias your-key-alias
9.3. Add the keys to Firebase
- Open Firebase Console → Project Settings → Your apps → Android app.
- Click Add fingerprint and paste the SHA-1; repeat for the SHA-256.
- Download the refreshed
google-services.jsonand replace the one inandroid/app/.
10. Signing, Building & Publishing the Apps
The User App, Restaurant App and Delivery Man / Driver App are published as three independent listings on each store, so this section runs three times — once per app. You can sign all three with the same keystore; only the package name, the store listing and the artwork differ.
10.1. Create a release keystore
Android release builds must be signed with your own keystore. Create it once and keep it safe — if you lose it you cannot update the app on Google Play.
keytool -genkey -v -keystore ~/my-release-key.jks -keyalg RSA \
        -keysize 2048 -validity 10000 -alias my-key-alias
-keystore— where the.jksfile is written.-keyalg RSA,-keysize 2048— the signing algorithm and key length.-validity 10000— validity in days (about 27 years).-alias— the name of the key inside the keystore.
You are prompted for a keystore password, a key password and your organisation details.
10.2. Reference the keystore from the project
Create android/key.properties (never commit this file):
storePassword=your-store-password
keyPassword=your-key-password
keyAlias=my-key-alias
storeFile=/Users/yourusername/my-release-key.jks
Gradle reads this file at build time, so the keystore password never lives in the tracked
sources. Add android/key.properties and the .jks file itself to
.gitignore.
10.3. Build a release version
# Android App Bundle (required by Google Play)
flutter build appbundle --release

# Android APK (for direct distribution / testing)
flutter build apk --release

# iOS (macOS only)
flutter build ipa --release
Outputs are written to build/app/outputs/ (Android) and build/ios/ipa/ (iOS).
10.4. Publish to Google Play
- Create a developer account at the Google Play Console.
- Create three apps — one each for the User, Restaurant and Driver app — and complete each store listing (title, description, screenshots, feature graphic, icon) plus its Data Safety, Content Rating and Privacy Policy sections.
- Upload the
.aabto a Production (or Internal Testing) release. - Increment
version:inpubspec.yamlfor every new upload — Play rejects duplicate version codes. - Submit for review.
10.5. Publish to the Apple App Store
- Enrol in the Apple Developer Program.
- Create the App ID and the app record in App Store Connect.
- In Xcode set the team and signing certificates, then Product → Archive and
upload with the Organizer (or upload the
.ipawith Transporter). - Complete the listing, privacy details and App Review information, then submit for review.
Note: Apple requires Sign in with Apple on any iOS app that offers third-party sign-in such as Google. Enable the Apple provider in Firebase Authentication and add the capability in Xcode before submitting.
11. FAQ
What should I do if I get the error "Missing project_info object"?
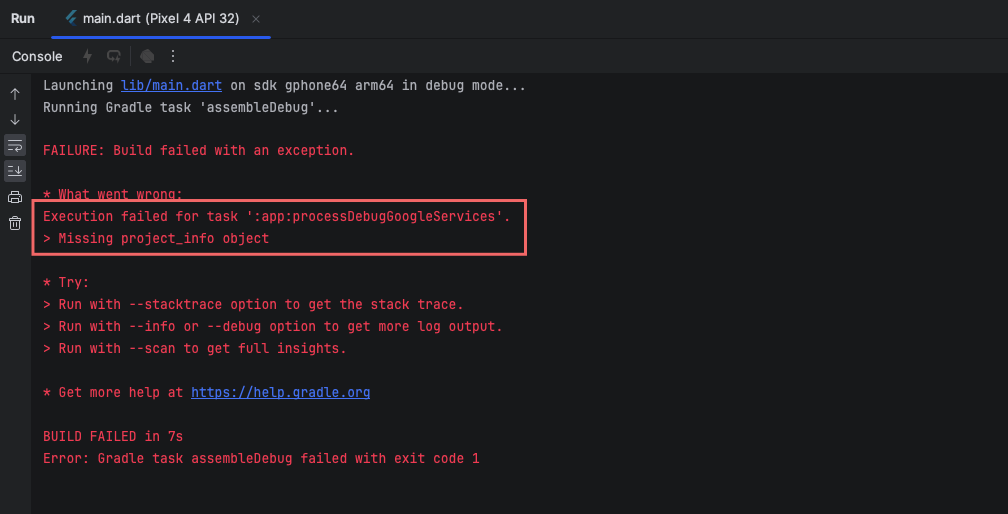
This Android build error means the google-services.json file is missing, in the wrong place,
or does not match the package name.
Solution
- Check the file location.
google-services.jsonmust sit inandroid/app/— not inandroid/and not in the project root. - Check the package name. The
package_nameinside the JSON must match theapplicationIdinandroid/app/build.gradle. If you renamed the package, register the new one in Firebase and download the file again. - Verify the Firebase setup. Confirm the Android app is registered in the Firebase console under Project Settings → Your apps.
- Update the Google Services plugin. Make sure the
com.google.gms:google-servicesclasspath inandroid/build.gradleis a current version. - Re-sync and rebuild. Sync Gradle in Android Studio, then run:
flutter clean
flutter pub get
flutter run
12. Server Requirement
All three web panels — Admin, Restaurant and Website — are Laravel 12 applications and share the same server requirements. To run Foodie smoothly your hosting must provide:
12.1. Server & Runtime
- Web server: Apache (with
mod_rewrite) or NGINX. - PHP 8.2 or above, with the extensions Laravel requires:
BCMath,Ctype,cURL,DOM,Fileinfo,JSON,Mbstring,OpenSSL,PCRE,PDO,Tokenizer,XML,GD(or Imagick) andZIP. - MySQL 5.7+ / MariaDB 10.3+ — used for panel authentication, sessions and jobs. All platform data lives in Firestore.
- Composer for PHP dependencies.
- Node.js 18+ and npm — required by the Firebase CLI and by the scheduled scripts the Admin Panel runs from cron.
- FTP / SFTP or SSH access for transferring and extracting the packages.
- Cron job support for Laravel's scheduler.
- SSL certificate (HTTPS) — mandatory for Firebase Authentication, Google login and payment-gateway callbacks.
12.2. Domains
Each panel needs its own domain or subdomain, for example:
https://yourdomain.com— Website (Customer) Panelhttps://admin.yourdomain.com— Admin Panelhttps://restaurant.yourdomain.com— Restaurant (Vendor) Panel
12.3. External Services
- Google Firebase project upgraded to the Blaze plan (required for Cloud Functions and for outbound network calls).
- Google Maps API key with Maps JavaScript, Places, Geocoding and Directions enabled — used for restaurant search, address selection and delivery tracking.
- SMTP account for outgoing email (order receipts, password resets, templates).
- Payment gateway accounts for the gateways you plan to enable.
- OpenAI API key (optional) for the AI food-listing features.
13. Installing Node.js & npm
Node.js is needed for the Firebase CLI (indexes, rules and Cloud Functions), for the Firestore import/export utility, and for the scheduled scripts the Admin Panel executes.
13.1. Install Node.js
Download the LTS installer from nodejs.org/en/download and run it. npm is installed alongside Node. Verify:
node -v
npm -v
13.2. Find the Node binary path
The Admin Panel needs the absolute path to the Node executable so its scheduled commands can run. On Linux/macOS:
which node
On Windows:
where node
The command prints something like /usr/local/bin/node. Copy that value into the
NODE_PATH variable of the Admin Panel's .env file.
[user@server ~]$ which node
/usr/local/bin/node
Copy that path into the Admin Panel's .env:
NODE_PATH='/usr/local/bin/node'
13.3. Install the Firebase CLI
npm install -g firebase-tools
firebase login
firebase login opens a browser window; sign in with the Google account that owns your
Firebase project.
14. Create Firebase Project
Firebase is the backend for the whole platform. Create one project and use it for the Admin Panel, the Restaurant Panel, the Website Panel and every mobile app.
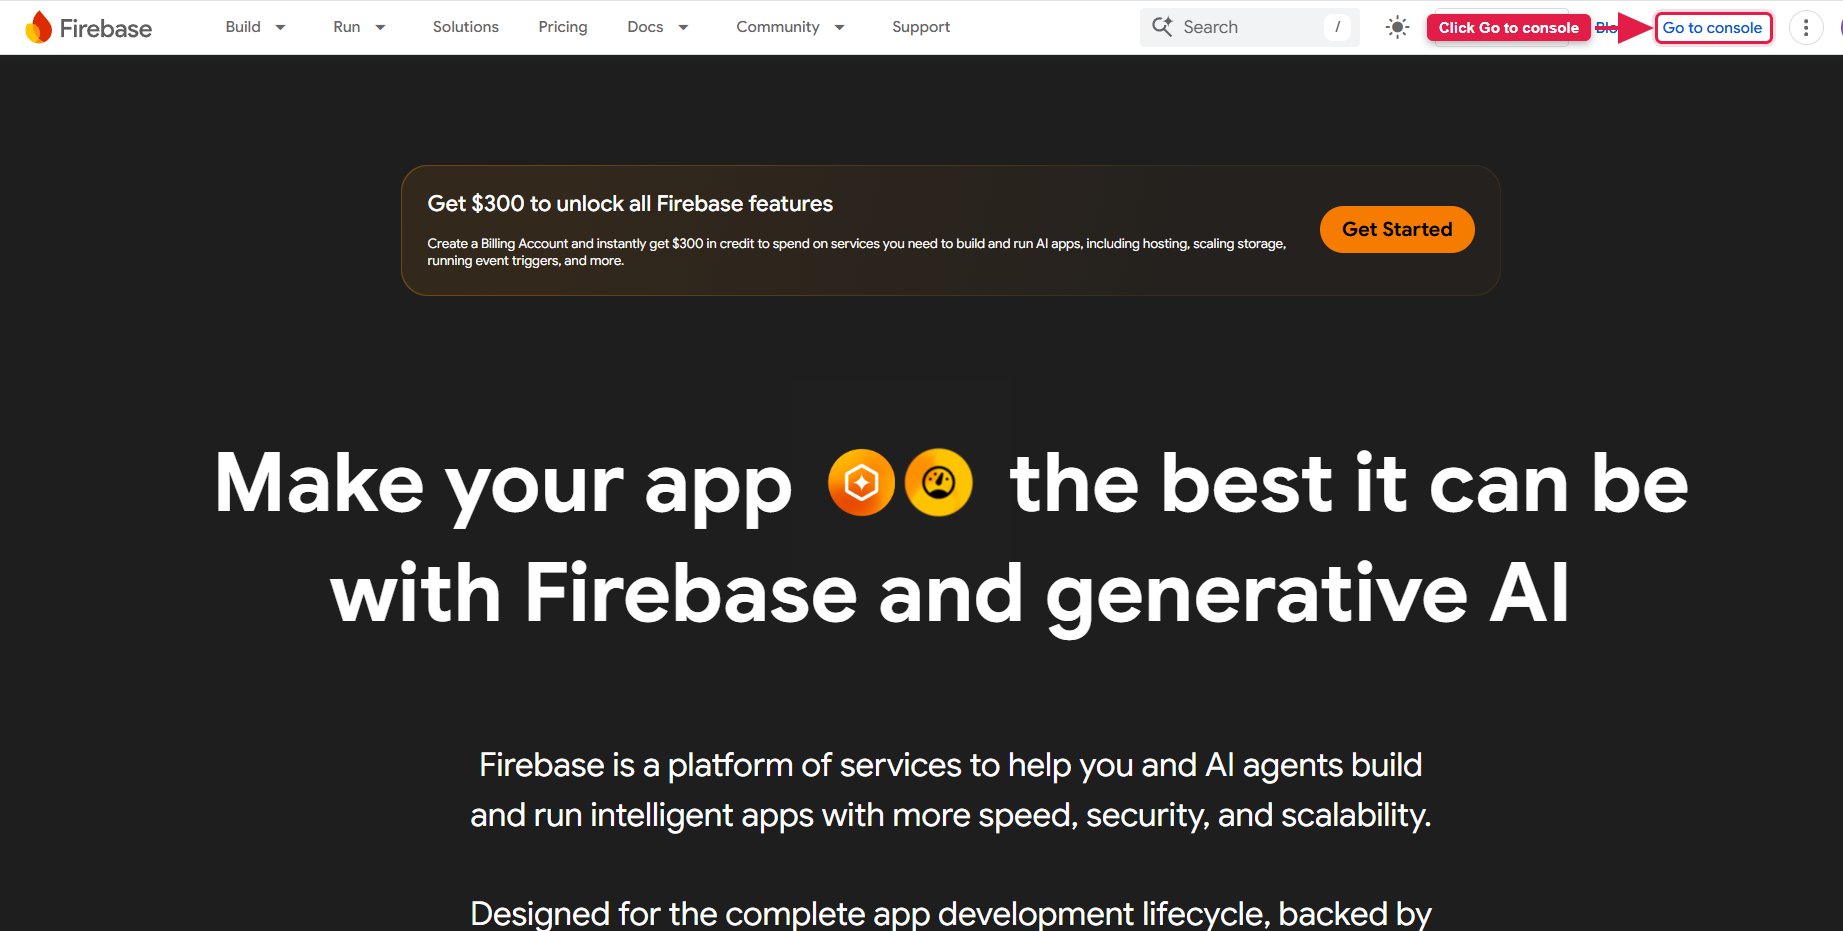
14.1. Go to firebase.google.com and click Go to console in the top-right corner.
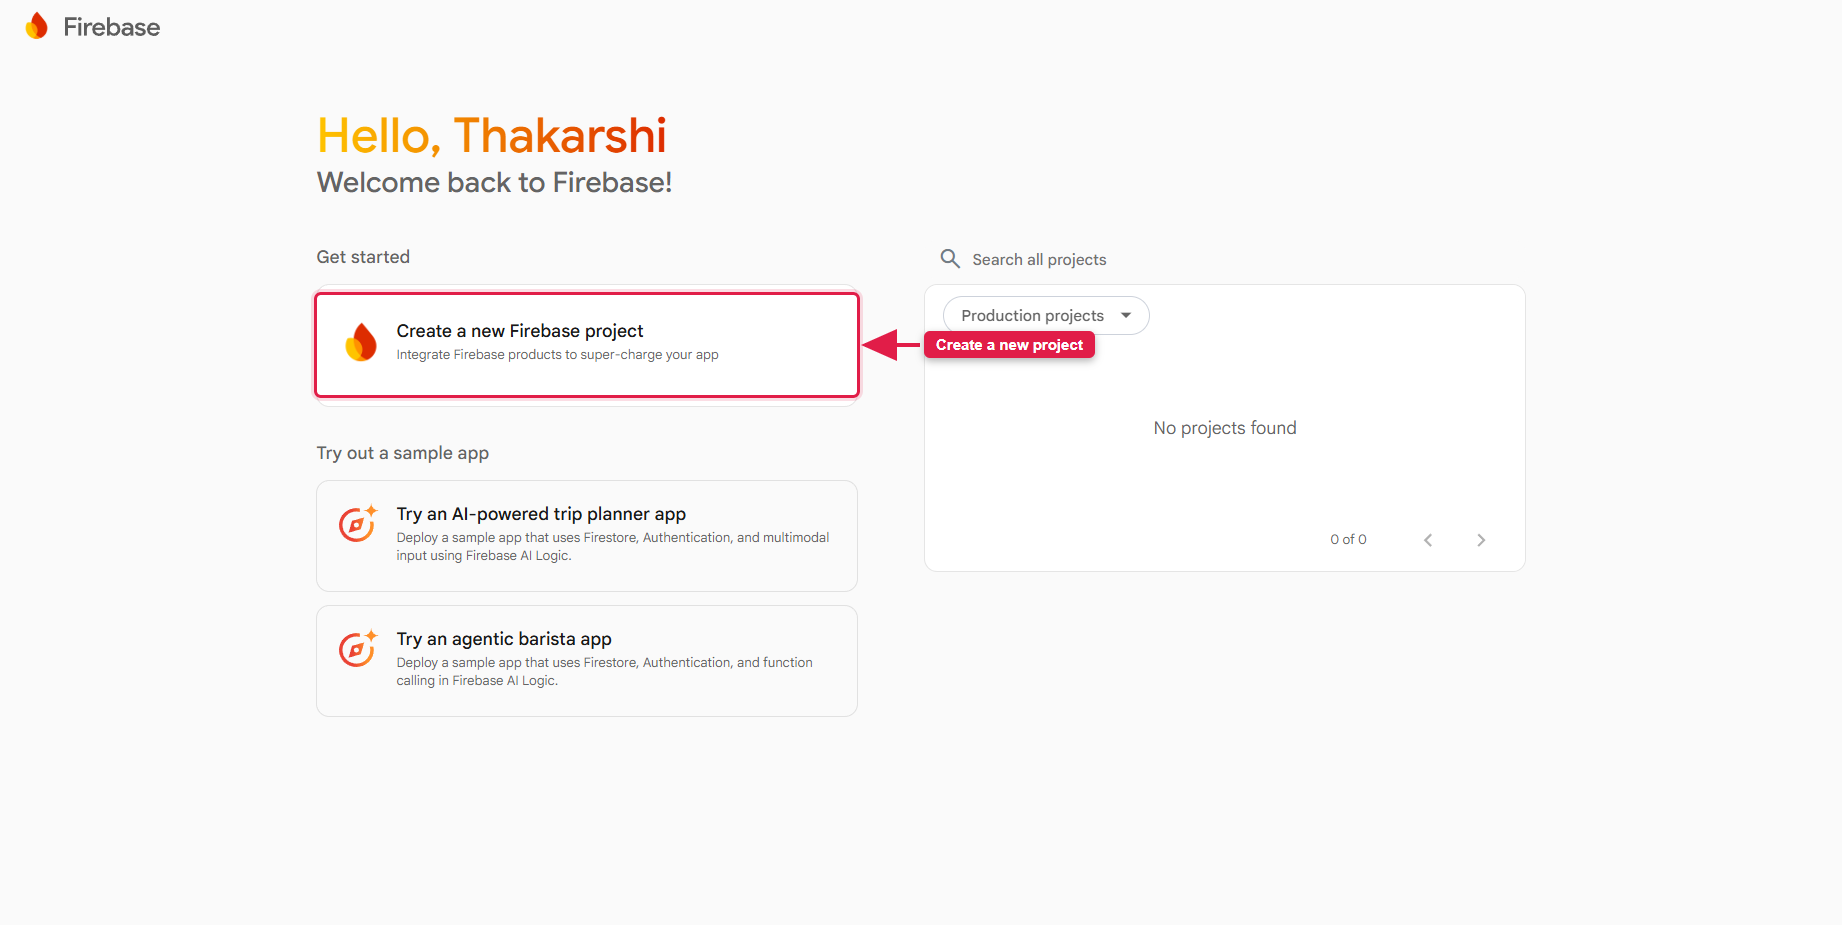
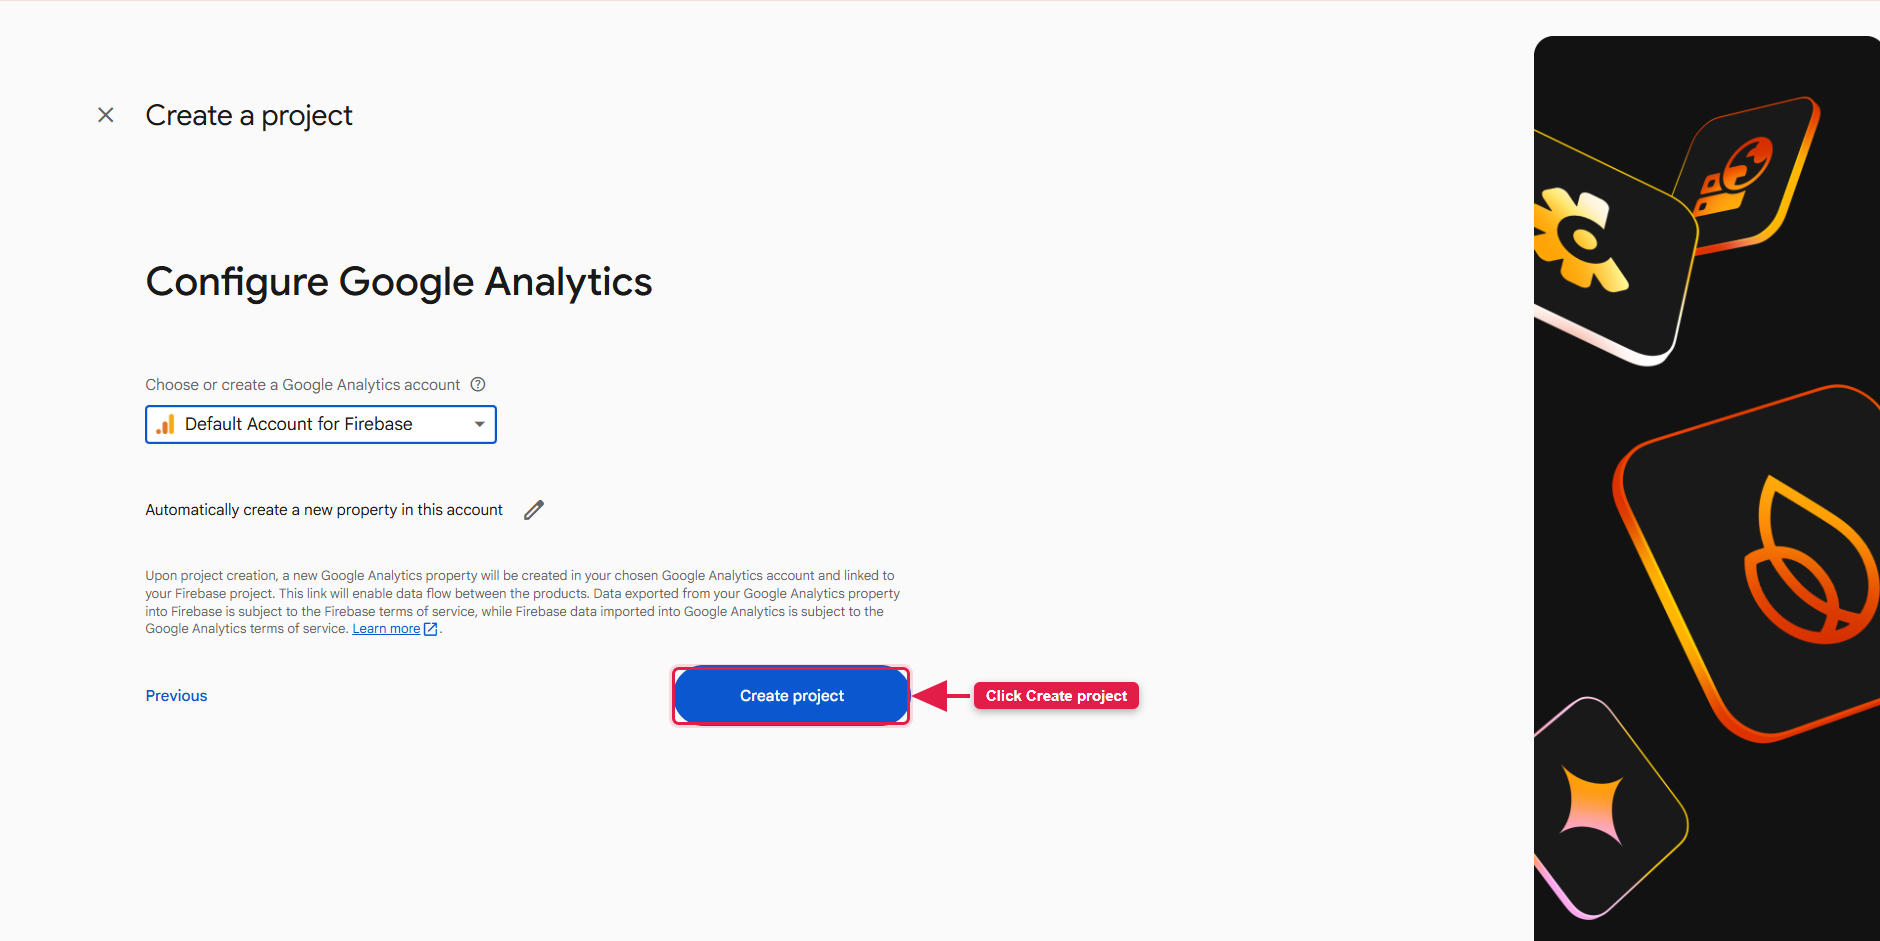
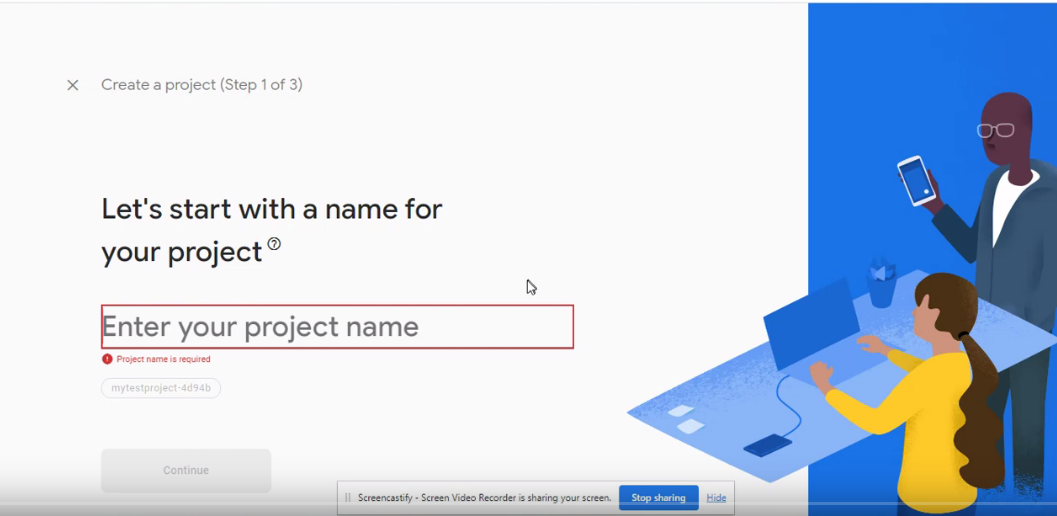
14.2. Click Add project, enter a project name and click Continue. Choose whether to enable Google Analytics, select the default account for Firebase, then click Create project.
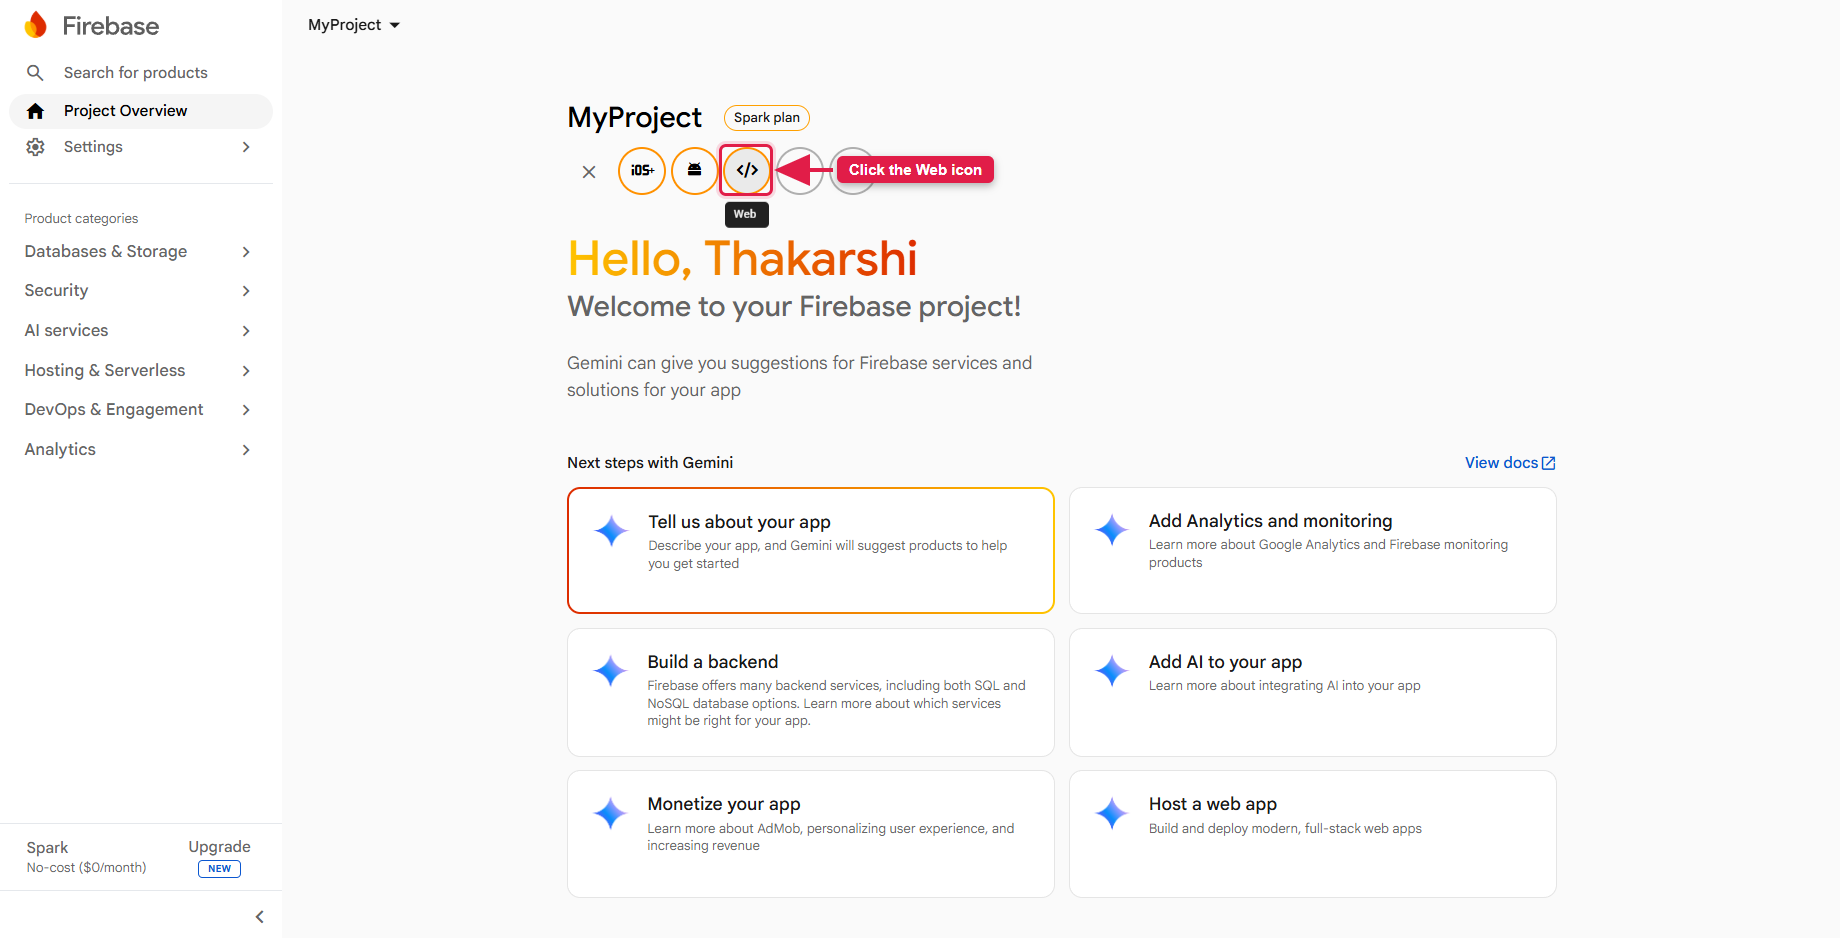
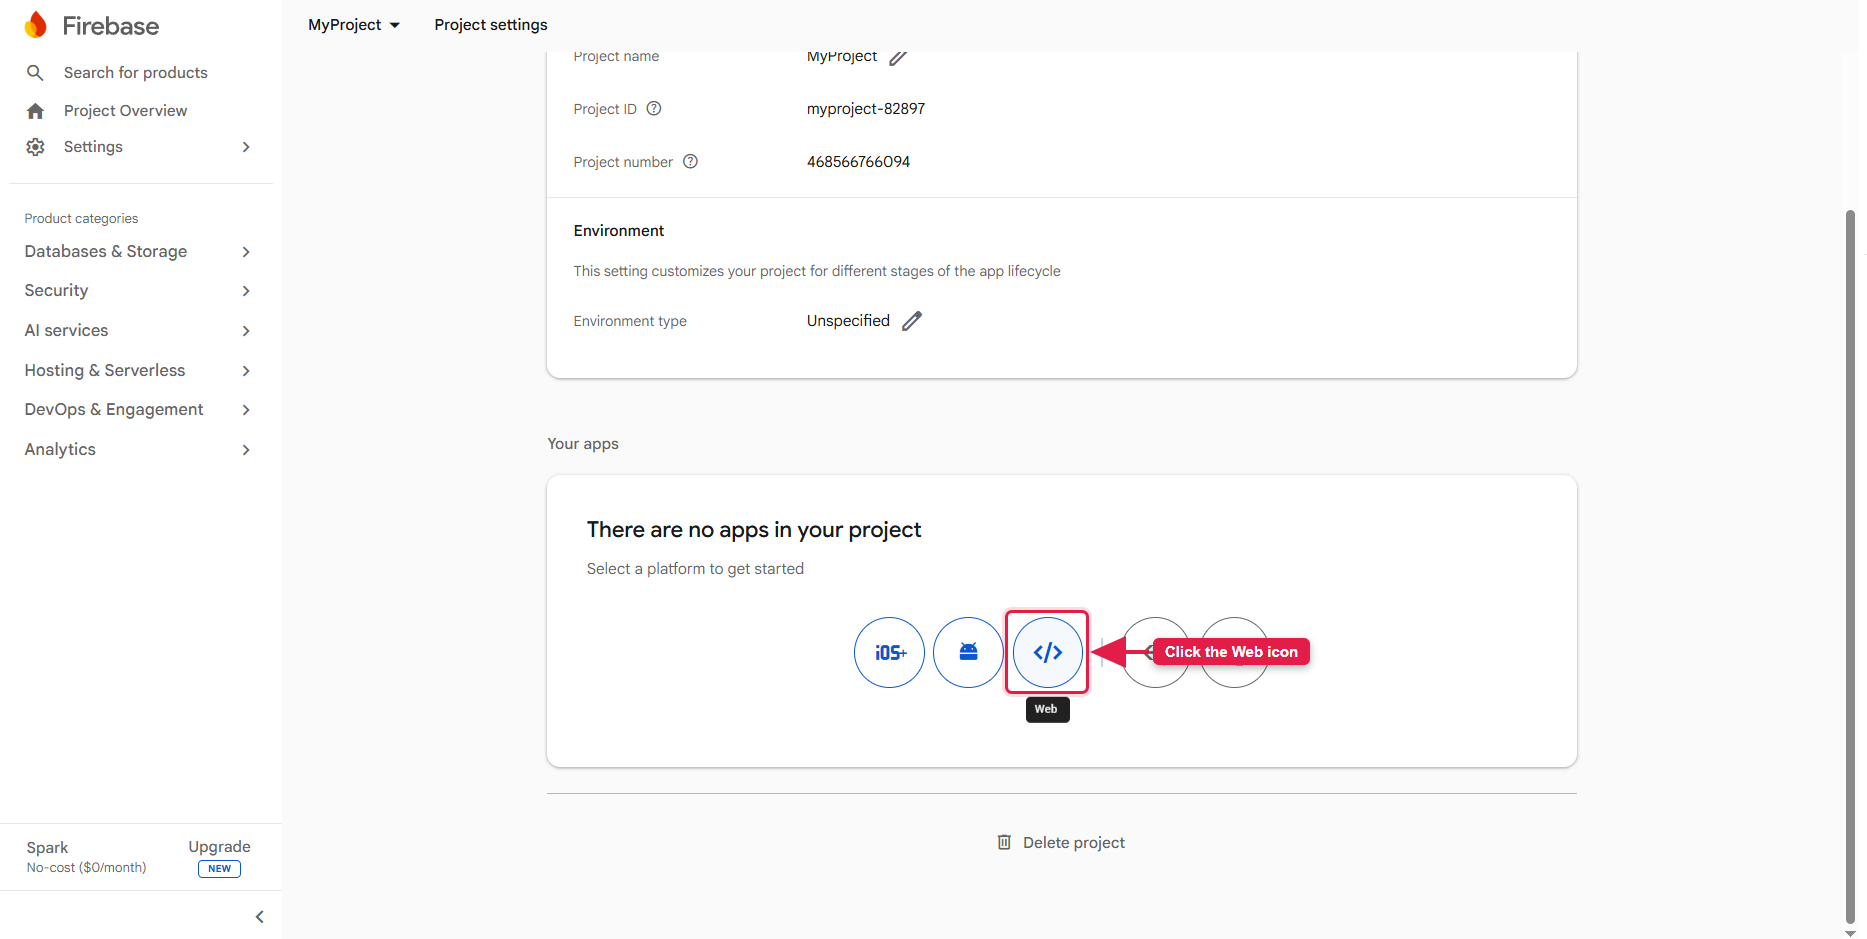
14.3. From the project overview, click the Web (</>)
icon to register a web app.
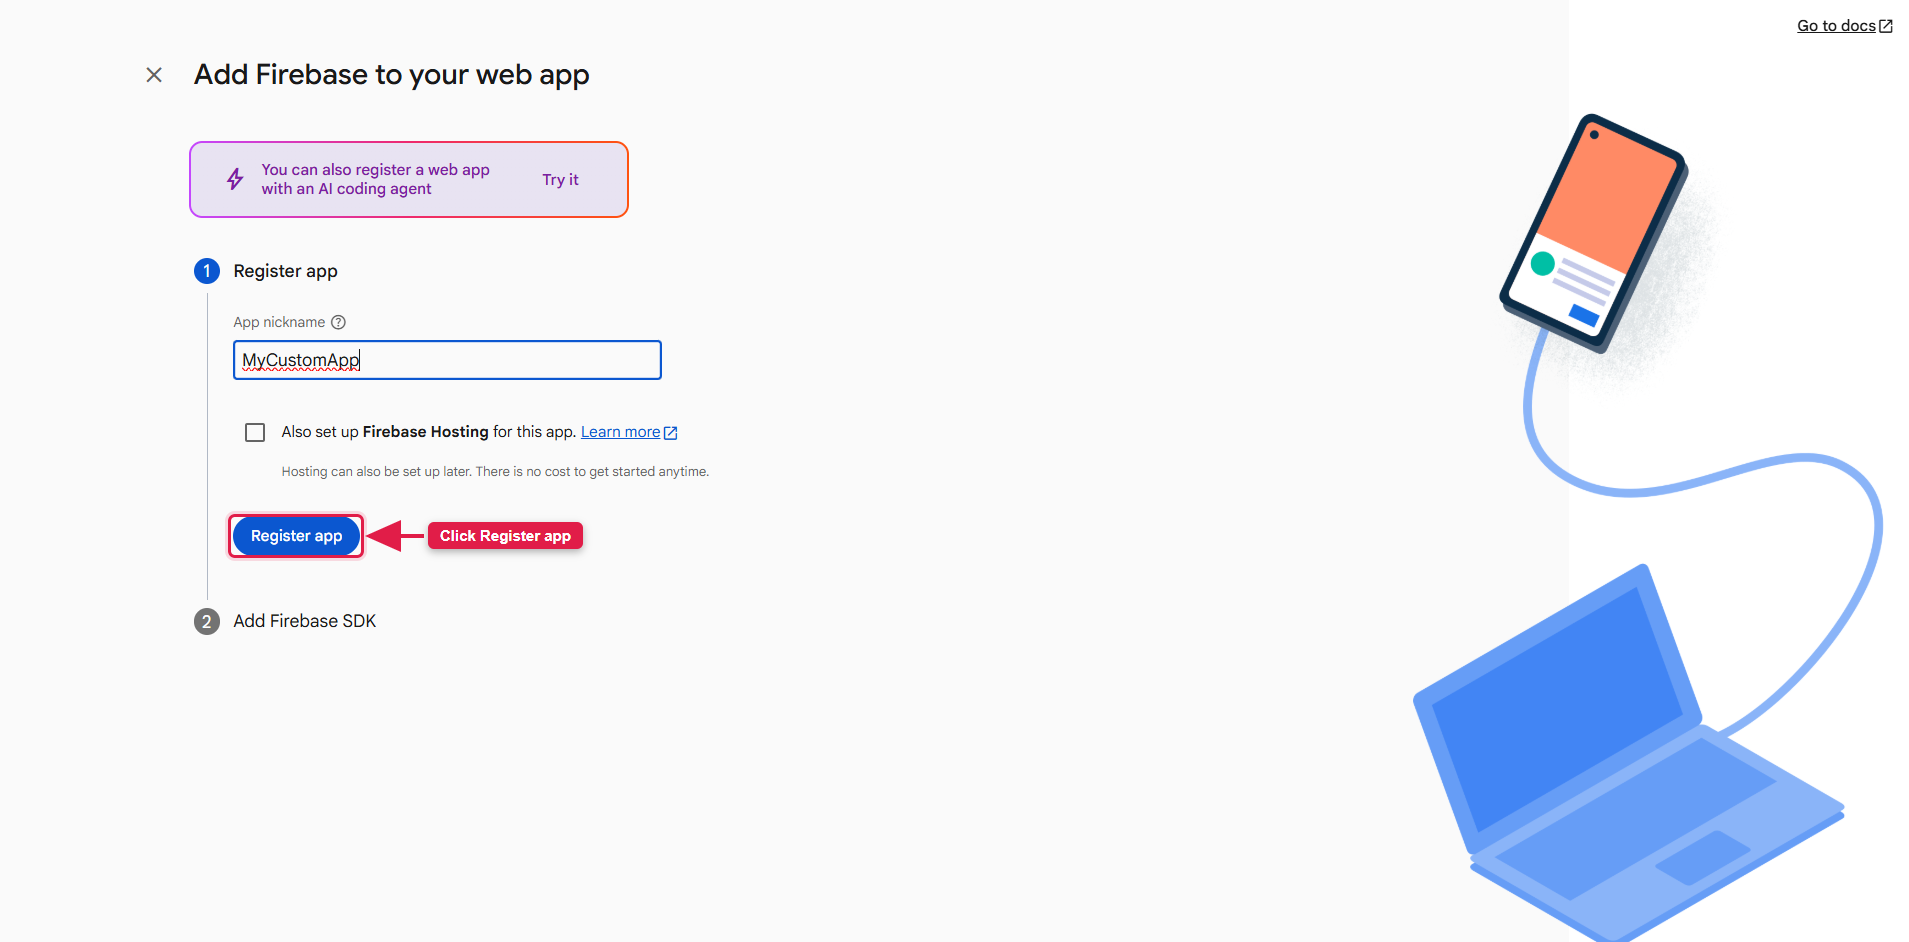
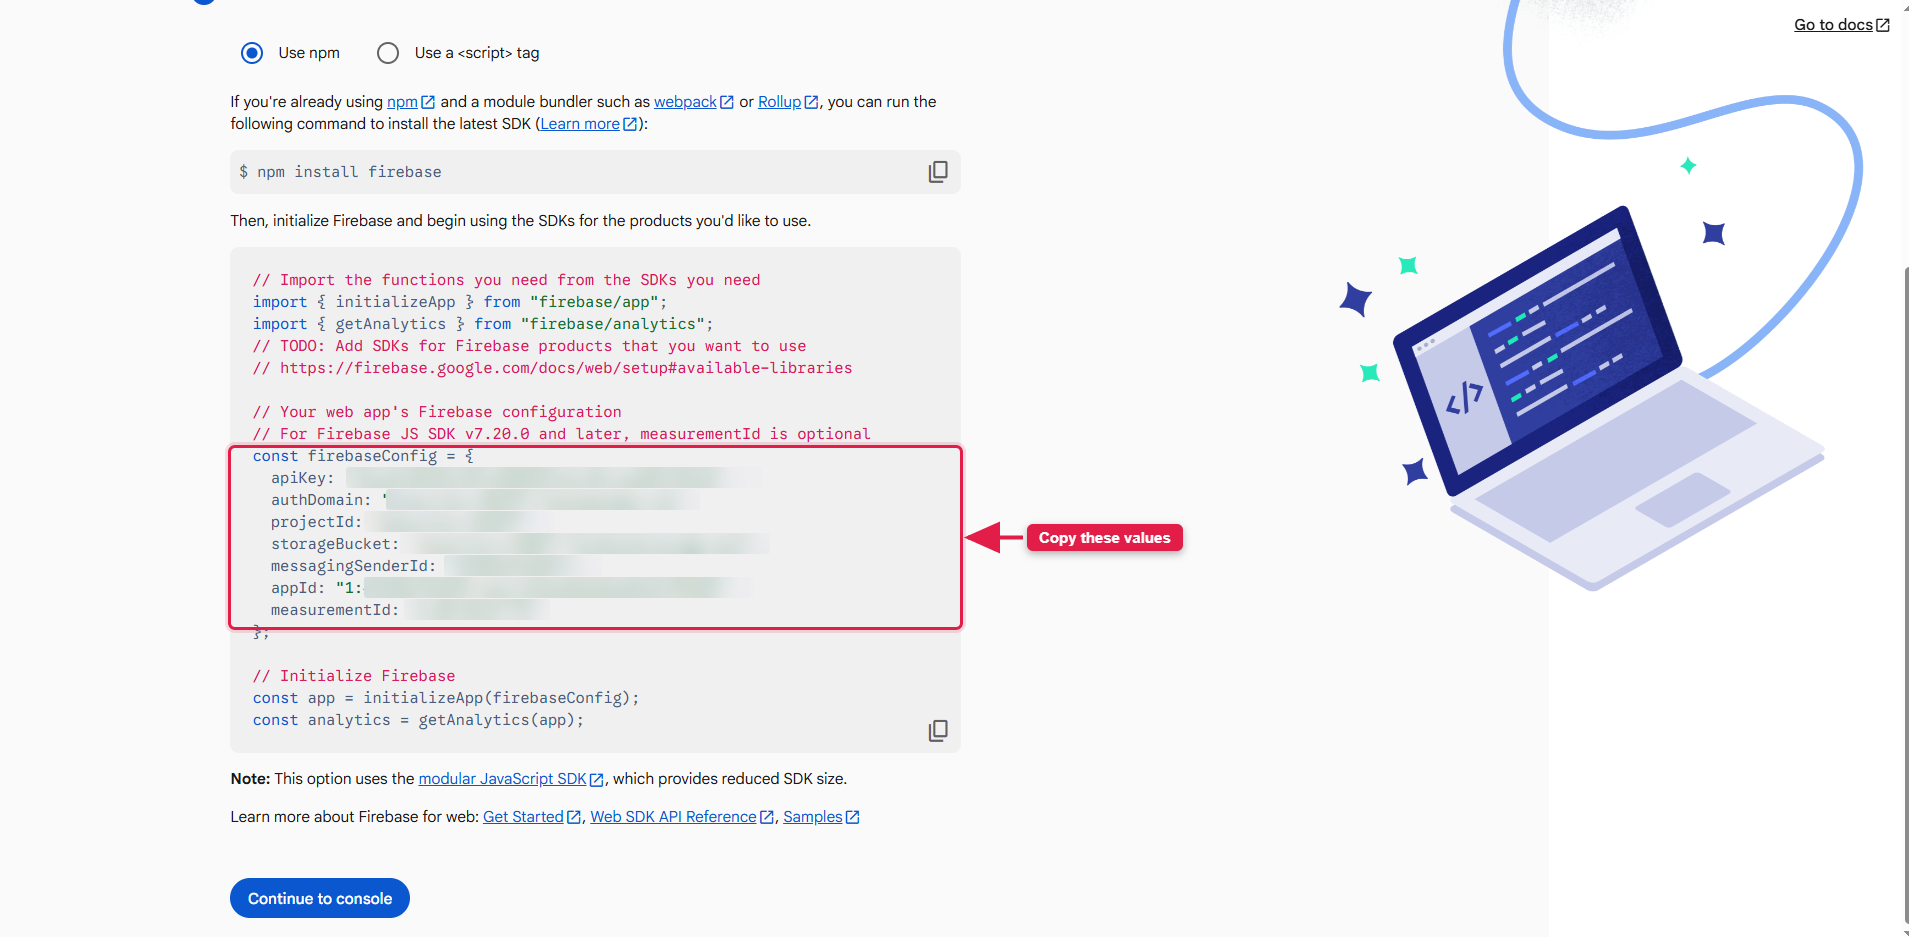
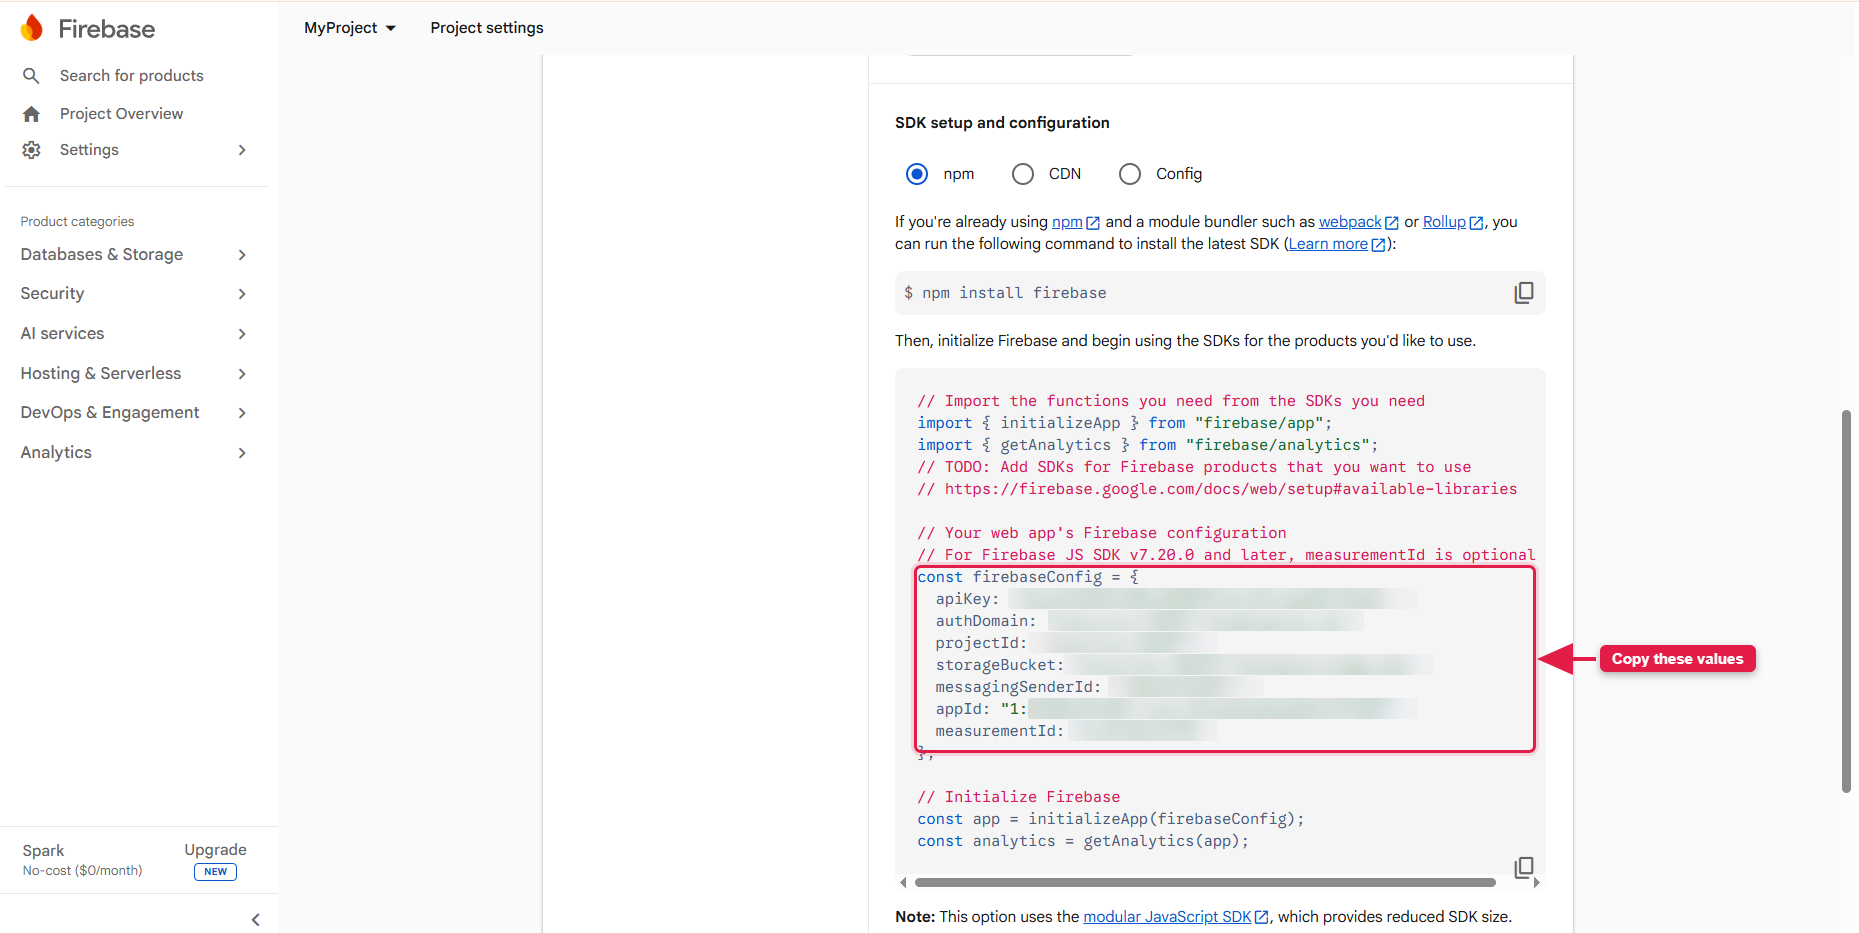
14.4. Enter an app nickname and click Register app. Scroll down to the
configuration snippet and copy the values — these are the FIREBASE_* credentials you
will paste into every panel's .env file.
The same values can be read again at any time from Project Settings → General → Your apps:
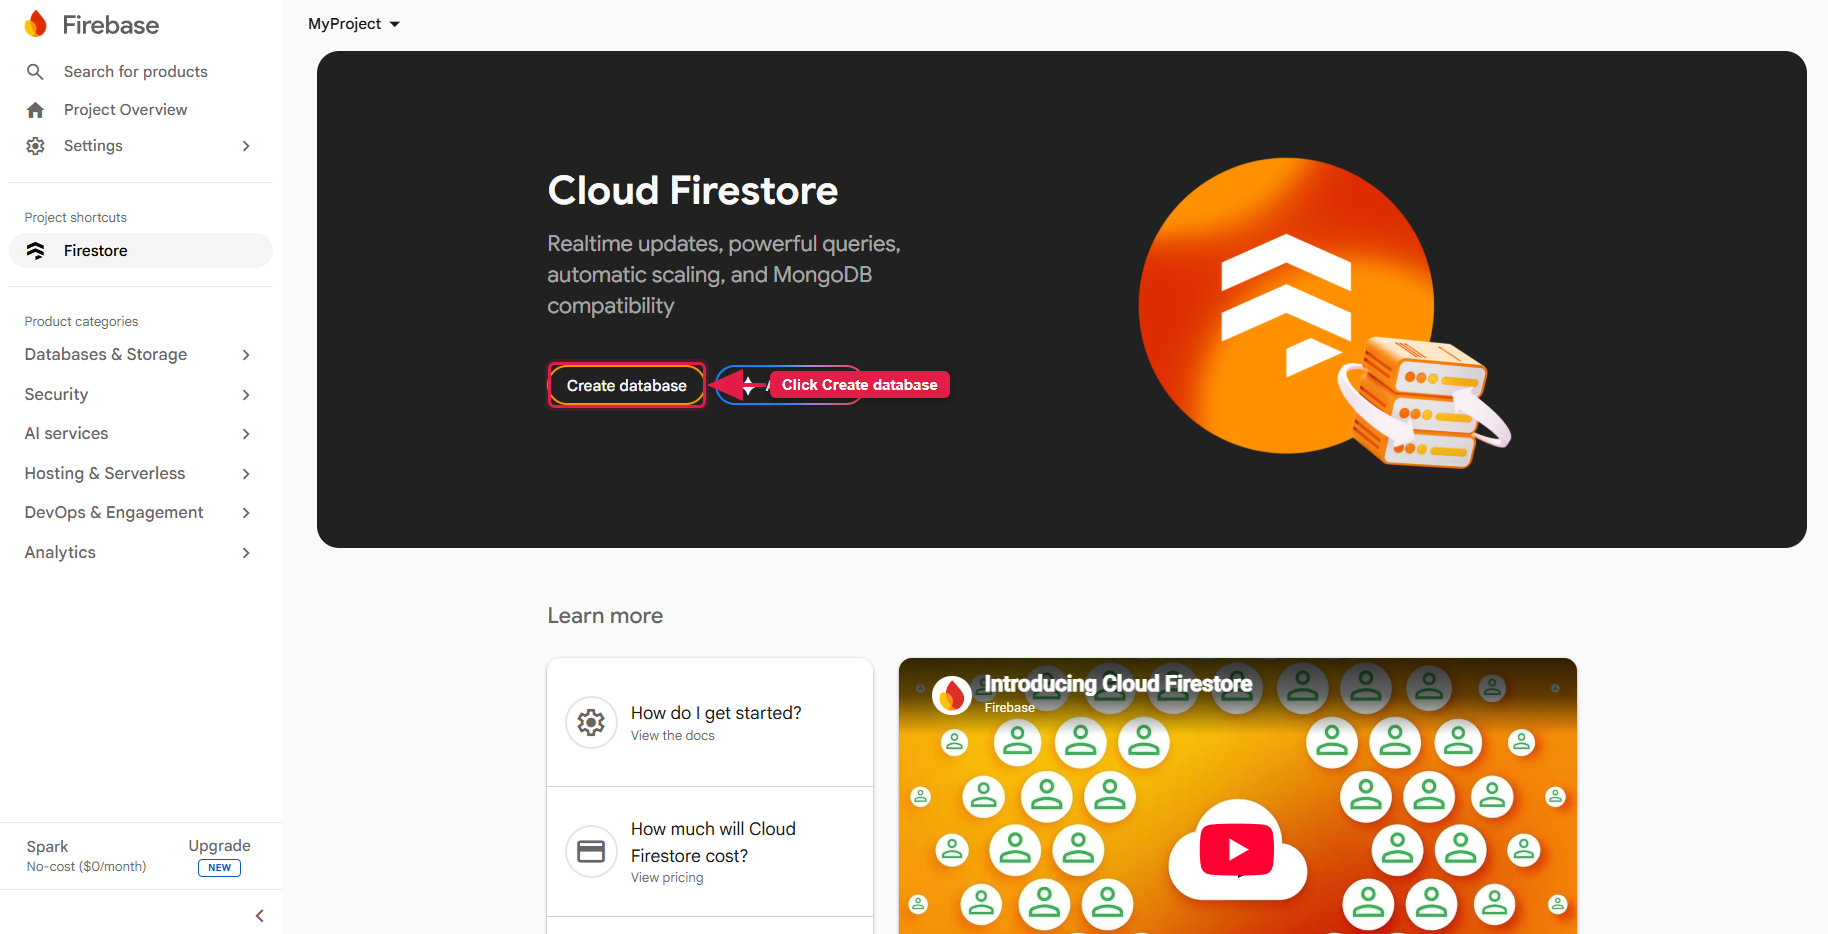
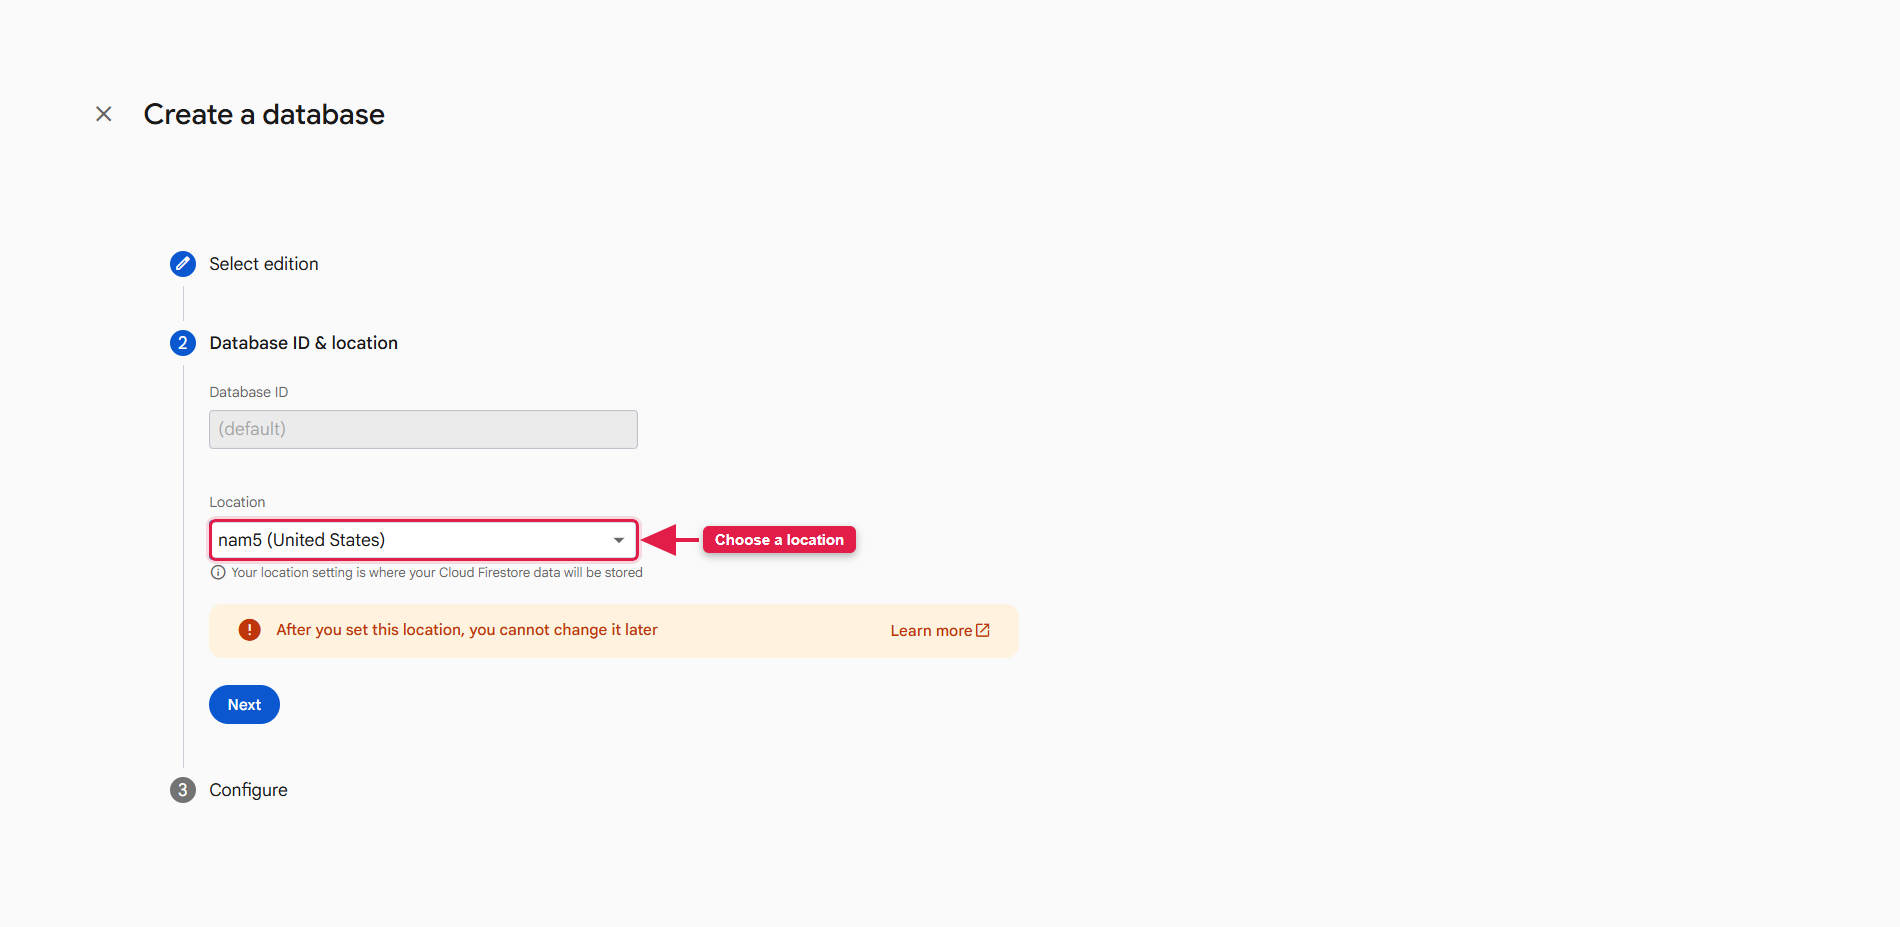
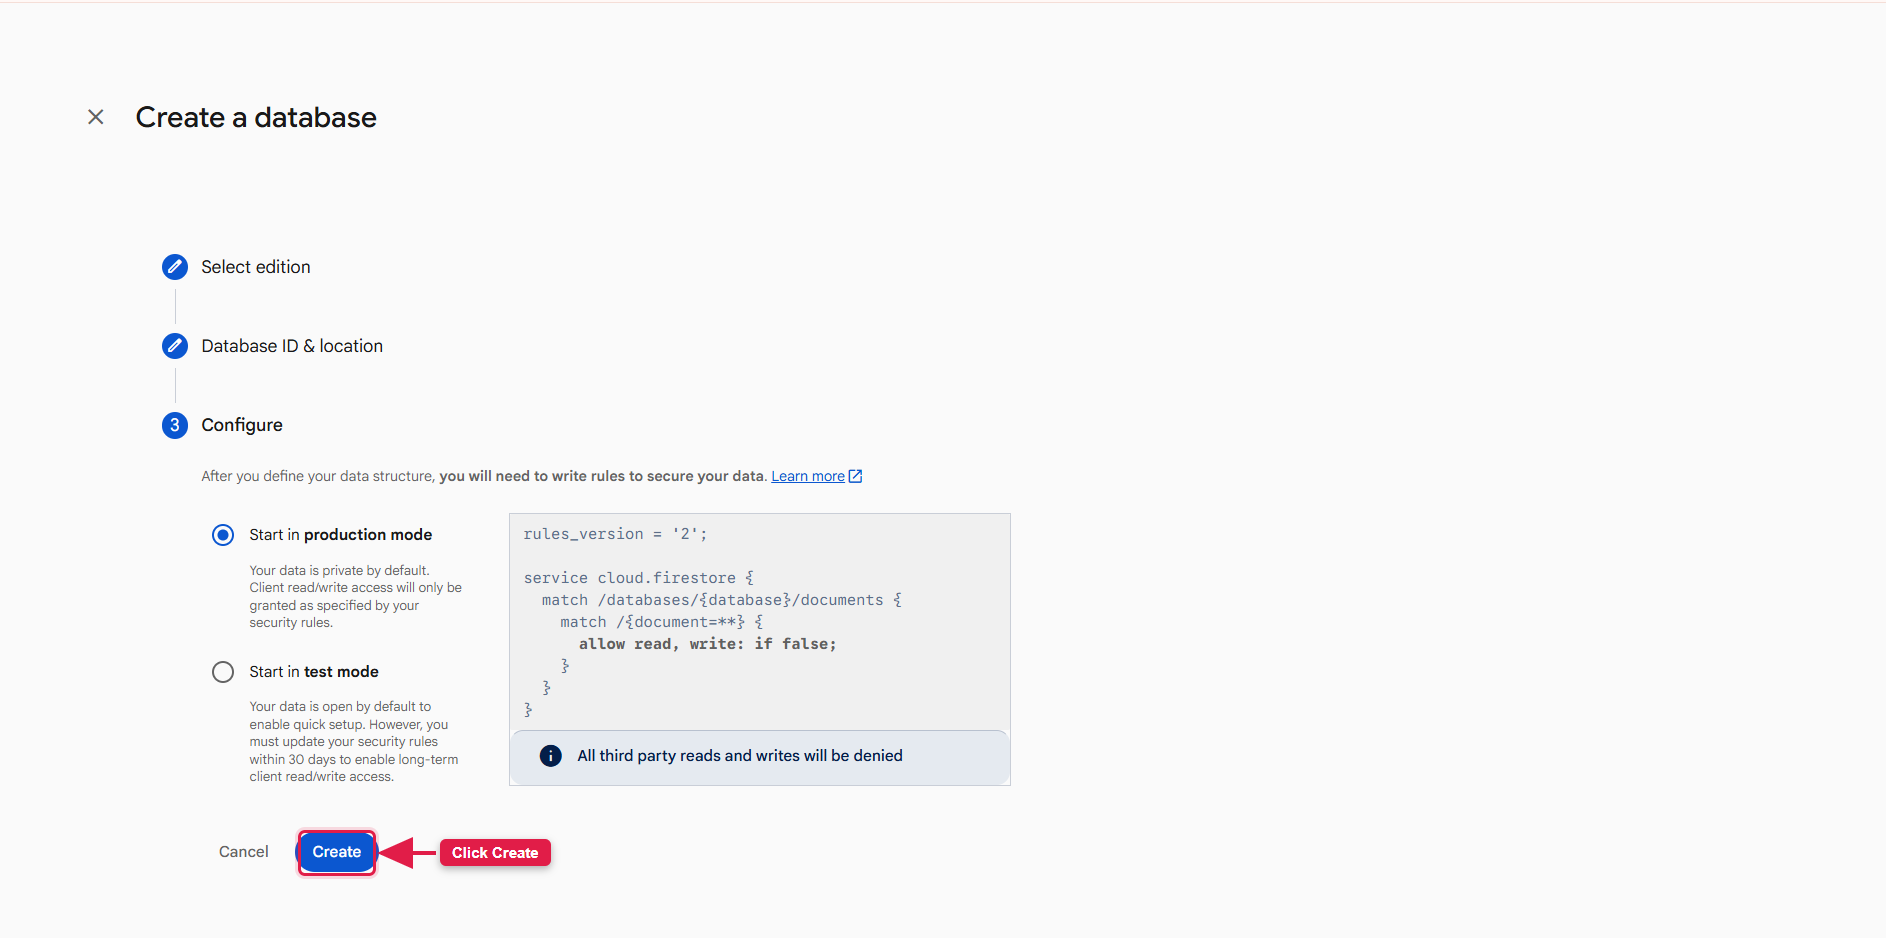
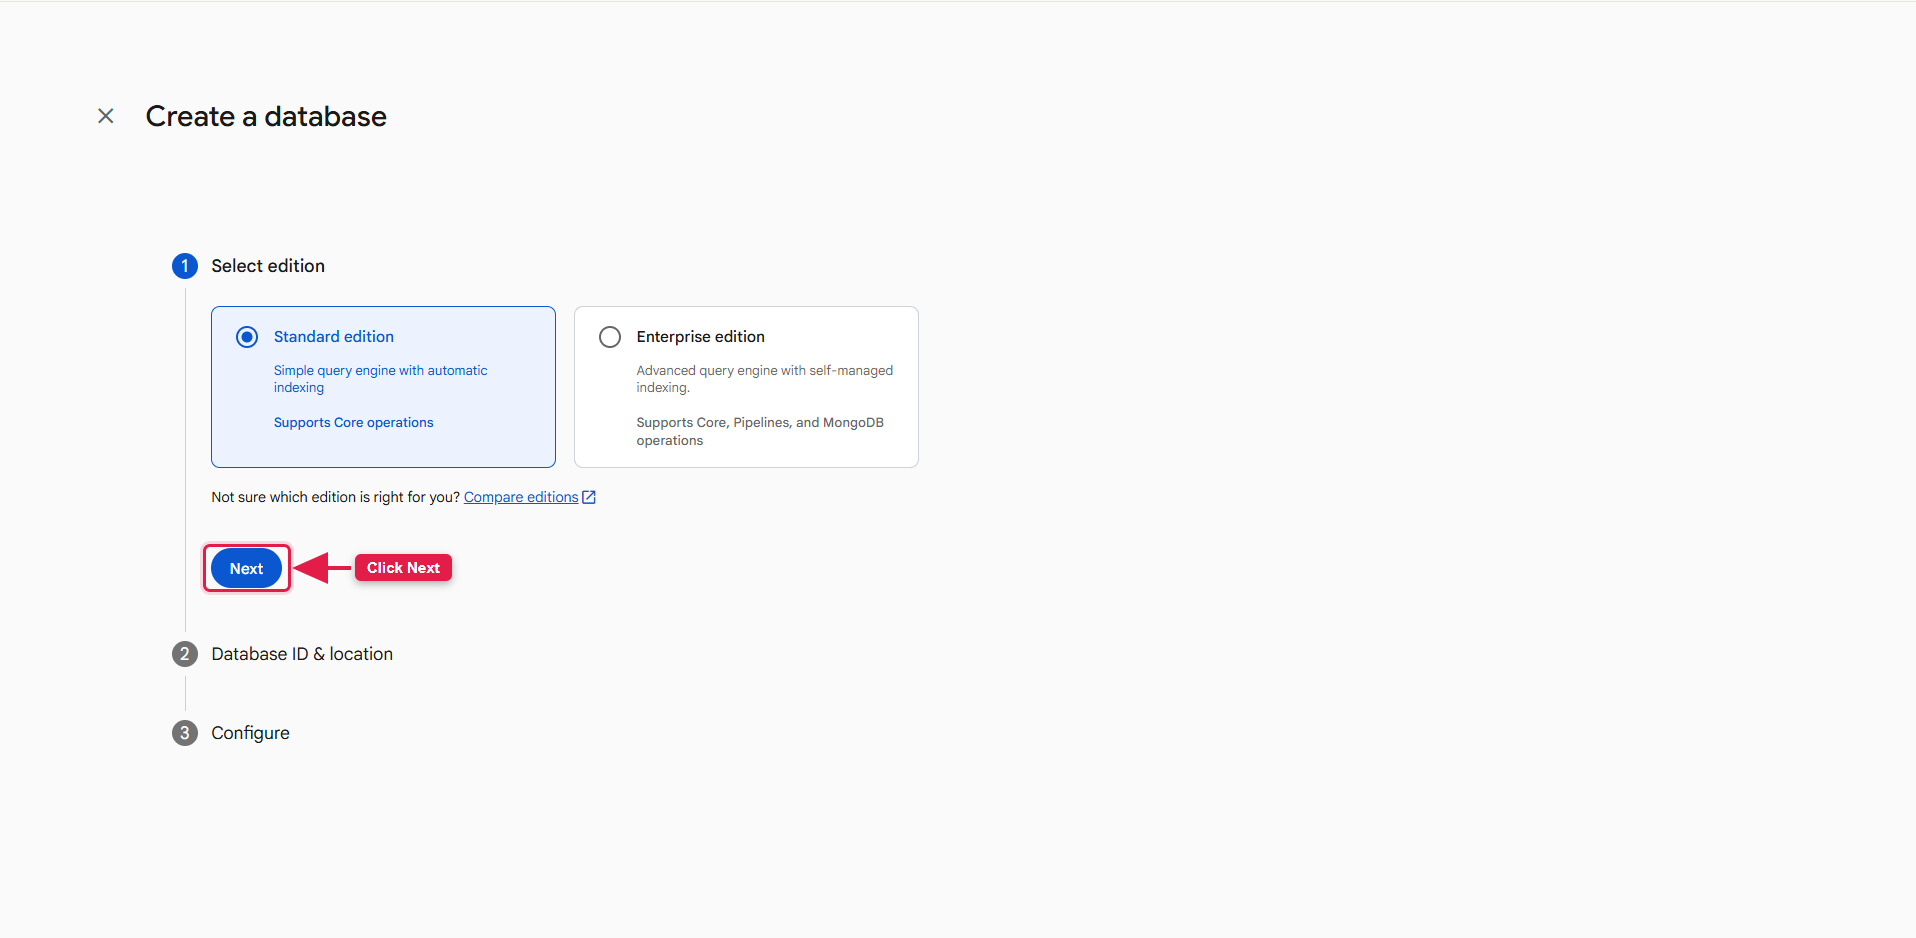
14.5. In the left sidebar open Firestore Database and click Create database. Pick a location close to your users and start in the mode you prefer — the rules are replaced in step 14.9.
14.6. Open Realtime Database and click Create Database. It is used for live driver location tracking.
14.7. Open Storage and click Get started. Firebase Storage holds all uploaded images — restaurant and food photos, banners, avatars and verification documents.
14.8. Open Authentication → Sign-in method and enable Email/Password, Phone, Google and, for iOS, Apple. Under Authentication → Settings → Authorized domains, add your website and restaurant-panel domains.
14.9. Open Firestore Database → Rules, replace the contents with the rules below, and click Publish.
rules_version = '2';
service cloud.firestore {
  match /databases/{database}/documents {
    match /{document=**} {
      allow read, write: if true;
    }
  }

}
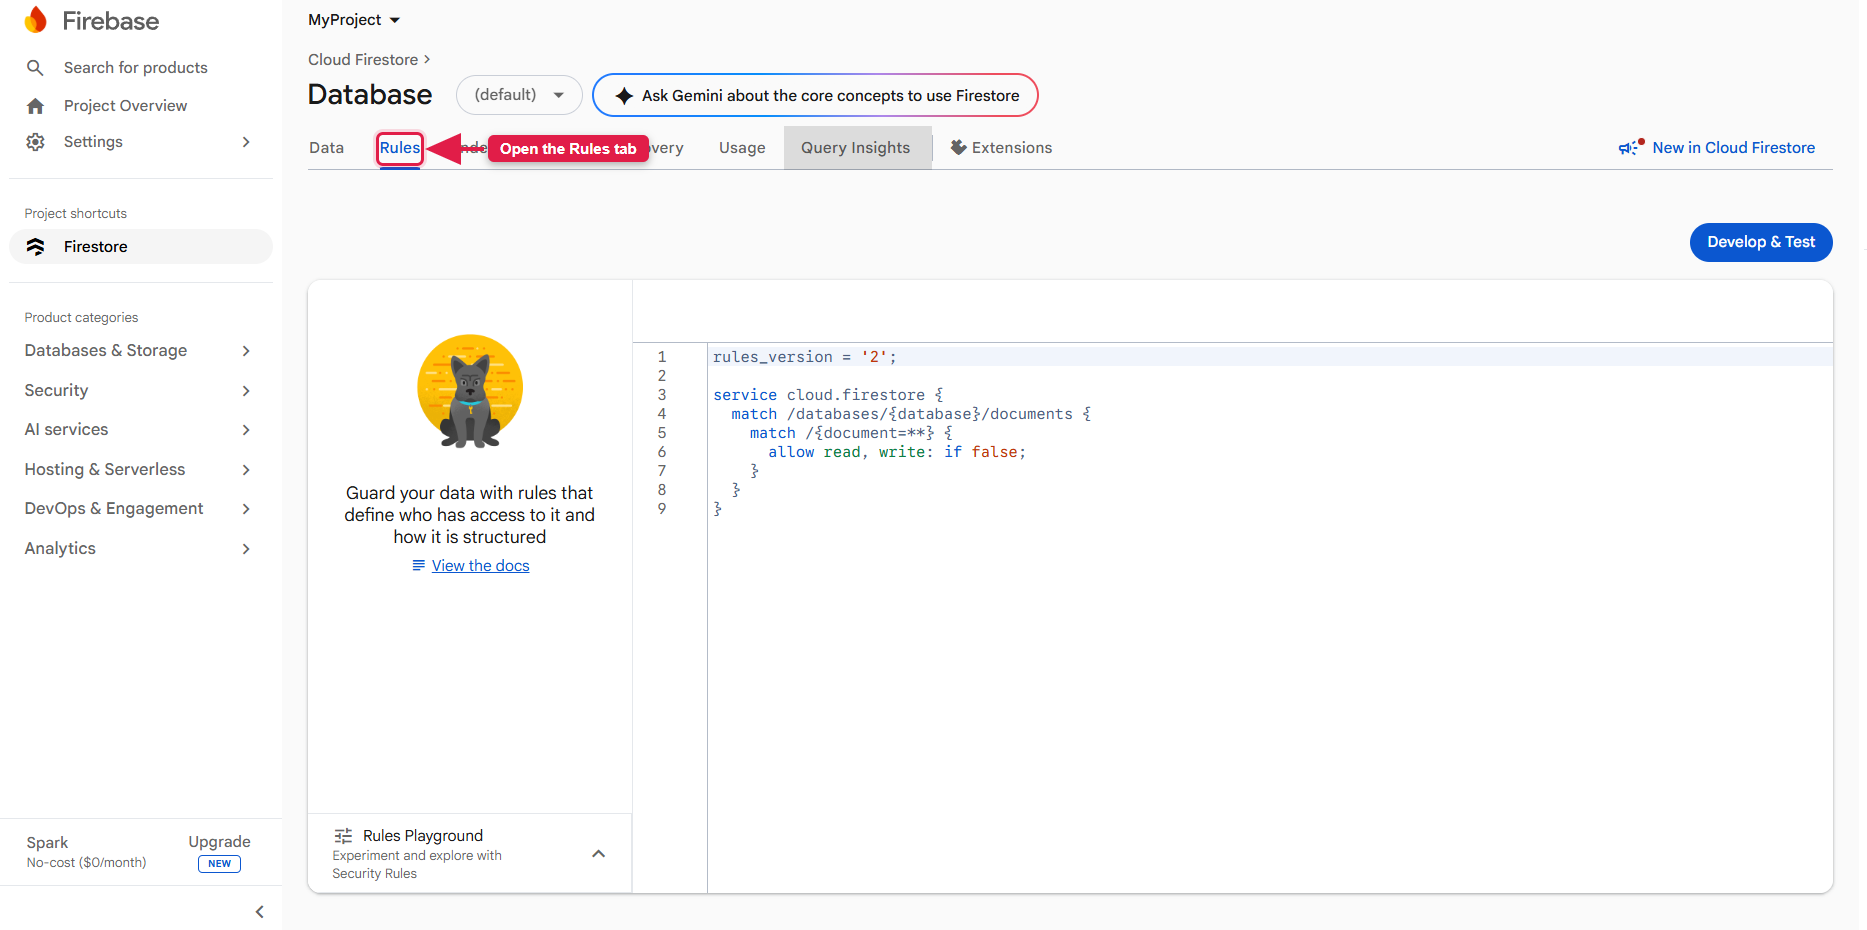
Apply the same rules under Storage → Rules so image uploads work. If a screen
later fails to load data with a PERMISSION_DENIED message, check that these rules were
published — see Troubleshooting.
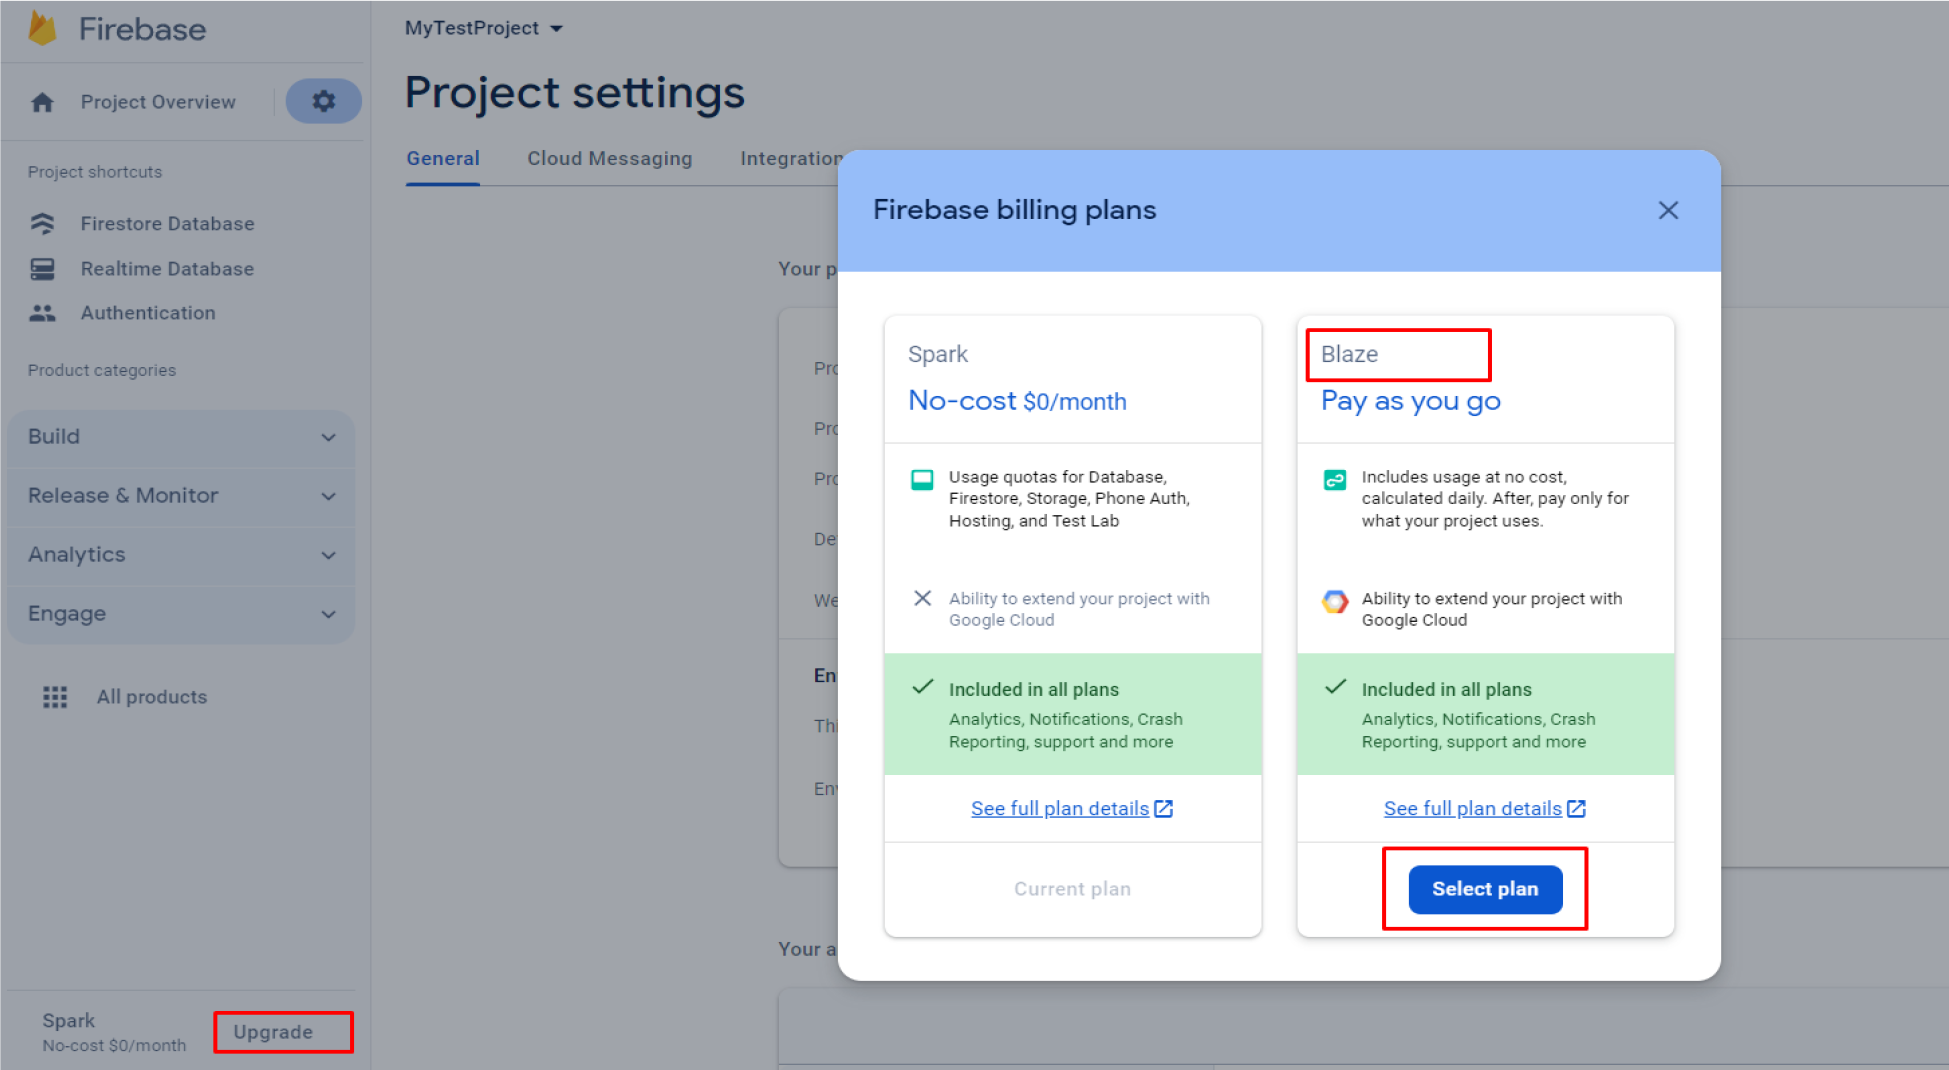
14.10. Upgrade the project to the Blaze (pay-as-you-go) plan. Cloud Functions and any outbound call to a payment gateway require it.
14.11. Generate the service account key. Open
Project Settings → Service accounts, choose Node.js and click
Generate new private key. A JSON file downloads — you will use it for the Admin
Panel (storage/app/firebase/credentials.json), for push notifications, and for the
import/export utility.
Keep the service-account file private. It grants full administrative access to your
Firebase project. Never commit it to Git and never place it inside a web-accessible folder such as
public/.
See Video:

15. Firestore Database Collection Import / Export
The product ships with a demo dataset (settings, categories, currencies, email templates, CMS pages and sample restaurants). Import it so the panels start with working defaults instead of empty screens.
15.1. Install Node.js if you have not already — see Installing Node.js & npm.
15.2. Unzip the source file named "Firebase Import Export Collections.zip".
15.3. Create your Firebase project first if you have not — see Create Firebase Project.
15.4. Replace credentials.json in the extracted folder with the
service account key you generated in step 14.11.
15.5. Open a terminal in the extracted folder. On Windows, hold Ctrl+Shift, right-click inside the folder and choose "Open PowerShell window here".
15.6. Install the dependencies, then run the import or export command:
# Import every collection into your Firestore
npx -p node-firestore-import-export firestore-import -a credentials.json -b collections.json

# Export every collection out of your Firestore
npx -p node-firestore-import-export firestore-export -a credentials.json -b collections.json
The export writes a collections.json file you can keep as a backup.
Please note: Before running either command, make sure credentials.json
holds the service-account key of the correct Firebase project. Importing into the wrong
project, or importing twice, can overwrite existing documents.
See Video:
16. Deploy Firestore Indexes
Firestore needs a composite index for every query that filters and sorts on more than one field. Foodie uses many of these (nearby restaurants, order lists, reports), so deploy the supplied index definitions before going live — otherwise those screens fail with "The query requires an index".
16.1. Install Node.js — see Installing Node.js & npm.
16.2. Unzip the source file named "Firebase Indexing.zip".
16.3. Open a terminal in the extracted folder (Ctrl+Shift + right-click → "Open PowerShell window here" on Windows).
16.4. Log in to Firebase, if you have not already:
firebase login
16.5. Initialise Firestore configuration in the folder:
firebase init
16.6. Confirm with Y and press Enter.
16.7. Choose Firestore: Configure security rules and index files for Firestore.
Important Notes:
Use the arrow keys to move between options and the space bar to select one, then press Enter to confirm.
16.8. Choose Use an existing project.
16.9. Select your Foodie project.
16.10. Press Enter to accept the default rules file name
(firestore.rules).
16.11. Press Enter to accept the default index file name
(firestore.indexes.json).
16.12. Open the generated firestore.indexes.json, delete its contents, and
paste in everything from the supplied firestore_indexes.json file.
16.13. Deploy the indexes:
firebase deploy --only firestore:indexes
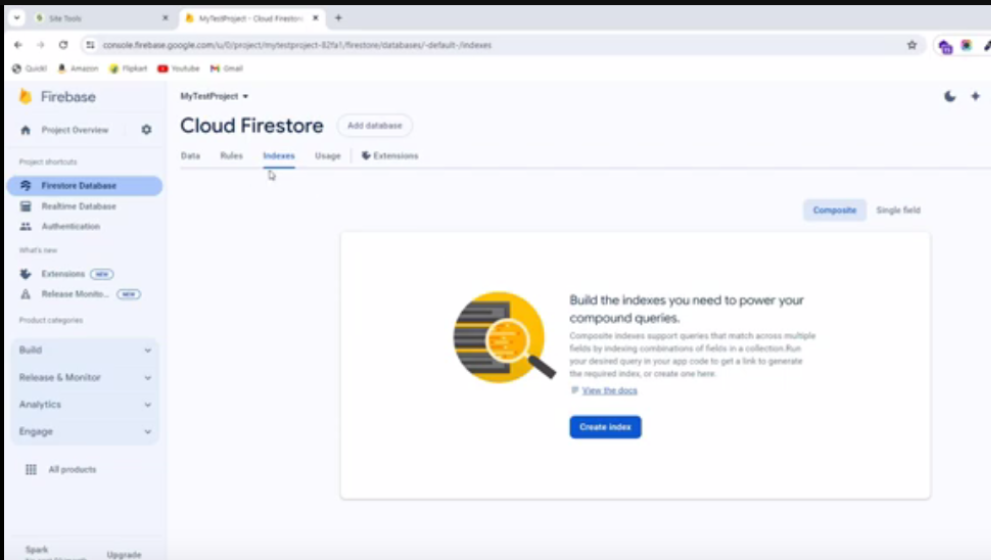
Building the indexes takes a few minutes. Watch the progress in Firebase Console → Firestore Database → Indexes and wait until every index shows Enabled.
See Video:
17. Deploy Firebase Cloud Functions
The Cloud Functions Foodie needs are already written — you only have to deploy them to your own Firebase project. The package deploys two functions:
deliveryDispatch— a Firestore trigger on therestaurant_orderscollection. It runs whenever an order is written and drives the driver-assignment flow, following the broadcast or sequential mode you chose under Settings → Feature Settings.deleteUser— a callable function that removes a user from Firebase Authentication when an account is deleted from a panel or app.
Without this package deployed, orders are created but never dispatched to a driver, so deploy it before going live.
Before you deploy — enable the required Google Cloud APIs. Cloud Functions
(2nd generation) build on Cloud Build, store images in Artifact
Registry and run on Cloud Run using your project's default compute
service account. On a new Firebase project the Compute Engine API is usually not enabled
yet, so the deploy fails for most functions with
"Compute Engine API has not been used…" or
"Unknown service account" (typically only one function deploys and the rest error). In
Google Cloud Console → APIs & Services → Enabled APIs & services,
make sure all of the following are enabled — enable any that are missing
(Compute Engine is the one most often turned off):
- Compute Engine API
- Cloud Build API
- Artifact Registry API
- Cloud Run Admin API
- Eventarc API
- Cloud Functions API
Or enable them all at once with the CLI, then wait 3–5 minutes for the change to propagate before deploying:
gcloud services enable compute.googleapis.com cloudbuild.googleapis.com \
  artifactregistry.googleapis.com run.googleapis.com eventarc.googleapis.com \
  cloudfunctions.googleapis.com --project=YOUR_PROJECT_ID
17.1. Install Node.js and the Firebase CLI
npm install -g firebase-tools
If you have already set up the Firebase tools, running npm install inside the functions
folder is enough.
17.2. Log in to Firebase
firebase login
A browser window opens; sign in with the Google account that owns your Firebase project.
17.3. Point the package at your project and database
Extract the supplied Cloud Functions package. It contains:
Cloud Function/
├── firebase.json                deploy configuration — leave as it is
├── .firebaserc                  which Firebase project to deploy to
└── functions/
    ├── .env                     which Firestore database to use
    ├── index.js                 the function code
    ├── products/delivery.js     the order-dispatch trigger
    ├── package.json             dependencies (Node 22 runtime)
    └── serviceAccountKey.json   shipped, but not used — see the note below
Step 1 — set the project. There are two ways to do this. They write the same value, so use one, not both:
Option A — let the CLI do it (recommended). From the folder containing
firebase.json:
firebase use YOUR_PROJECT_ID
This creates or updates .firebaserc for you, so there is nothing to edit by hand. Run
firebase projects:list if you are unsure of the exact project ID.
Option B — edit .firebaserc yourself. Open it and replace the project ID:
{
  "projects": {
    "default": "YOUR_PROJECT_ID"
  }
}
Step 2 — set the database. Open functions/.env and set
FIRESTORE_DB to the same Firestore database your panels use:
FIRESTORE_DB=(default)
This value must match FIREBASE_PROJECT_DB in all three panels'
.env files. The dispatch trigger is a 2nd-generation function bound to one
named database, so if the panels write orders to (default) while the function listens
on a different one, the function deploys cleanly and then simply never fires — no error is
reported anywhere.
Step 3 — install the dependencies:
cd functions
npm install
You do not need to touch serviceAccountKey.json. It ships inside
functions/, but the code never reads it — index.js calls
admin.initializeApp() with no arguments, so once deployed the function authenticates
automatically as your project's own service account. The credentials.json from step
14.11 is for the Laravel panels, not for this package. There is likewise no database URL to fill in
anywhere in index.js.
17.4. Deploy the functions
Run this from the folder containing firebase.json — the root of the extracted
package, not the functions/ sub-folder:
firebase deploy --only functions
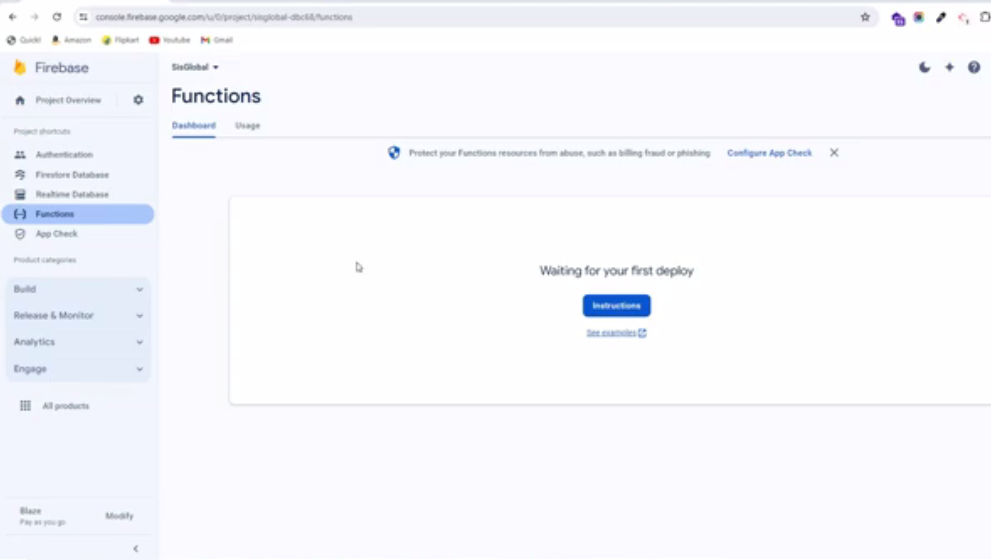
When the deploy finishes, open Firebase Console → Functions to confirm every function is listed. Each function has its own logs, which are the fastest way to debug a failing order or payment.
Please note: Cloud Functions require the Firebase Blaze (pay-as-you-go) plan — 2nd-generation functions build on Cloud Build and run on Cloud Run, neither of which is available on the free Spark plan. Payment gateways are not part of this package; their credentials live in the Laravel panels, so rotating a gateway key never requires a redeploy here.
17.5. Scheduled scripts run by the Admin Panel
Some recurring Firebase tasks have been moved out of Cloud Functions and into the Laravel Admin Panel, so you can control their timing from the panel instead of redeploying. The scripts live in:
root > storage > app > firebase
autoCancelOrder.js— automatically cancels orders that were never accepted.scheduleNotification.js— sends reminders for scheduled orders.
Important notes
- These scripts are executed by Laravel's scheduler, which needs a server cron job — see Cron & Scheduled Tasks.
- They talk directly to Firebase Firestore using the panel's
credentials.json. - Their timing values come from the admin panel — auto-cancellation duration under Settings, and reminder lead time under Settings → Schedule Order Notification.
See Video:
18. Admin Panel Setup
The Admin Panel is a Laravel 12 application. Make sure your server meets the requirements in Server Requirement, then upload the Admin Panel package to your domain or subdomain and extract it.
18.1. Upload the files
18.1.1. Connect over FTP/SFTP. Use a client such as FileZilla with your server IP, username and password — port 21 for FTP, port 22 for SFTP.
18.1.2. Transfer the ZIP file to the target path on the server, for example
/var/www/html.
18.1.3. Extract it from the server terminal, or with the cPanel File Manager:
unzip your-application.zip
18.1.4. Point the domain's document root at the project's public/
folder.
18.2. Create the database
The admin panel uses MySQL only for panel authentication (users, roles, permissions), sessions and jobs
— every piece of platform data lives in Firestore. Create a database and user from your control
panel, then import the supplied .sql file into it (step 18.3.6).
Each panel needs its own database. The Admin, Restaurant and Website panels ship
with a separate .sql file each, so create three databases — for example
foodie_admin, foodie_restaurant and foodie_web — and
import the matching file into each one. They all share the same Firebase project;
only MySQL is per-panel.
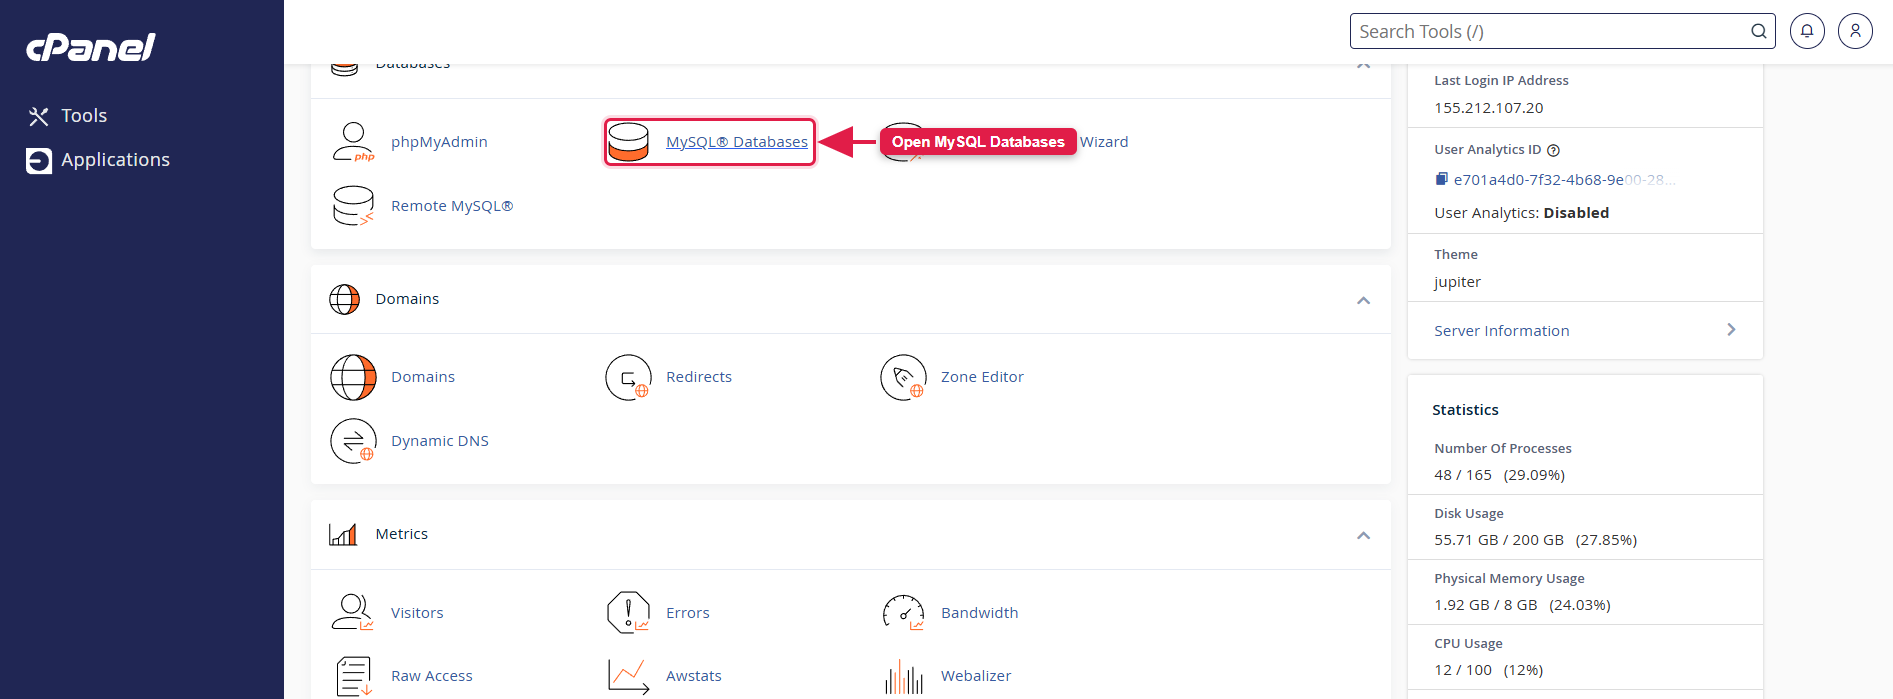
18.2.1. Open MySQL Databases in cPanel.
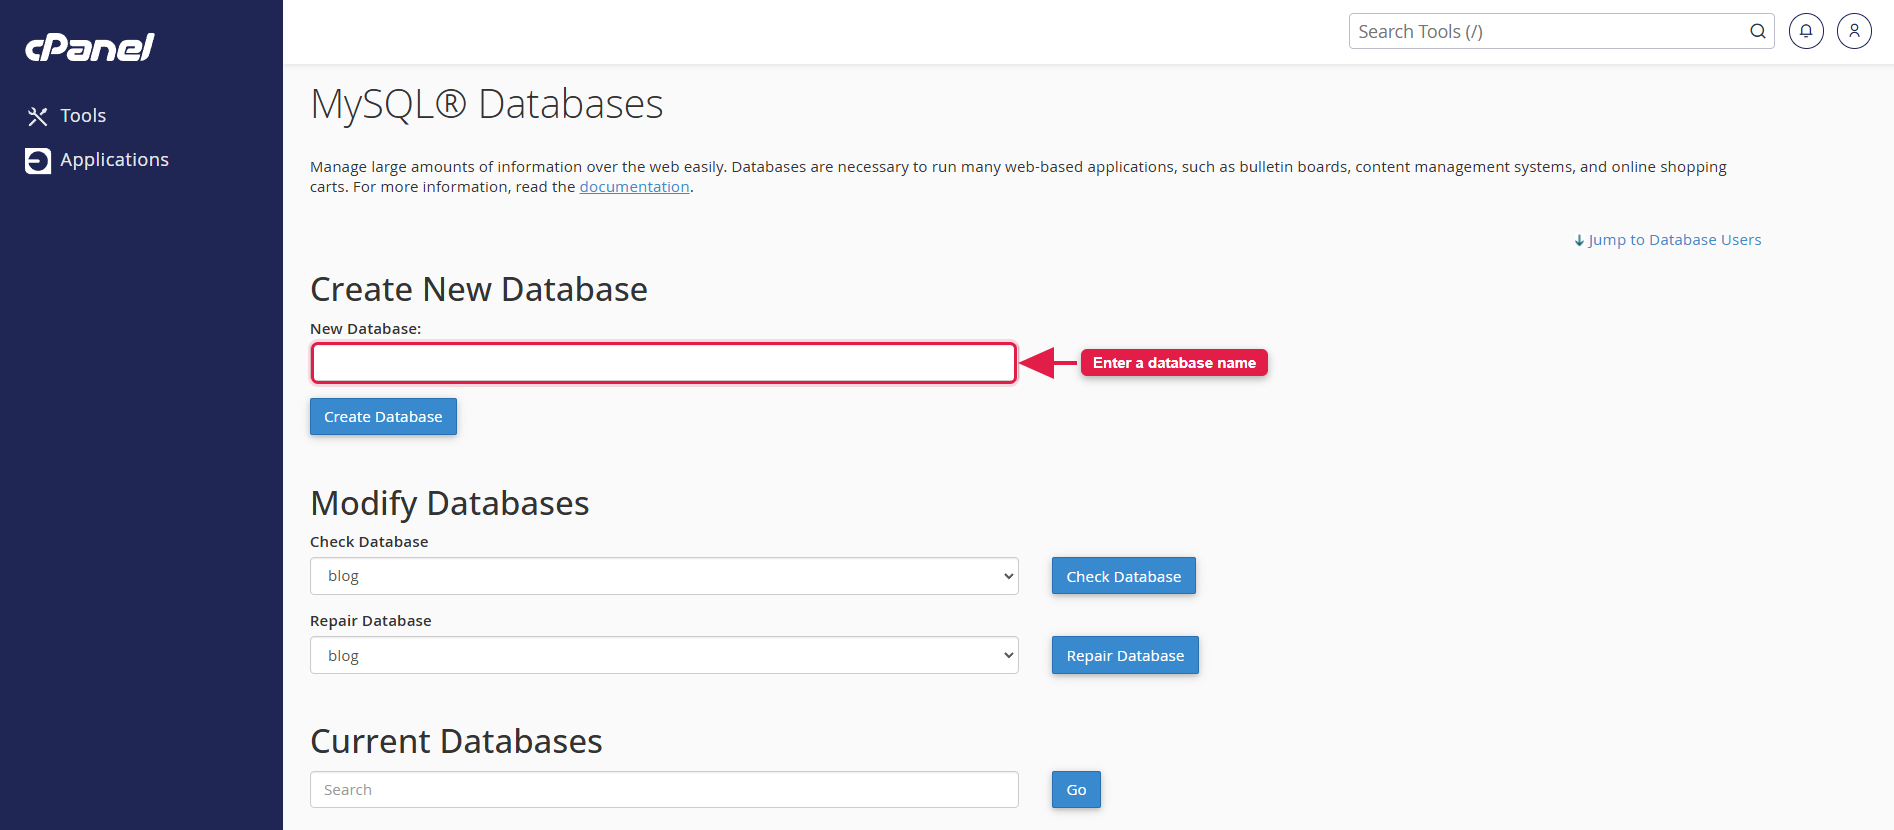
18.2.2. Enter a name and create the database.
18.2.3. Create a database user with a strong password.
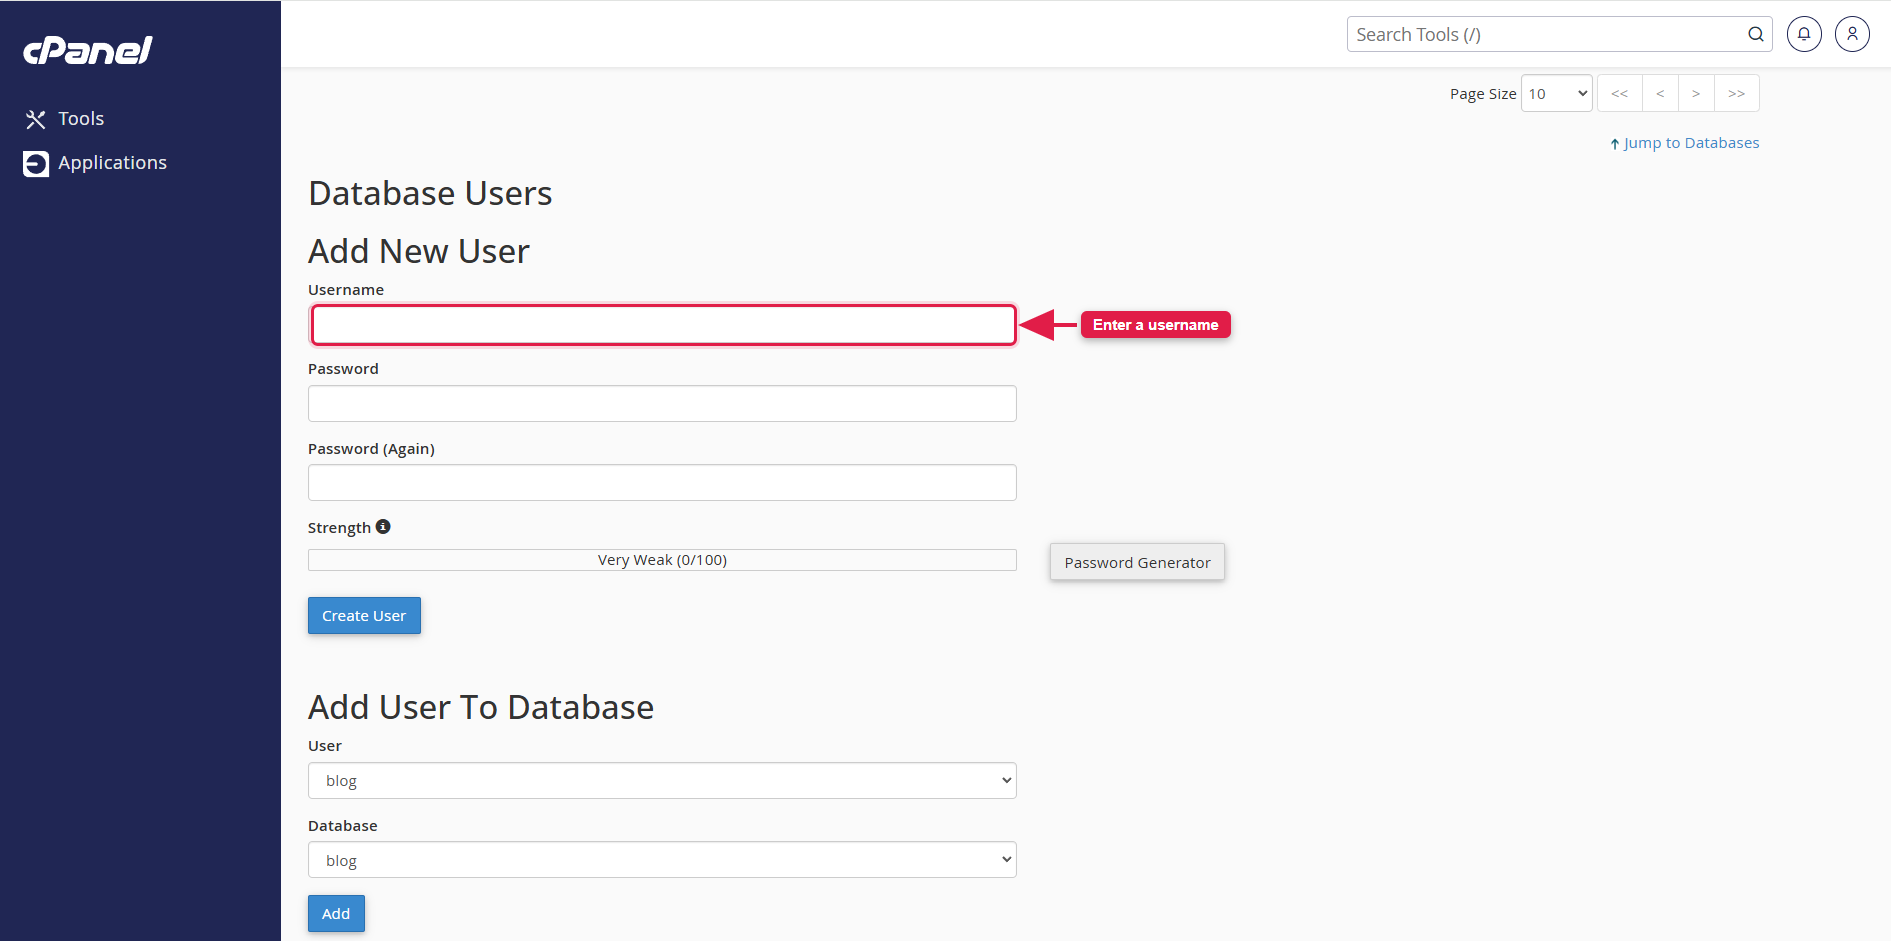
18.2.4. Add the user to the database, grant ALL PRIVILEGES, and click Make Changes.
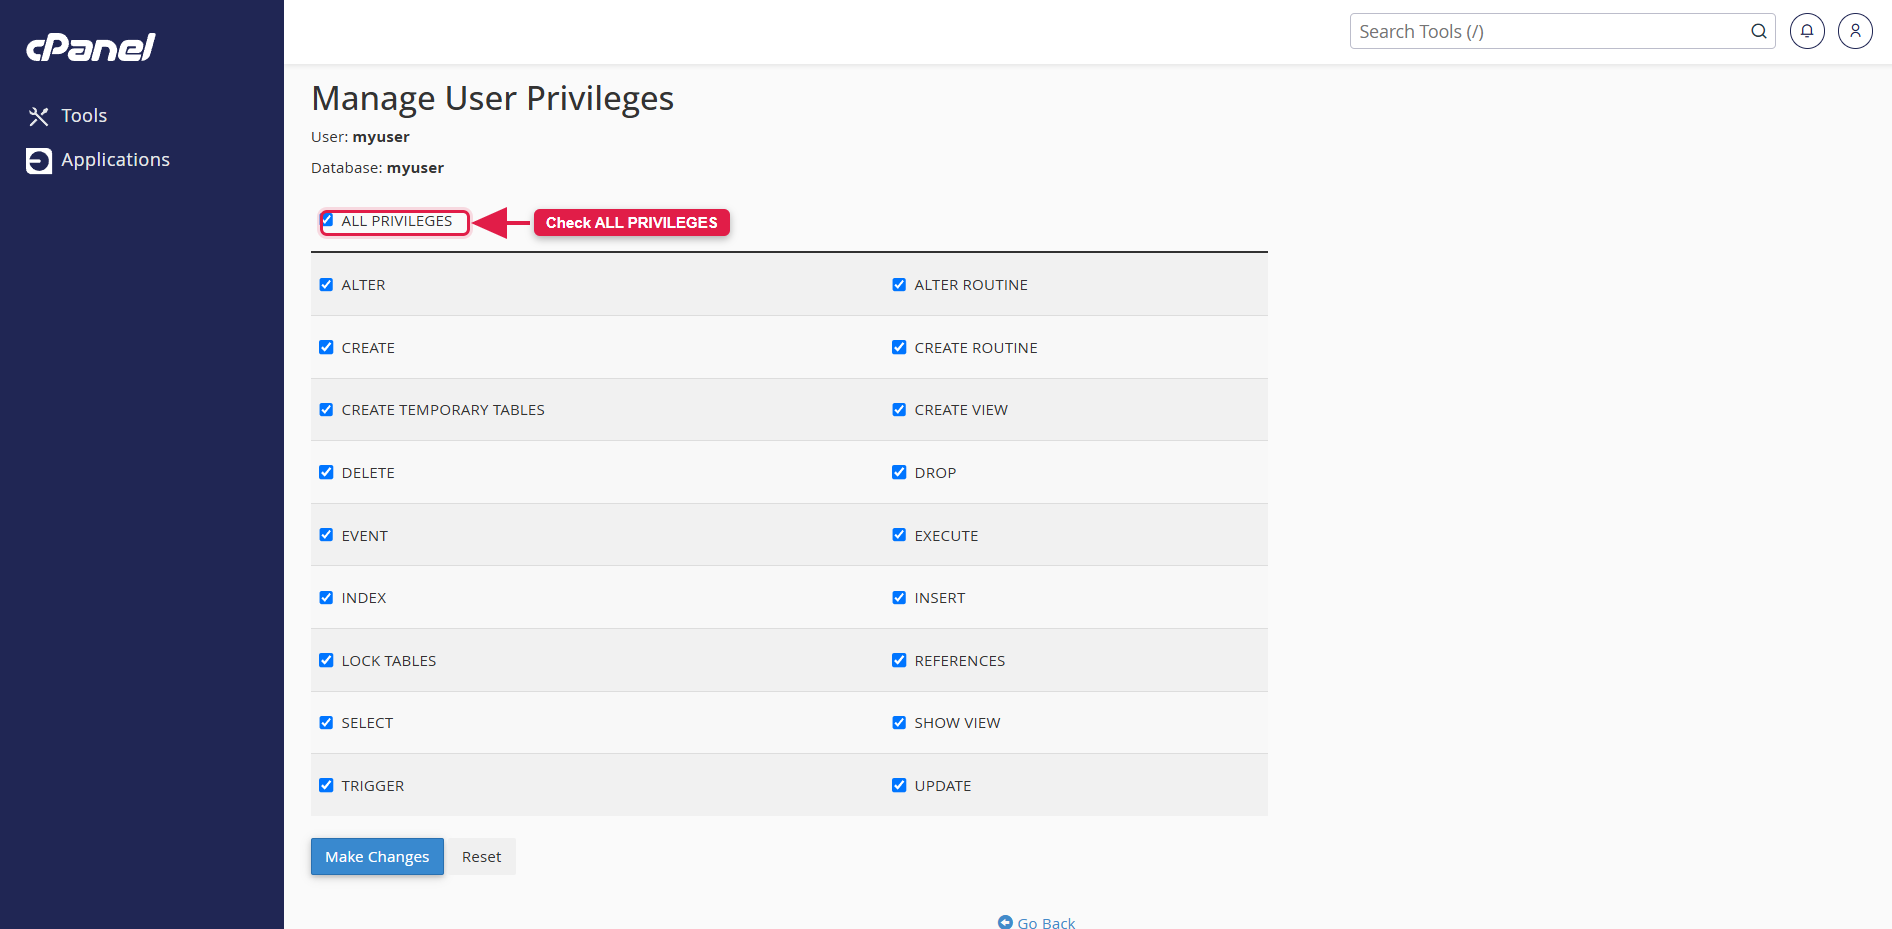
18.3. Configure the panel
18.3.1. Install the dependencies and generate the application key:
composer install
cp .env.example .env
php artisan key:generate
18.3.2. Edit .env and set the database connection and your
Firebase web app credentials (copied in step 14.4):
APP_NAME=Foodie
APP_URL=https://admin.yourdomain.com

DB_DATABASE=your_database
DB_USERNAME=your_db_user
DB_PASSWORD=your_db_password

# Firestore named database — '(default)' unless you created a named one
FIREBASE_PROJECT_DB=(default)

FIREBASE_APIKEY=
FIREBASE_AUTH_DOMAIN=
FIREBASE_DATABASE_URL=
FIREBASE_PROJECT_ID=
FIREBASE_STORAGE_BUCKET=
FIREBASE_MESSAAGING_SENDER_ID=
FIREBASE_APP_ID=
FIREBASE_MEASUREMENT_ID=

# Absolute path to the Node binary — used by the scheduled scripts
NODE_PATH=''

# Timezone
APP_TIMEZONE='Asia/Kolkata'
FIREBASE_PROJECT_DB must be identical in all three panels. Use
(default) unless you deliberately created a named Firestore database. A mismatch is the
most common cause of "data shows in one panel but not the other".
18.3.3. Place the Firebase service account file at
storage/app/firebase/credentials.json. It is required for server-side ID-token
verification, for sending push notifications, and by the scheduled scripts.
18.3.4. Install the Node modules the scheduled scripts need, from the panel root:
npm install
18.3.5. Set NODE_PATH in .env to the absolute path of your
Node binary — see Installing Node.js & npm.
18.3.6. Import the panel's database. Each panel ships with its own
.sql file inside the package — import it into the database you
created in step 18.2. Do not run php artisan migrate; the supplied
.sql file already contains the tables and the default data.
Using phpMyAdmin / cPanel: open phpMyAdmin, select your database from
the left-hand list, open the Import tab, choose the panel's .sql file and
click Go.
Using the command line:
mysql -u your_db_user -p your_database < admin_panel.sql
18.3.7. Set writable permissions on the runtime folders:
chmod -R 755 storage bootstrap/cache
18.4. Import the demo data
The panel reads its configuration from Firestore, so before your first login import the supplied Firestore collections — see Firestore Database Collection Import / Export. They contain the settings documents, currencies, email templates, CMS pages and the sample catalog.
Two imports, two places. The .sql file (step 18.3.6) sets up MySQL
— the panel's login accounts, roles and permissions. The Firestore import sets up the platform
data the panel displays. Both are needed before the panel is usable.
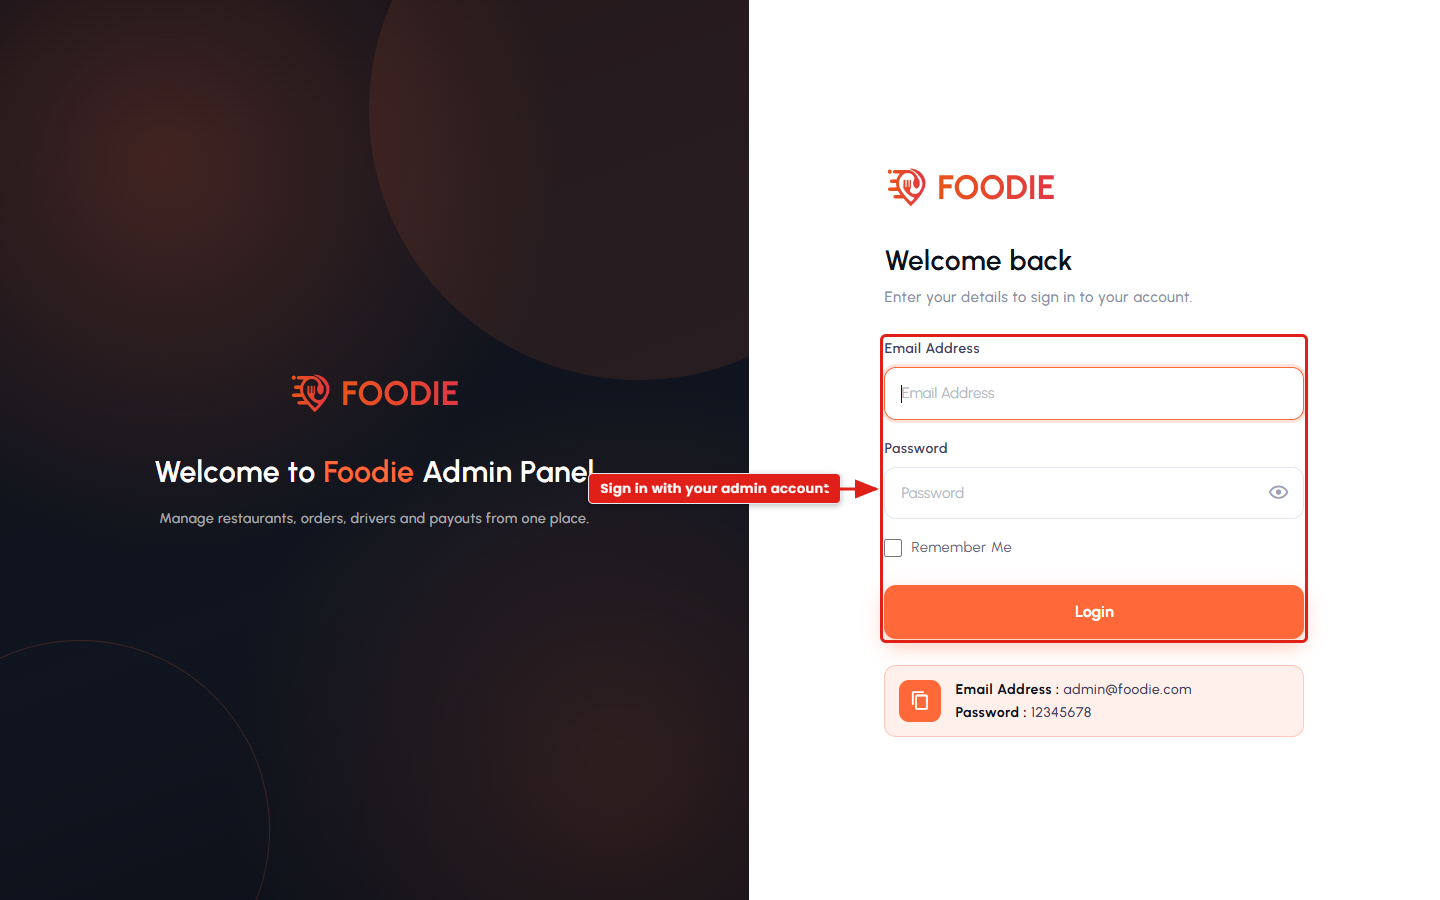
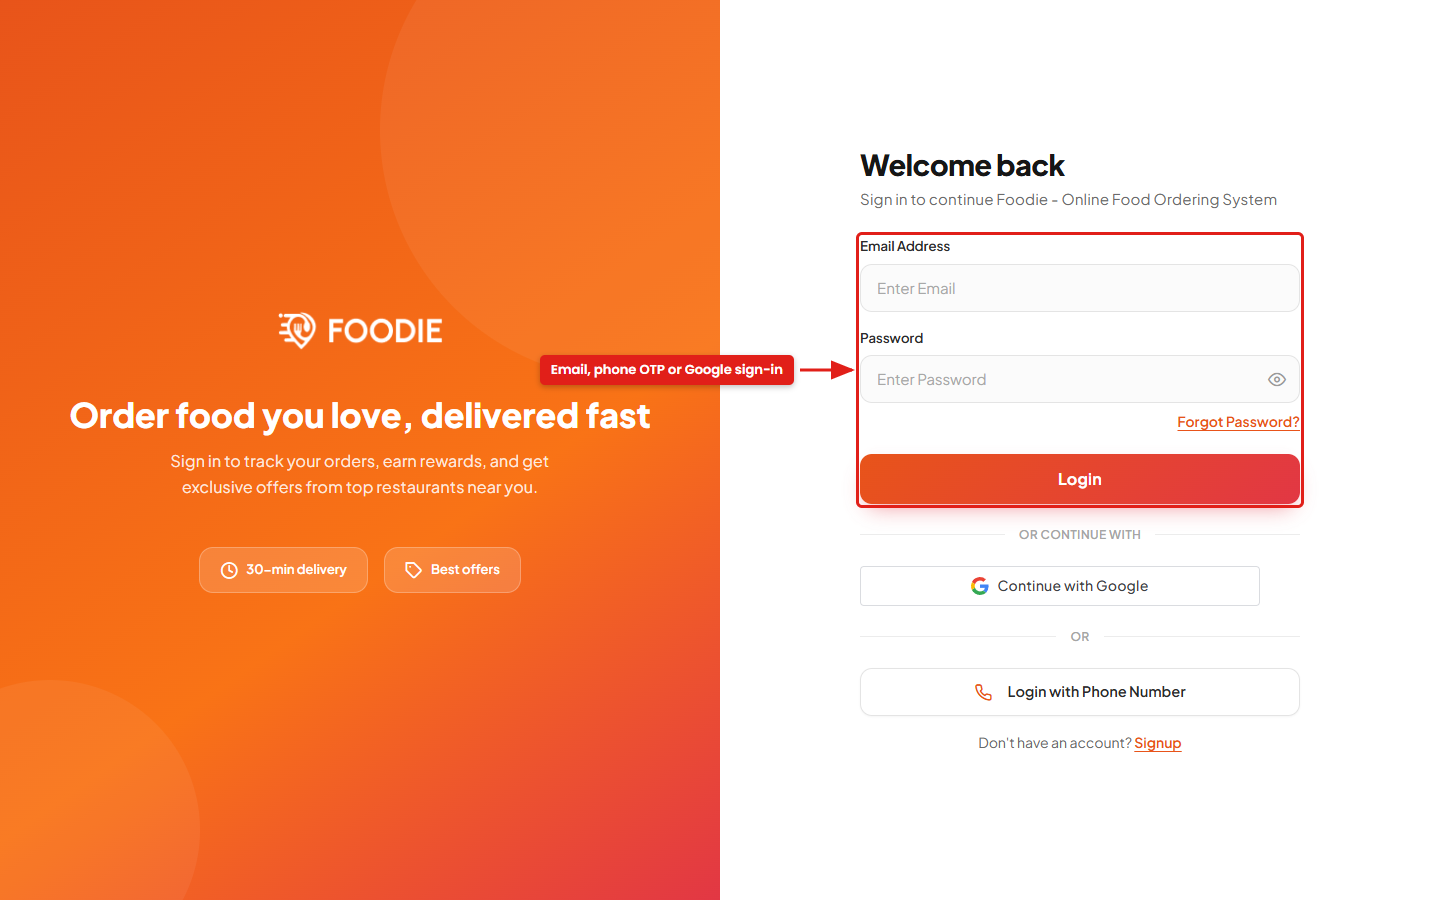
18.5. Log in
Open the panel at your domain, for example https://admin.yourdomain.com, and sign in with
the default account that came with the imported .sql file:
Email:    admin@foodie.com
Password: 12345678
18.6. Map configuration
Choose your map provider under Settings → Map Settings and paste your Google Maps API key — see Create Google Map API Key.
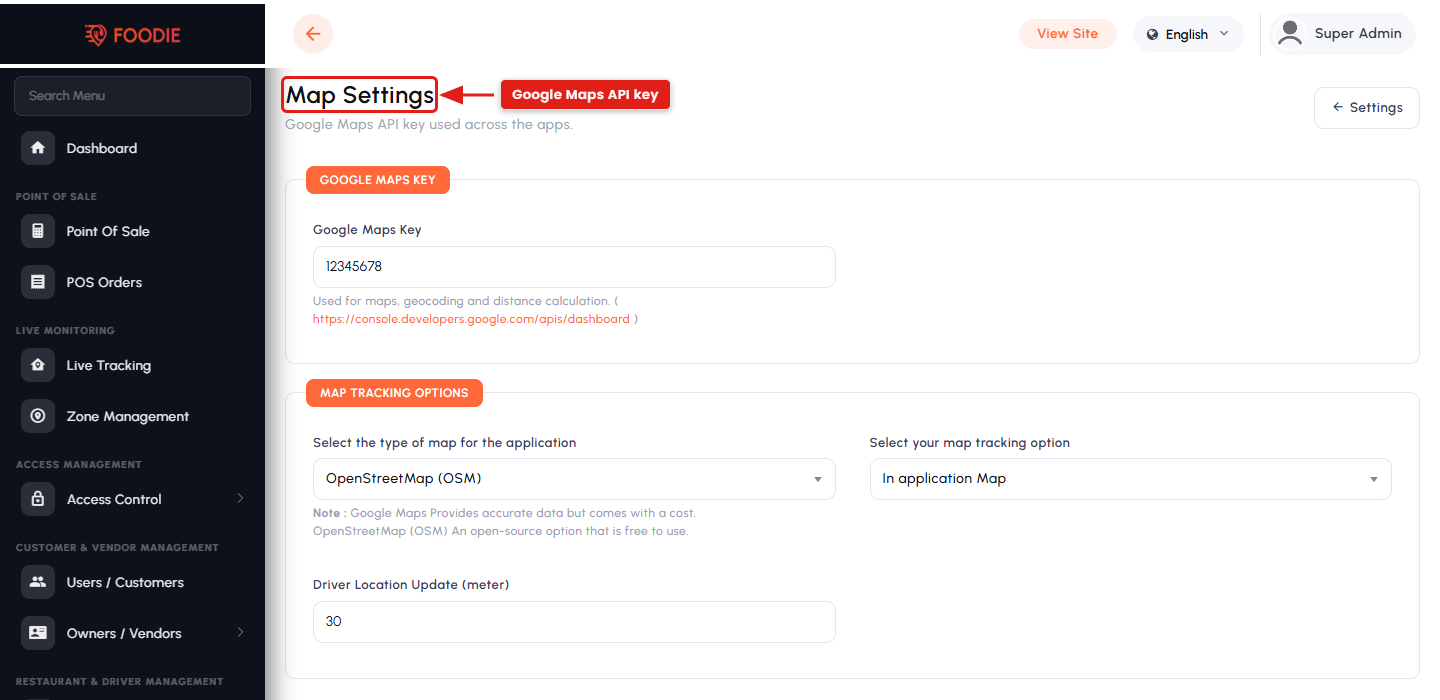
Google Maps is recommended for accurate location, search and delivery-distance results.
18.7. Notification settings
Push notifications are delivered through Firebase Cloud Messaging (FCM). Connect the panel to FCM as follows:
1. Generate the Firebase credentials file
- Open the Firebase console and select your project.
- Go to Project Settings → Service accounts.
- Click Generate new private key — a JSON file downloads (for example
firebase-adminsdk-xxxxx.json). - Keep this file safe; it grants administrative access to your Firebase project.
2. Upload it in the admin panel
- Log in to your Foodie Admin Panel.
- Go to Settings → Notification Settings.
- Upload the JSON file and enter the Sender ID from Project Settings → Cloud Messaging.
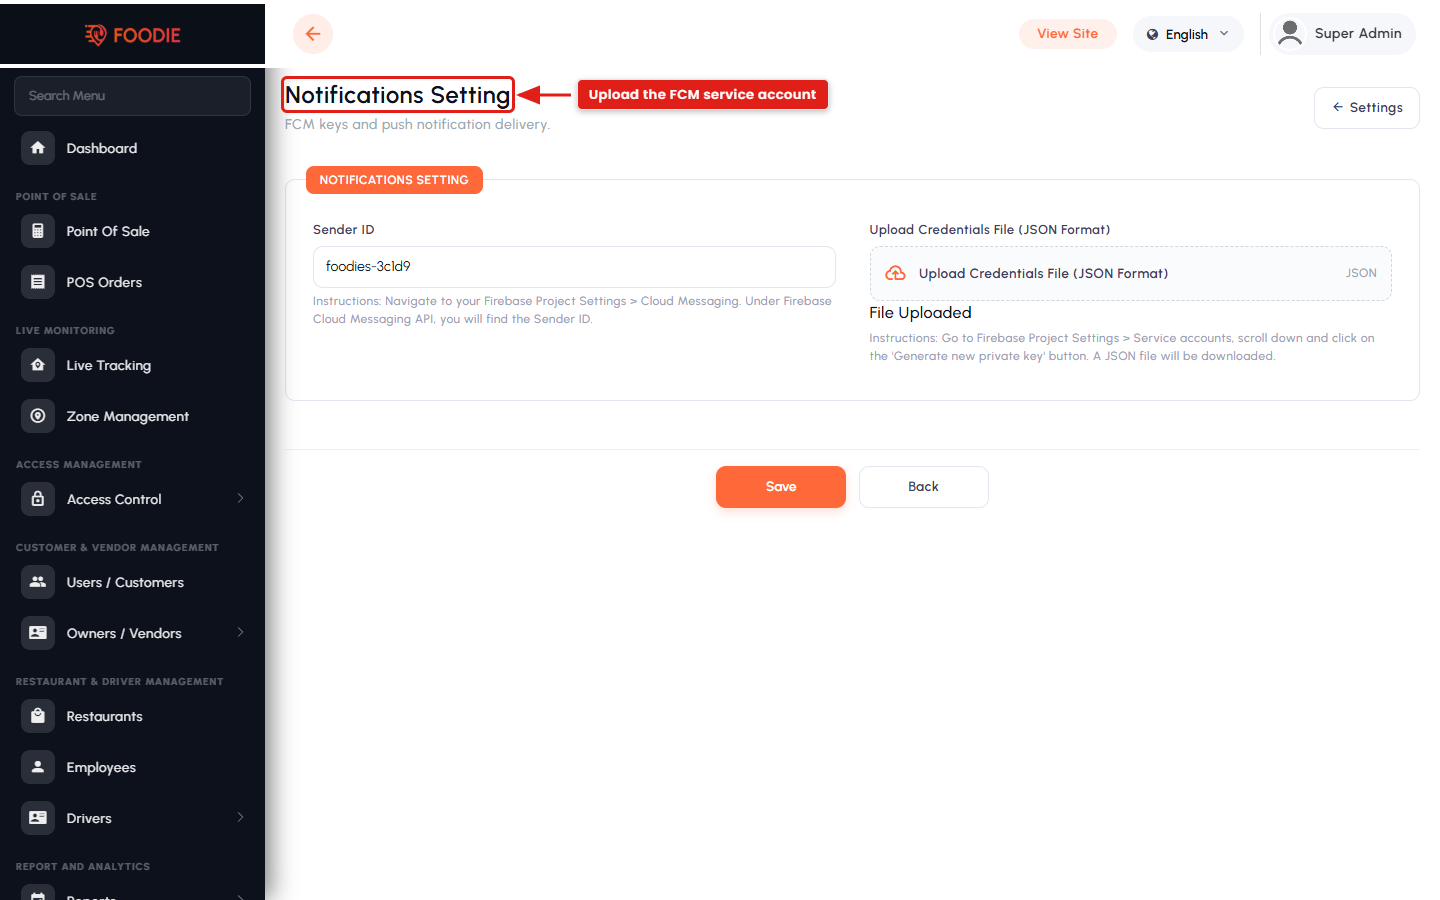
3. Save and verify
- Click Save. The panel now sends push through Firebase.
- Place a test order from the User App; the restaurant and the assigned driver should receive a push notification immediately, and the customer should receive the status updates (accepted, picked up, on the way, delivered).
18.8. AI settings
Open Settings → AI Settings and paste your OpenAI API key.
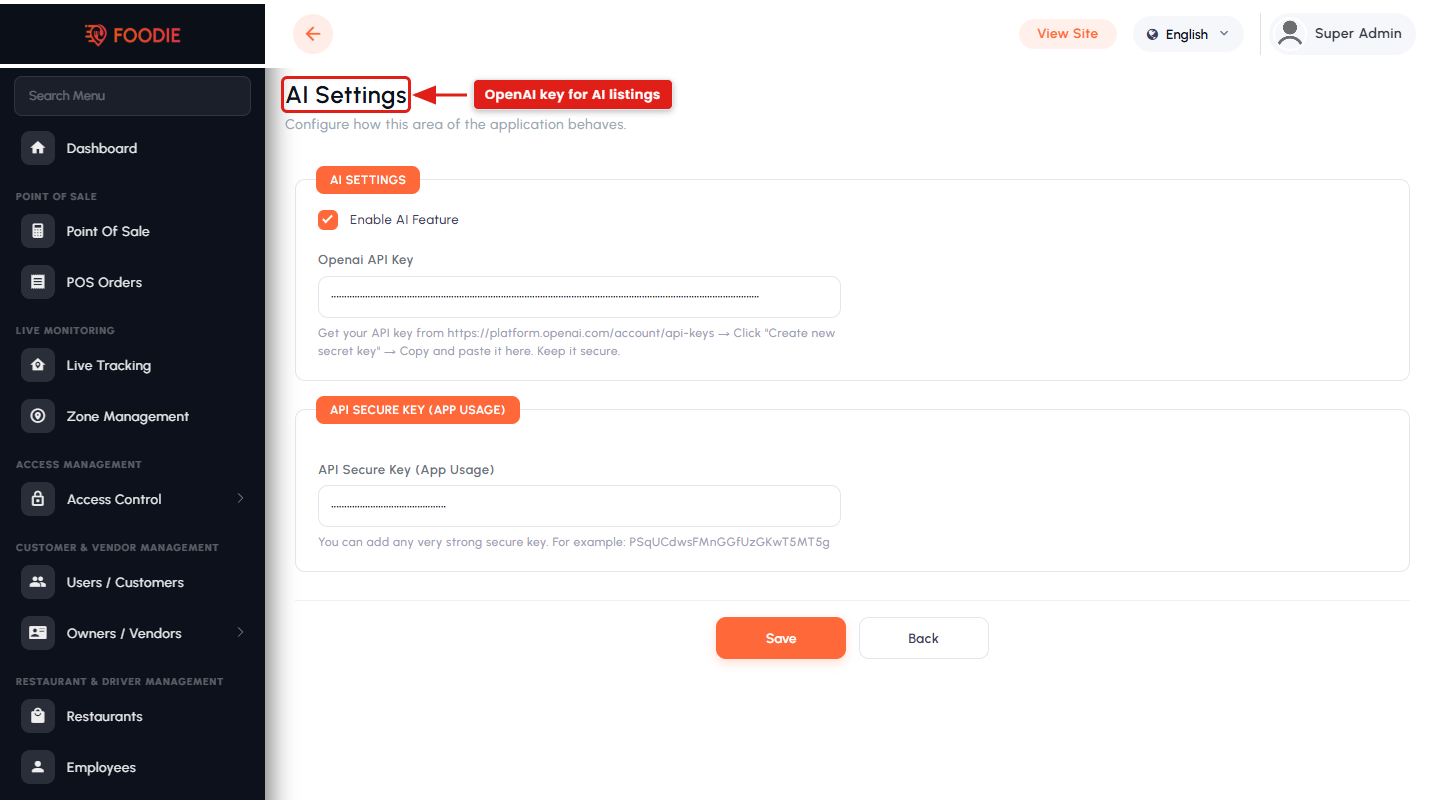
With AI enabled, a food item can be generated from its image plus a title and short description — the model returns an expanded description, specifications, variations and other attributes, which speeds up menu creation and keeps listings consistent.
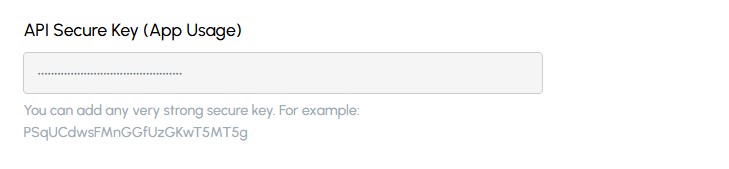
The API secure key used by the mobile apps for AI features is set under Settings → Global Settings.
19. Admin Panel Menus Overview
After logging in, the admin sidebar is grouped into the sections below. Menu items appear only if the logged-in admin's role grants the matching permission, so a restricted admin sees a shorter menu. A search box at the top of the sidebar filters the menu as you type.
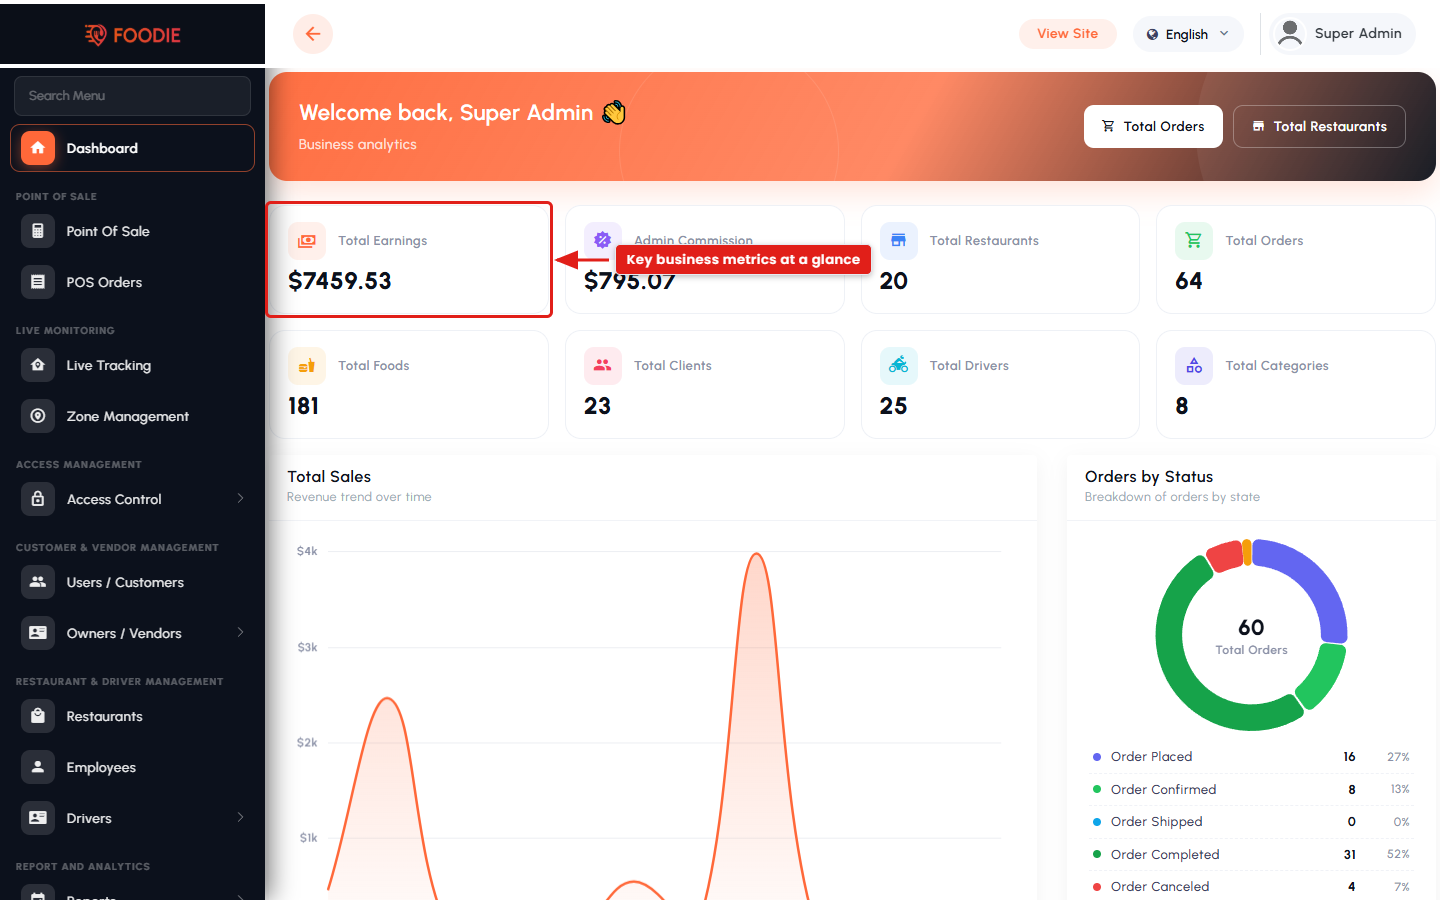
19.1. Dashboard
An at-a-glance overview of the business — total customers, restaurants and drivers, order counts by status, the latest orders, top-performing restaurants and an earnings summary. It is the fastest way to see whether the platform is healthy right now.
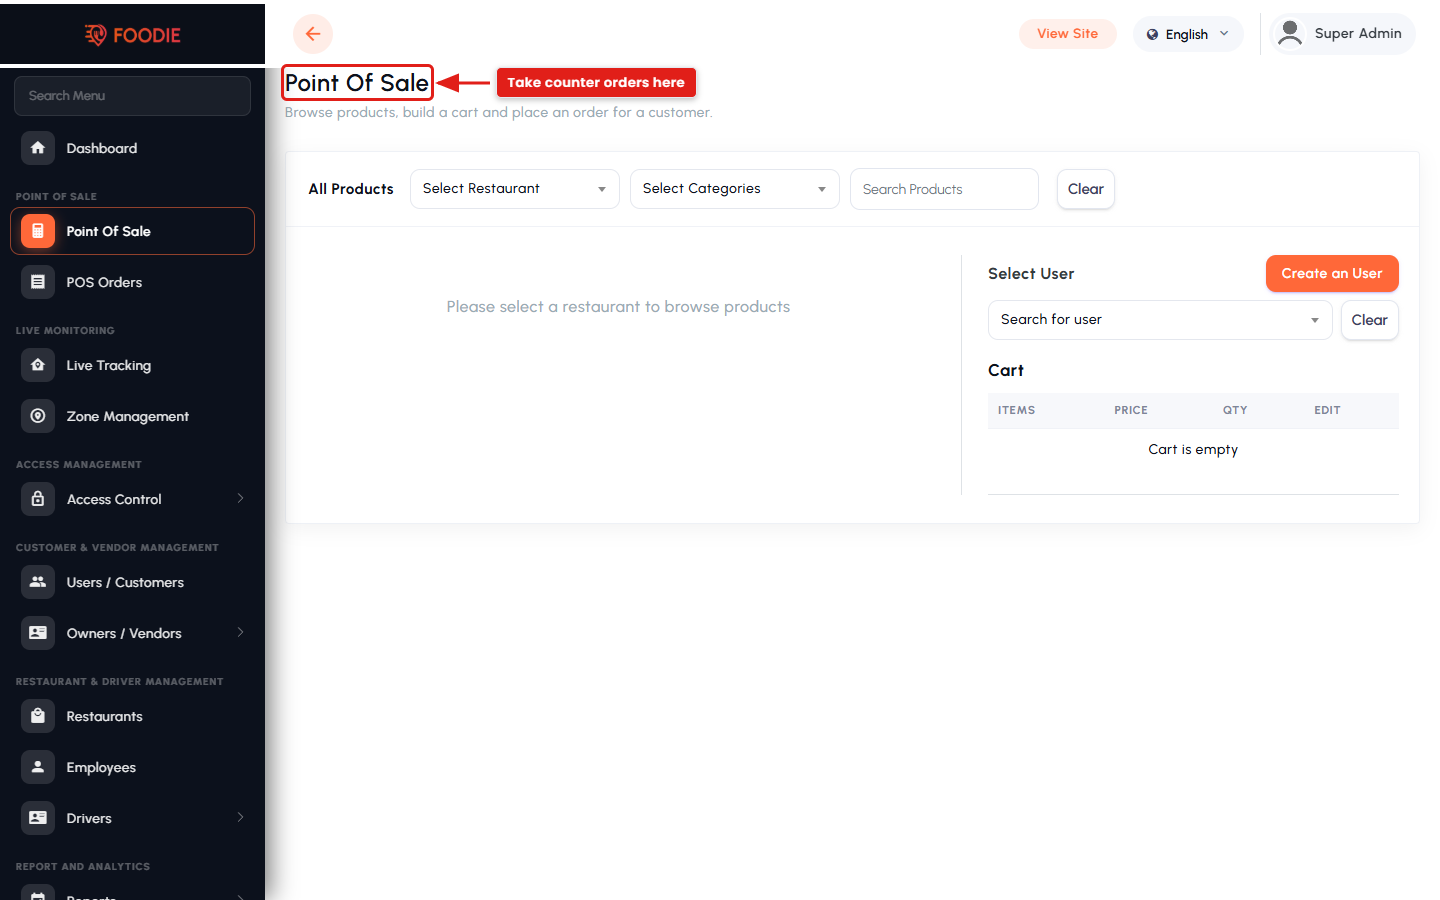
19.2. Point of Sale
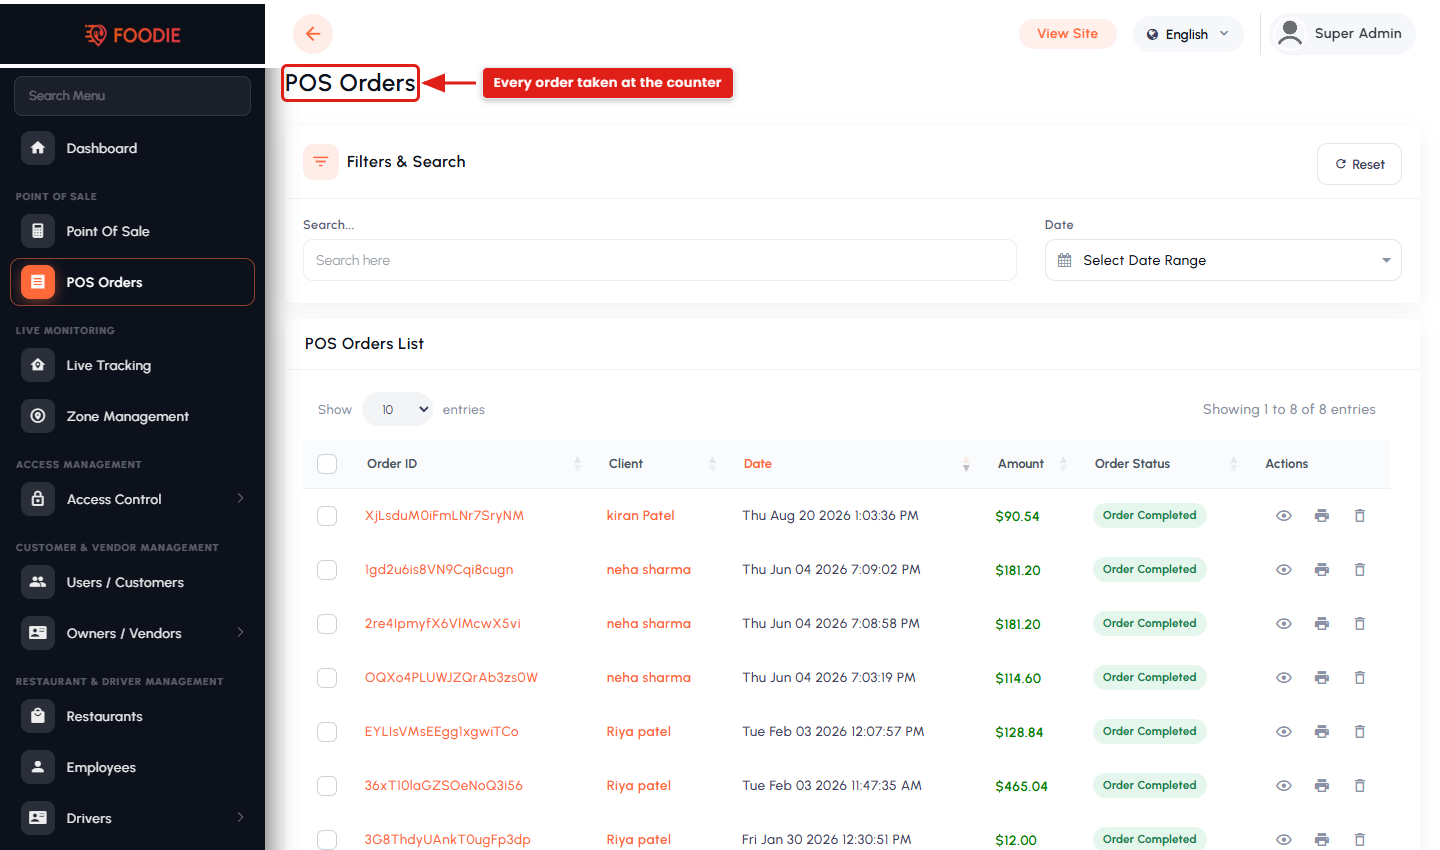
Point of Sale. Create counter or phone orders directly from the admin panel: pick a restaurant, add items with their add-ons, apply taxes and discounts, and take payment. Everything a POS order produces is stored alongside app orders, so reports stay complete.
POS Orders. The list of orders created through the POS, with item breakdowns and totals — useful for reconciling counter sales and resolving disputes.
19.3. Live Monitoring
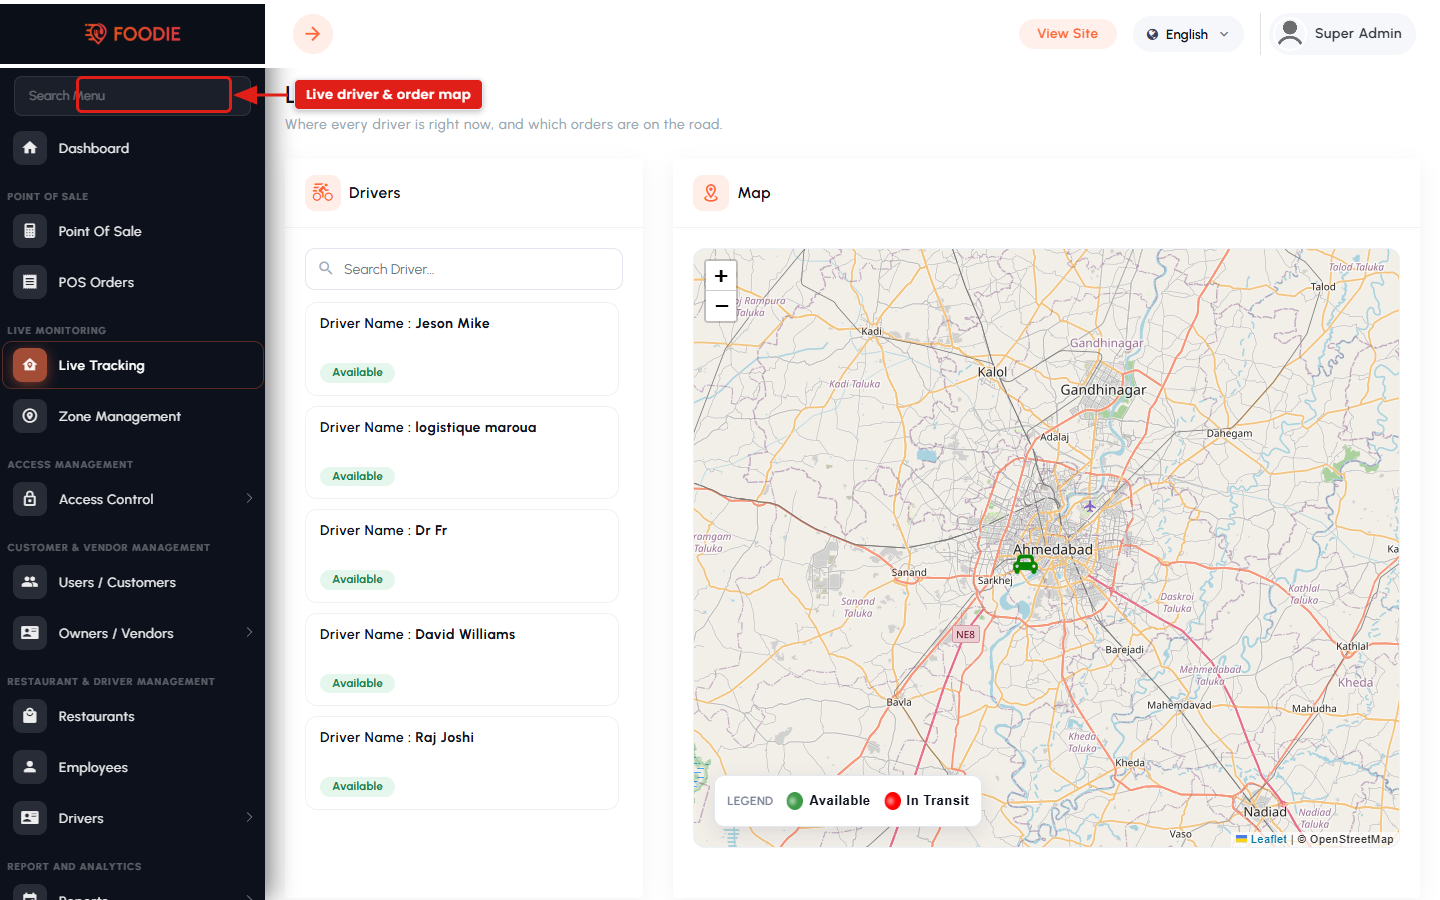
God's Eye (Live Tracking). A live map of every active driver and in-flight order, with a searchable driver list and a legend separating available drivers from those in transit. Click an order to see its pickup and drop points. Use it for dispatch support and driver accountability.
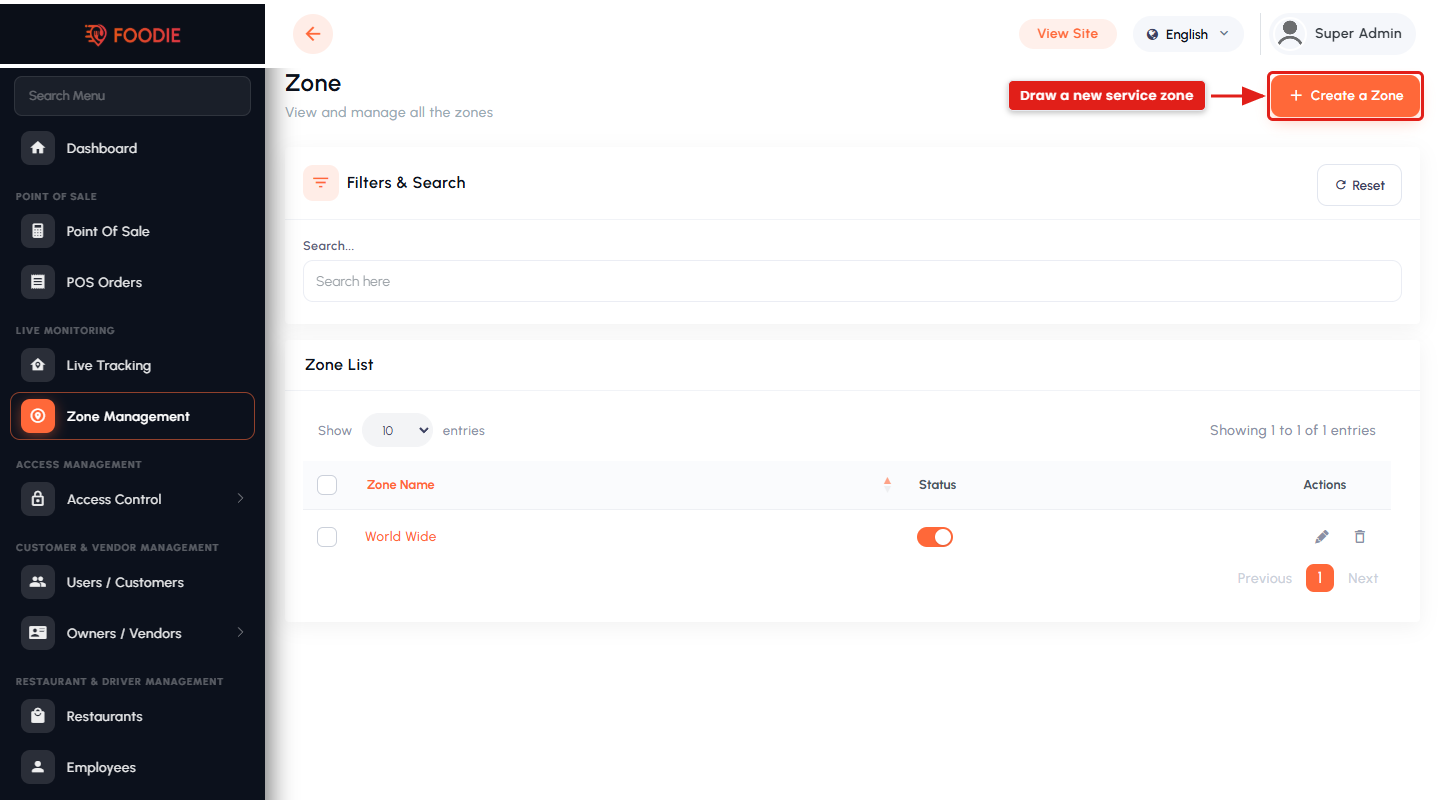
Zone. Service zones define exactly where the platform operates. Draw each zone as a polygon on the map — a minimum of three points — and restaurants, drivers and customers are matched to the zone they fall inside. Zones let you run different operational rules city by city.
19.4. Access Management
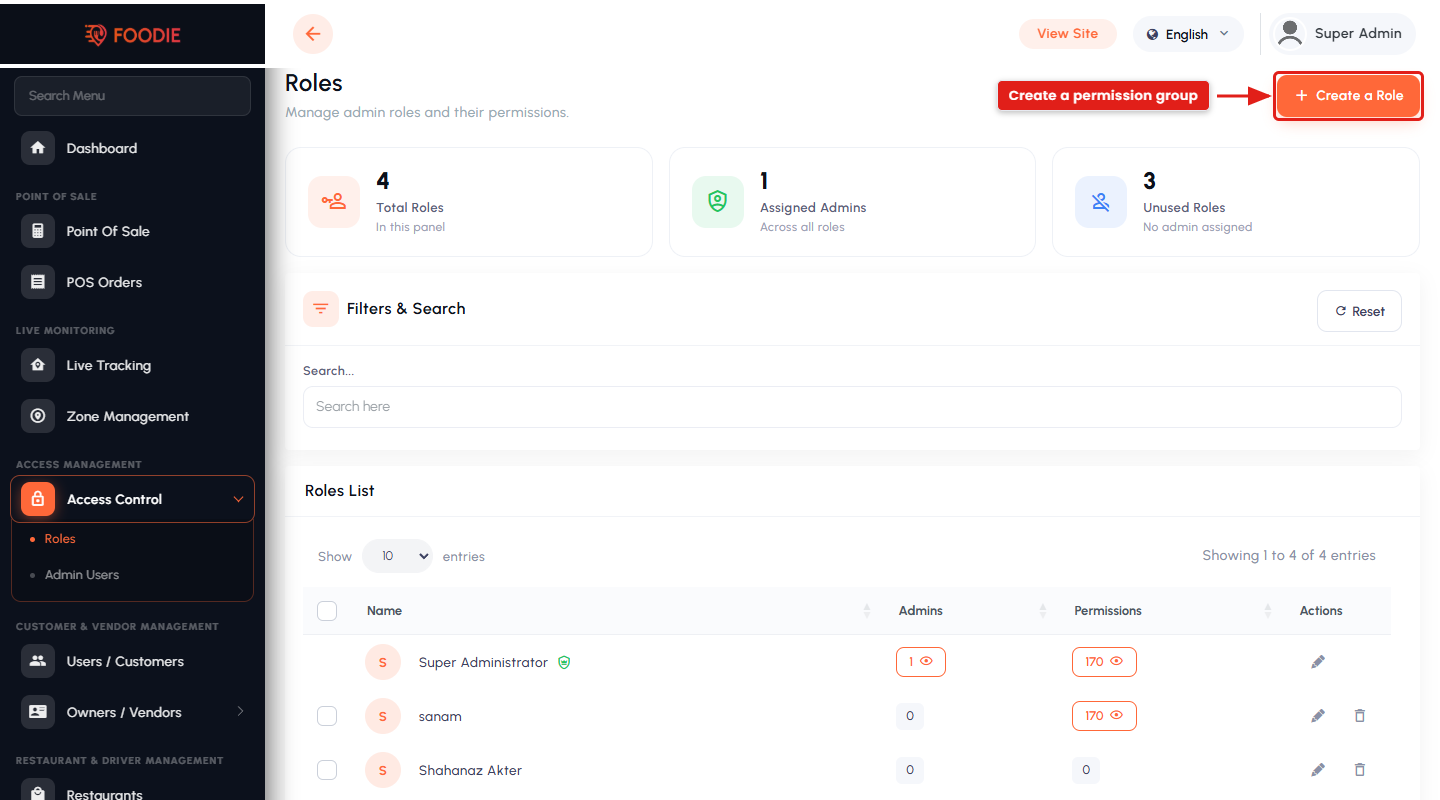
Roles. Create permission groups (Super Admin, Manager, Dispatcher, Support…) and tick exactly which menus and actions each role may use. Permissions are per menu and per action — list, create, edit, view, delete — so you can grant read-only access.
Admins. Create the admin accounts themselves and assign each one a role. Support agents can be created here too, so they get chat access without the rest of the panel.
19.5. Customer & Vendor Management
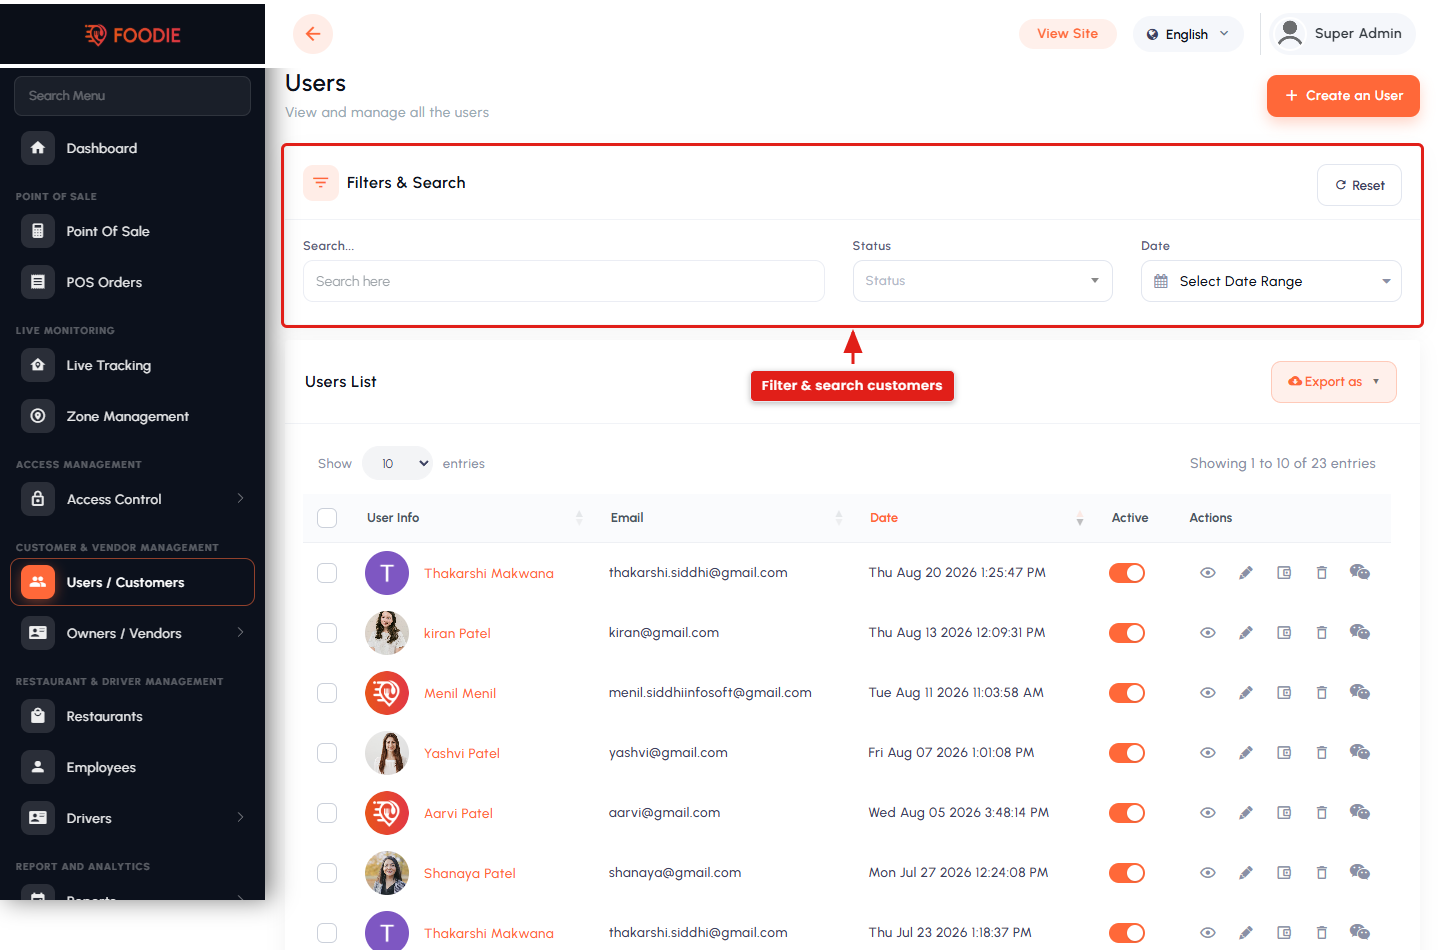
Customers. Every customer registered through the apps or the website. Each profile shows personal details, contact data, wallet balance and account status, along with the full order history — completed, cancelled and ongoing. From here you can chat with a customer, top up or review the wallet, edit the profile, or deactivate the account.
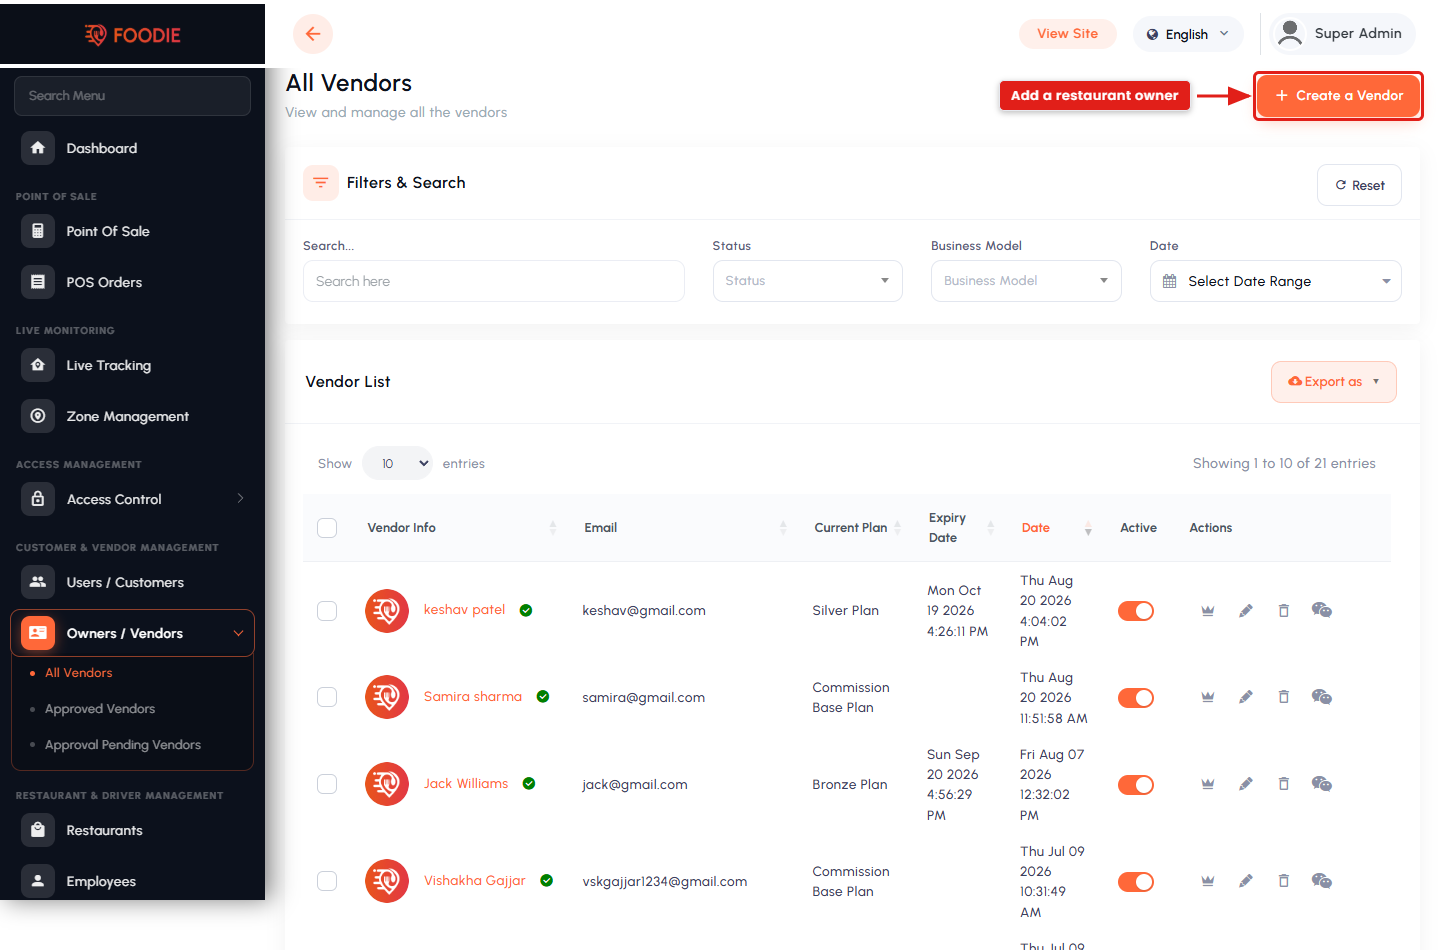
Owners / Vendors. The restaurant owners on the platform, split into All, Approved and Approval Pending. Review a new vendor's business details and documents, then approve or reject the request; approved vendors gain access to the Restaurant Panel. This screen also links to the vendor's restaurants, subscription history, documents and chat.
19.6. Restaurant & Driver Management
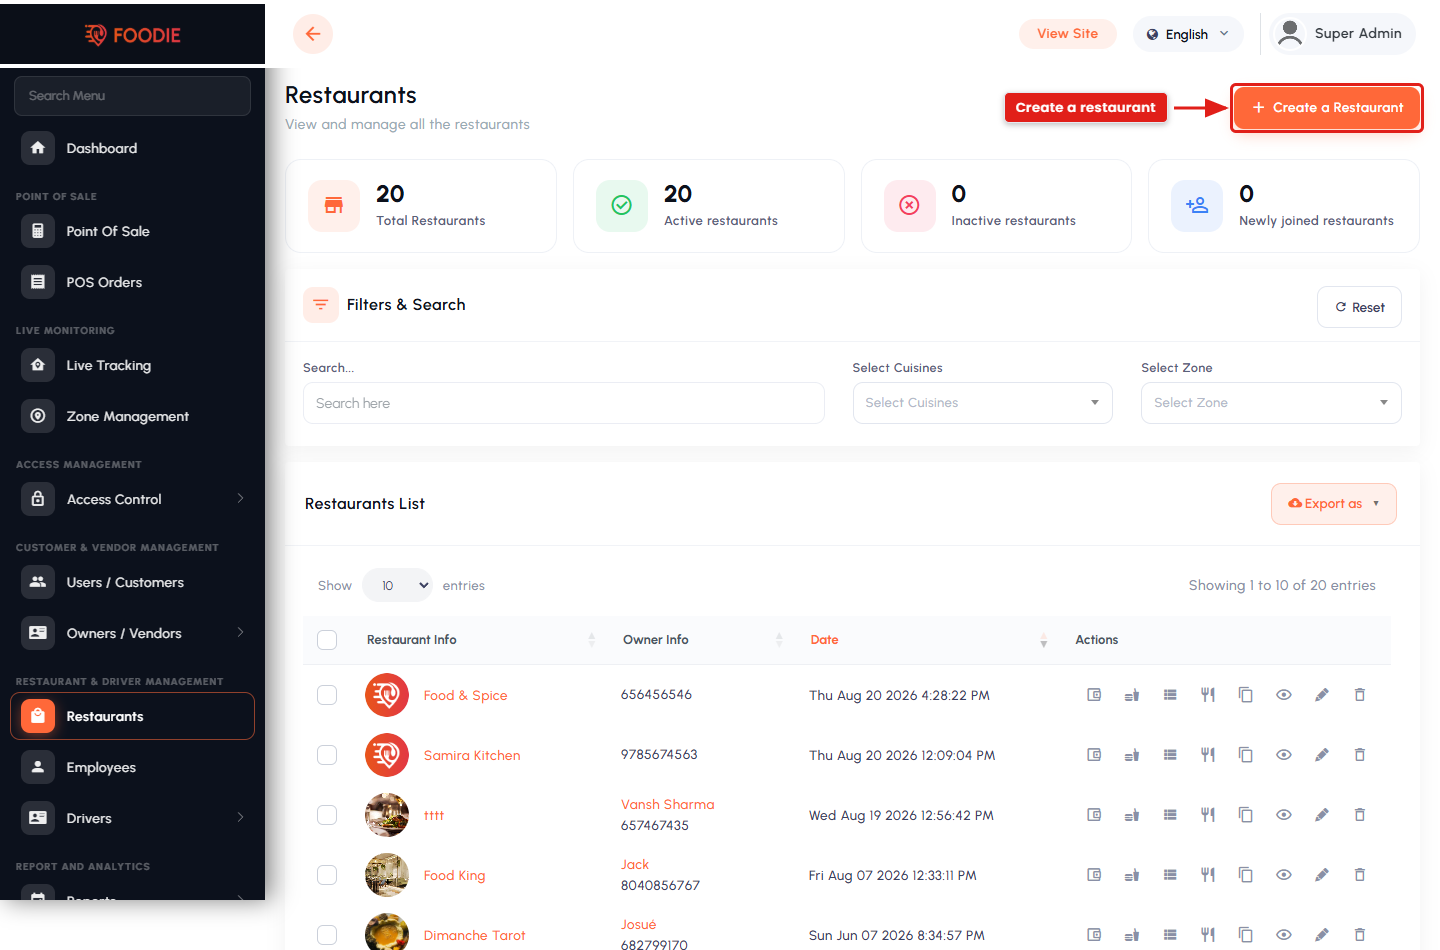
Restaurants. Every restaurant on the platform, with its owner, zone, address, opening hours, commission or subscription setup and status. From a restaurant you can jump straight to its foods, orders, coupons, advertisements, deliverymen, employees and payouts.
Employees. Staff accounts that belong to a restaurant rather than to the platform. Each employee has a role that limits what they may do inside the Restaurant Panel.
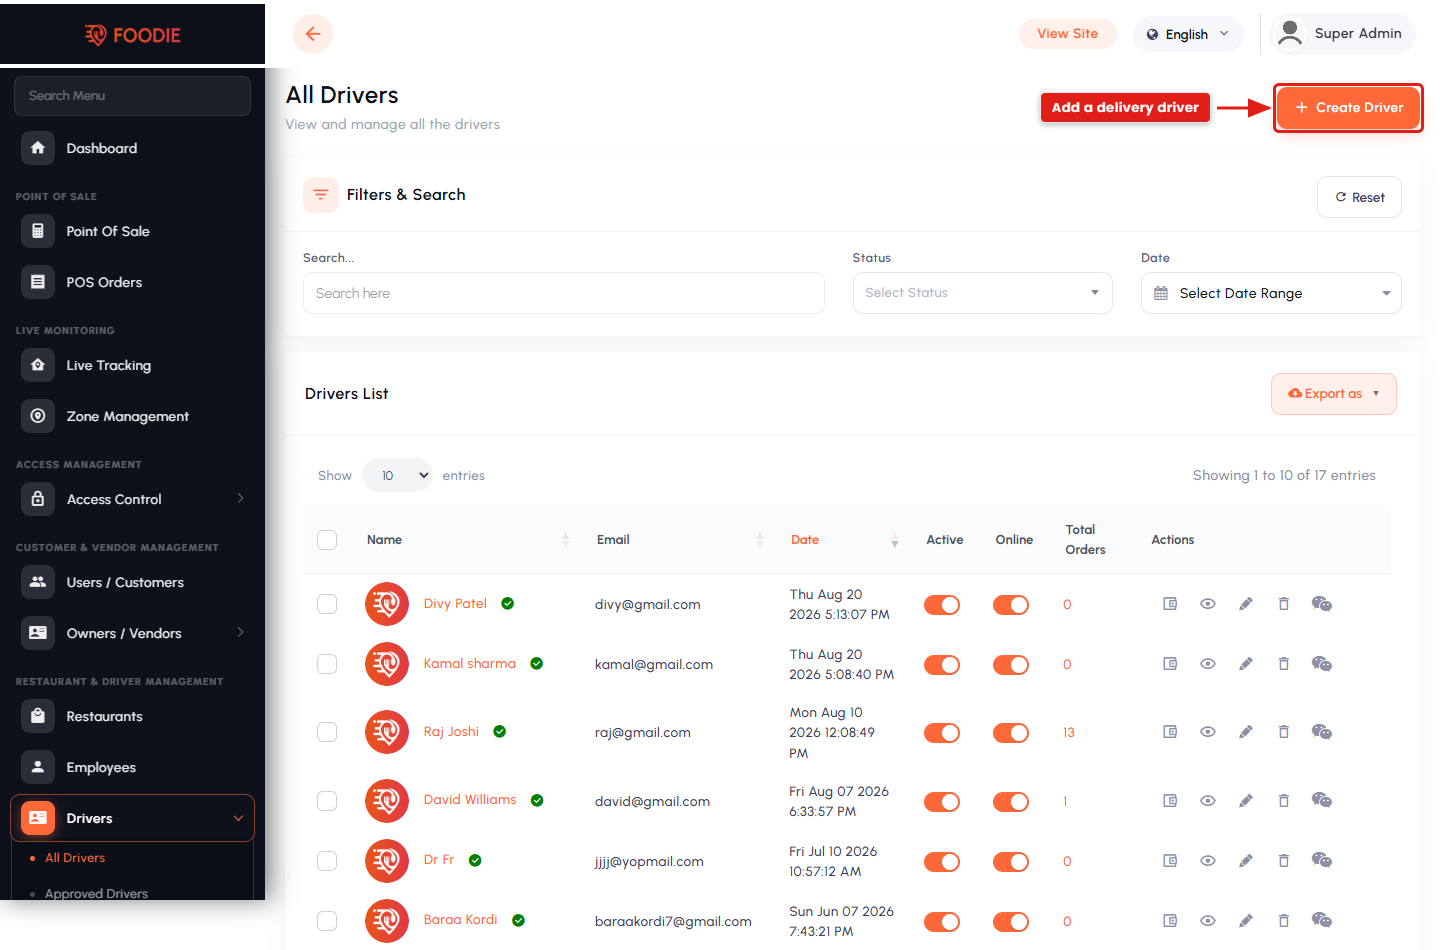
Drivers. The delivery fleet, split into All, Approved and Approval Pending. Review contact details, vehicle information and uploaded documents, approve or reject applications, monitor availability, and open a chat with any driver.
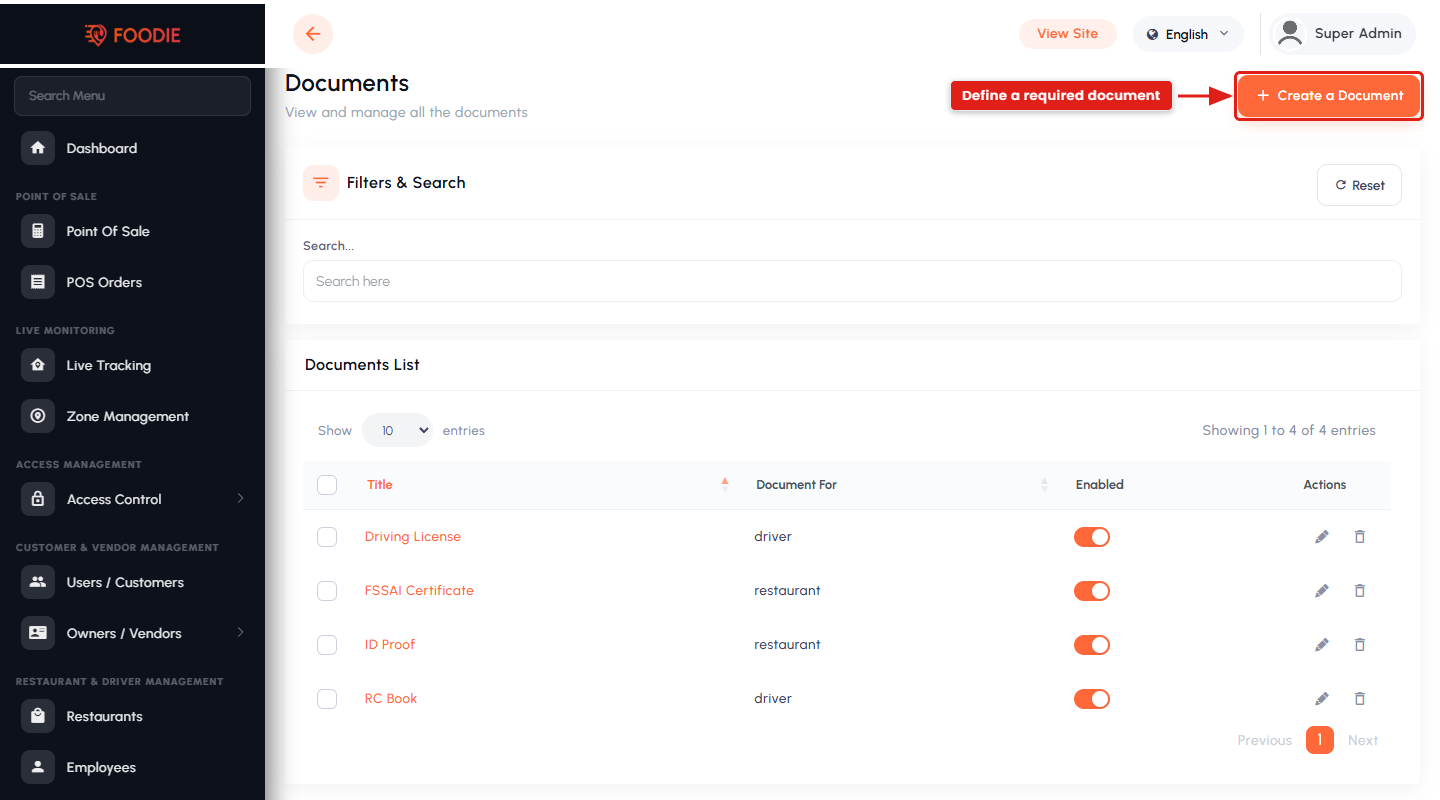
Documents. Define which documents drivers and vendors must upload for verification — ID proof, driving licence, business licence, food-safety permit and so on — and mark each one required or optional. Uploaded files are reviewed from the driver's or vendor's document list.
19.7. Report & Analytics
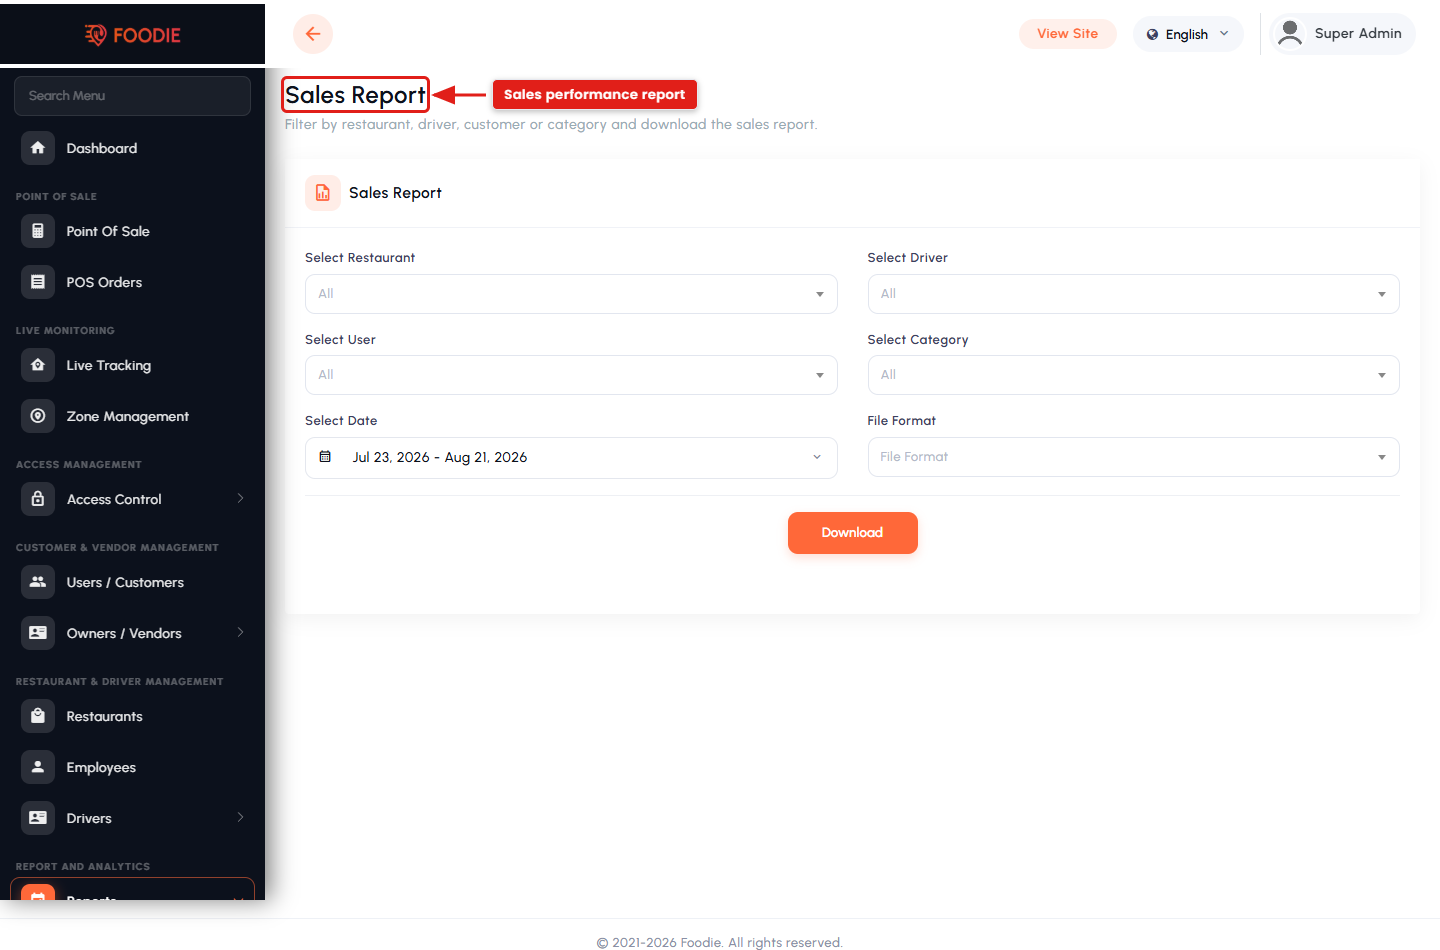
Reports give a filtered view of platform activity and can be exported for accounting. Common filters:
- Restaurant — limit the report to one restaurant.
- Driver — limit the report to one driver.
- Date range — Today, This Week, This Month, This Year or a custom range.
- File format — export as XLS, CSV or PDF.
Sales Reports. Total orders, revenue, commission and payment summaries over the selected period, broken down by restaurant, customer or delivery type — the report to use for growth tracking and for finding top performers.
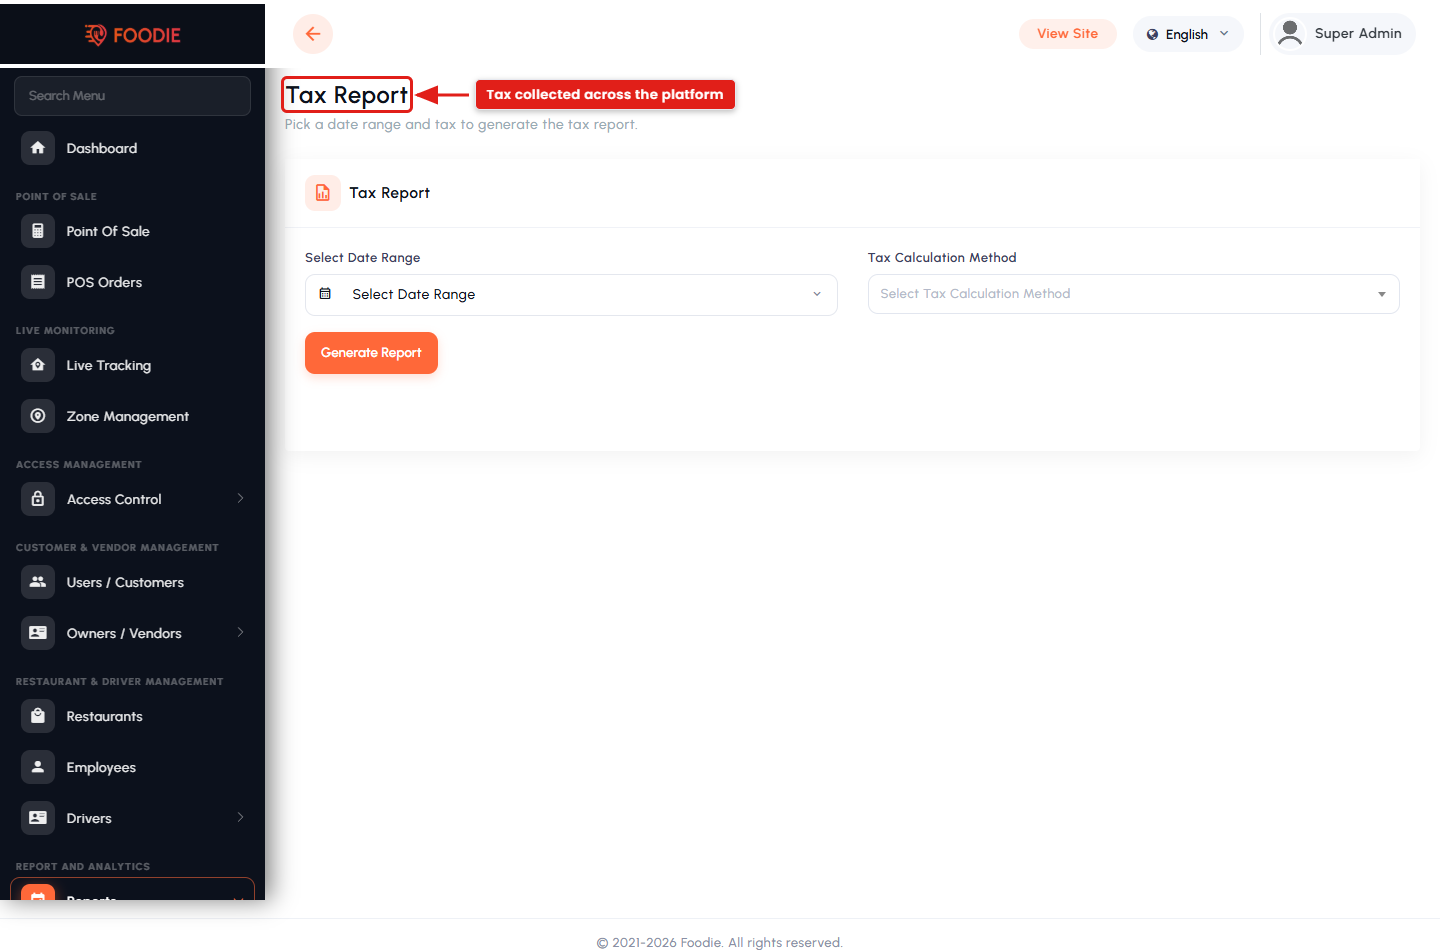
Tax Reports. Every tax collected across the platform — on items, delivery fees, packing charges, platform fees, admin commission and vendor subscriptions — filterable by tax type. Use it for tax liability, compliance and regulatory reporting.
19.8. Menu & Food Management
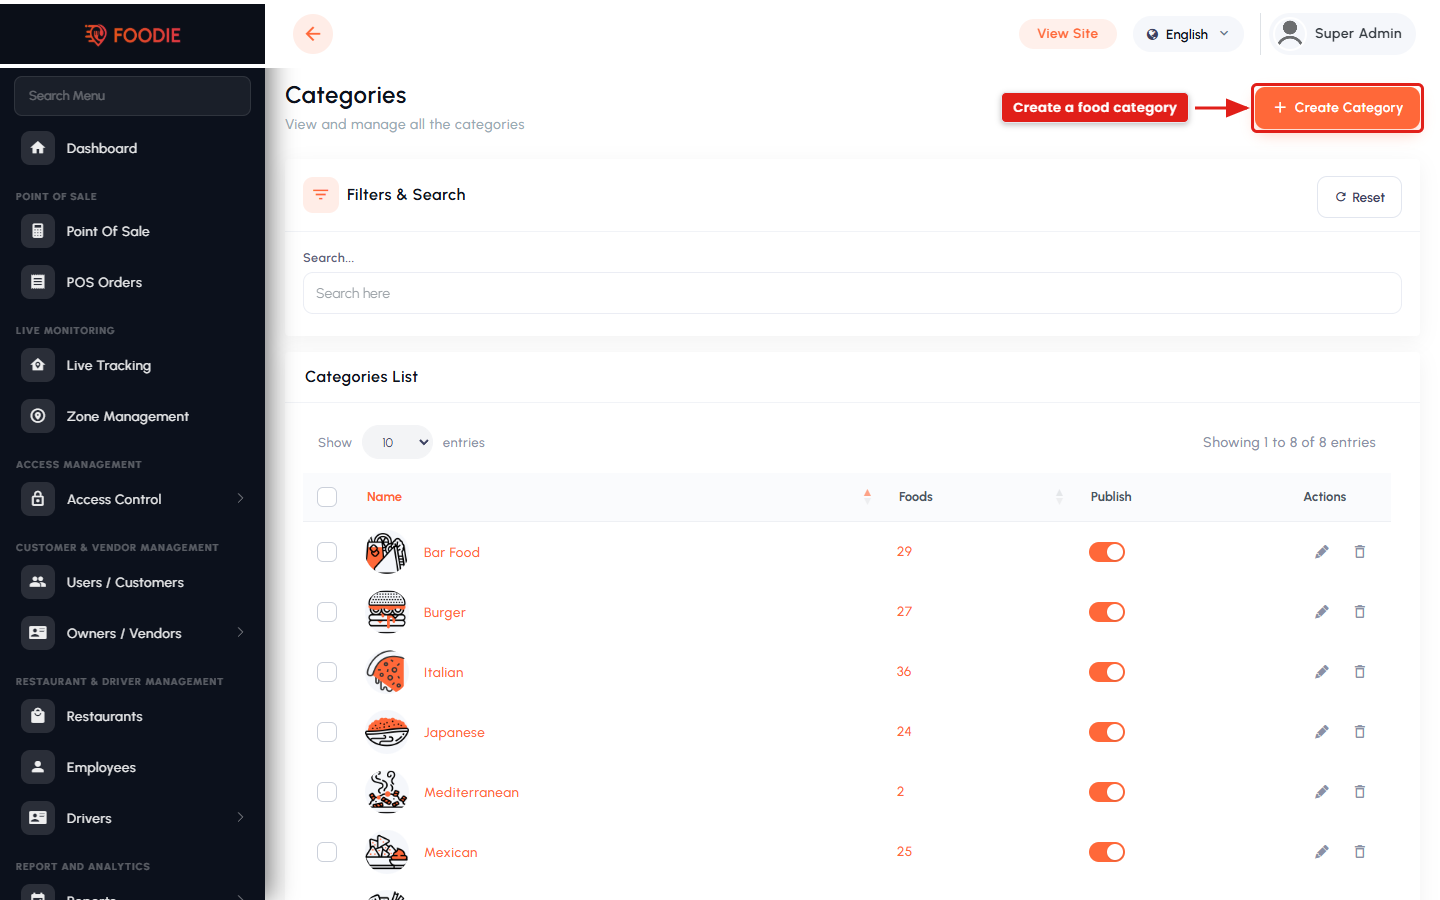
Categories. The food categories customers browse. Each category carries a name, image and description, and can be shown or hidden. Good category structure is what makes the User App easy to navigate.
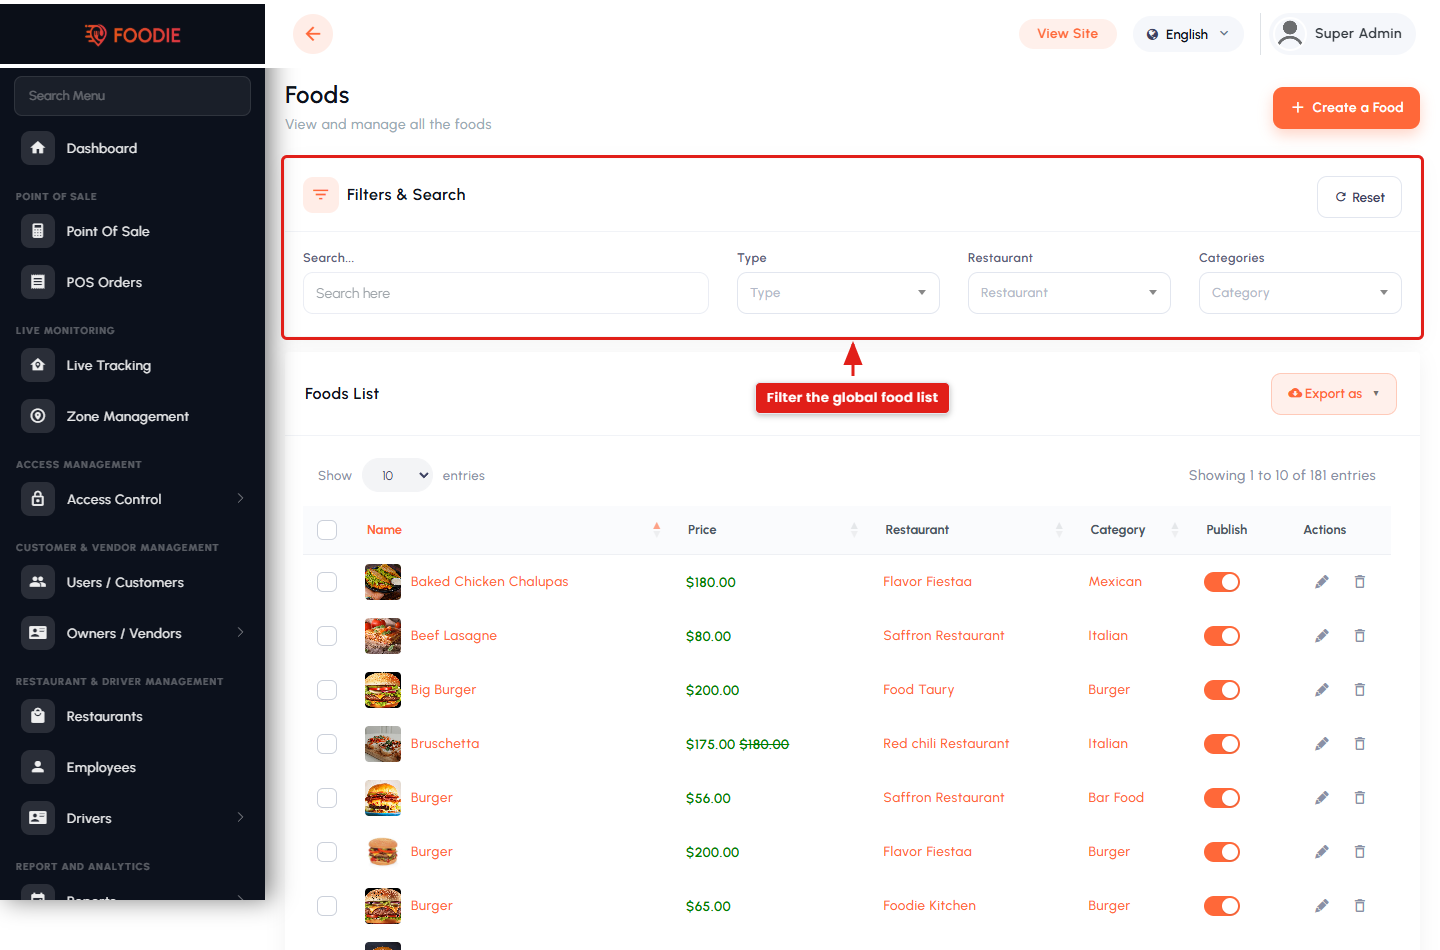
Foods. Every food item across all restaurants — name, category, price, description, images, add-ons and availability. Admins can create items on a restaurant's behalf, correct listings that break platform standards, or build a global menu that vendors import into their own restaurants.
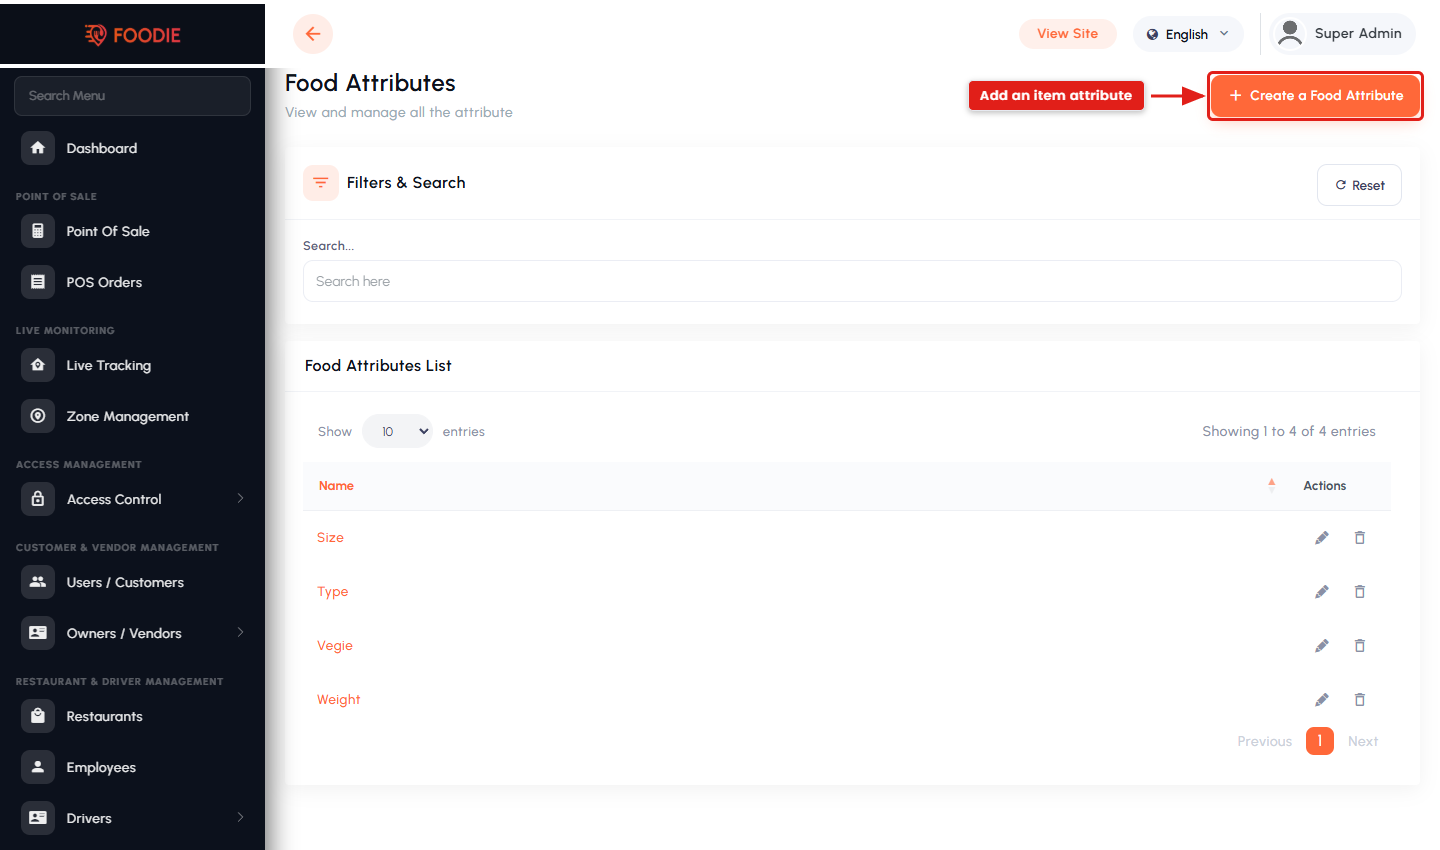
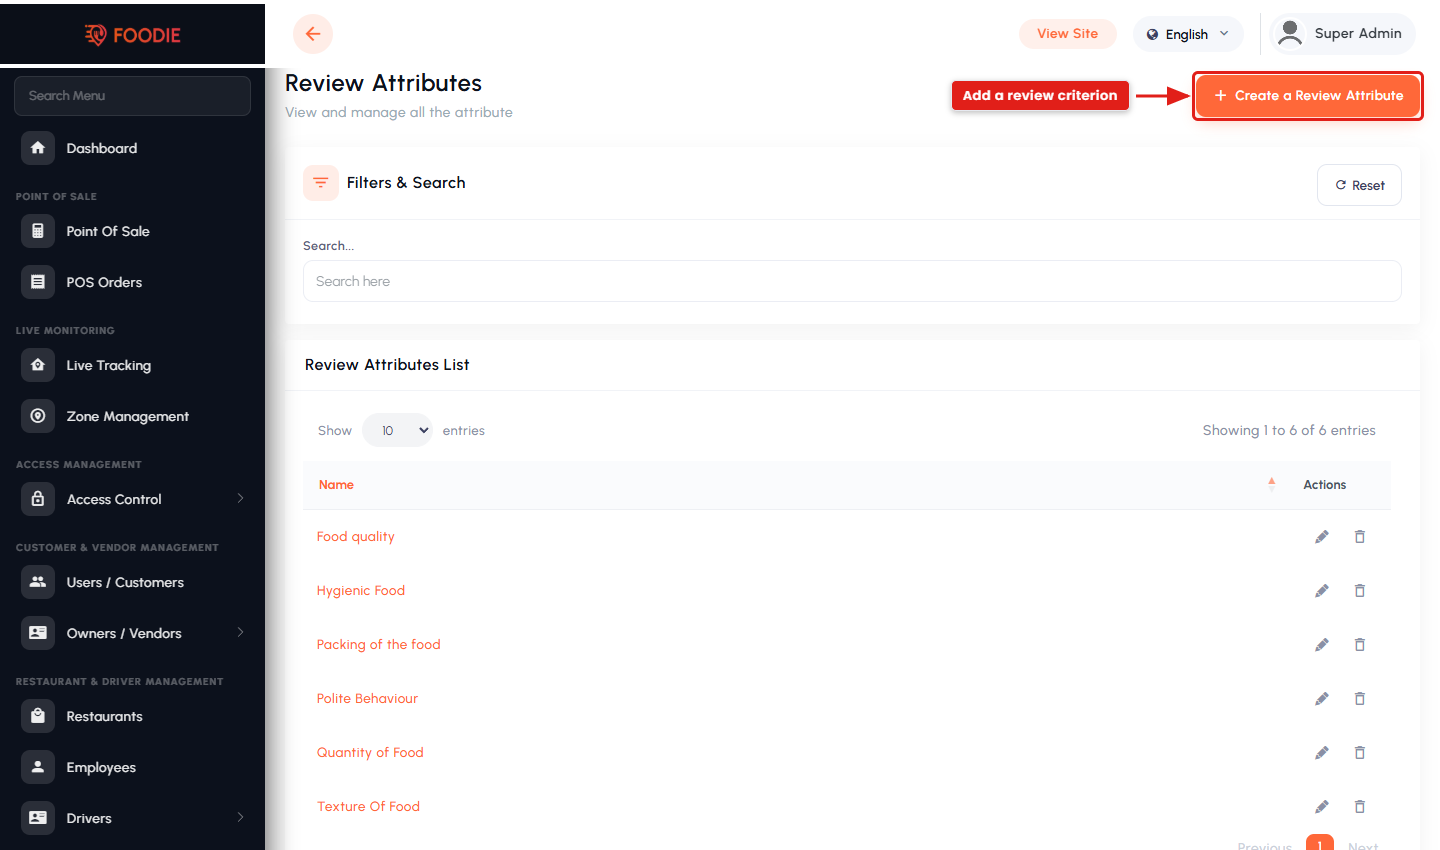
Attributes. Two related lists. Item Attributes define the variations customers pick when ordering — size, crust, spice level, add-ons. Review Attributes define the criteria customers rate — taste, packaging, delivery, service — so feedback is structured rather than a single star rating.
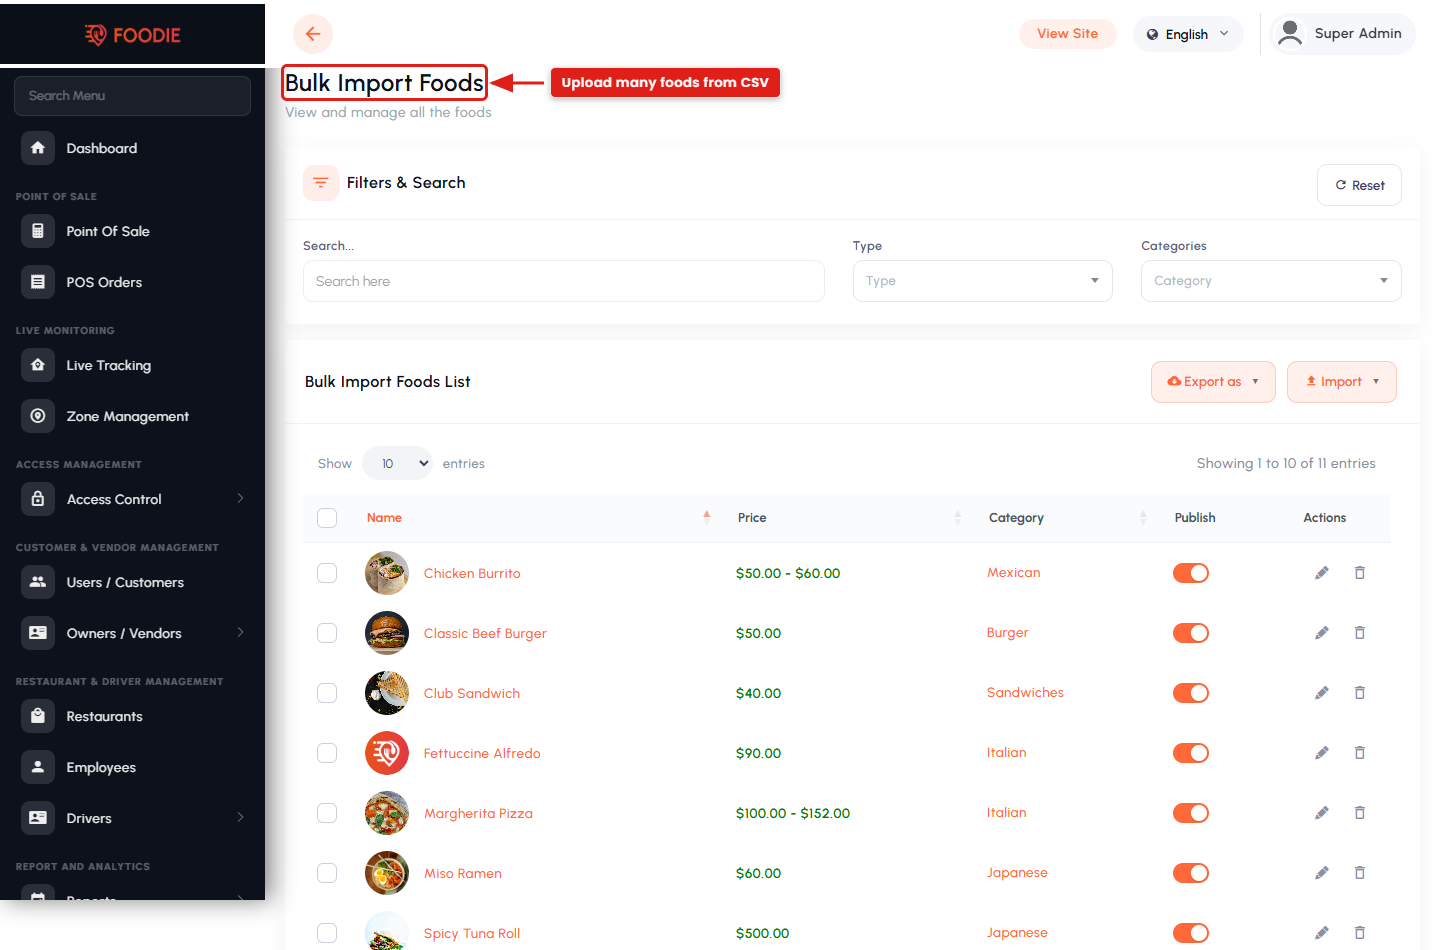
Bulk Import Foods. Upload many food items at once from a CSV — name, price, category, attributes and more — instead of creating each entry by hand. The importer reports rows that fail validation so you can correct and re-upload.
19.9. Business Setup
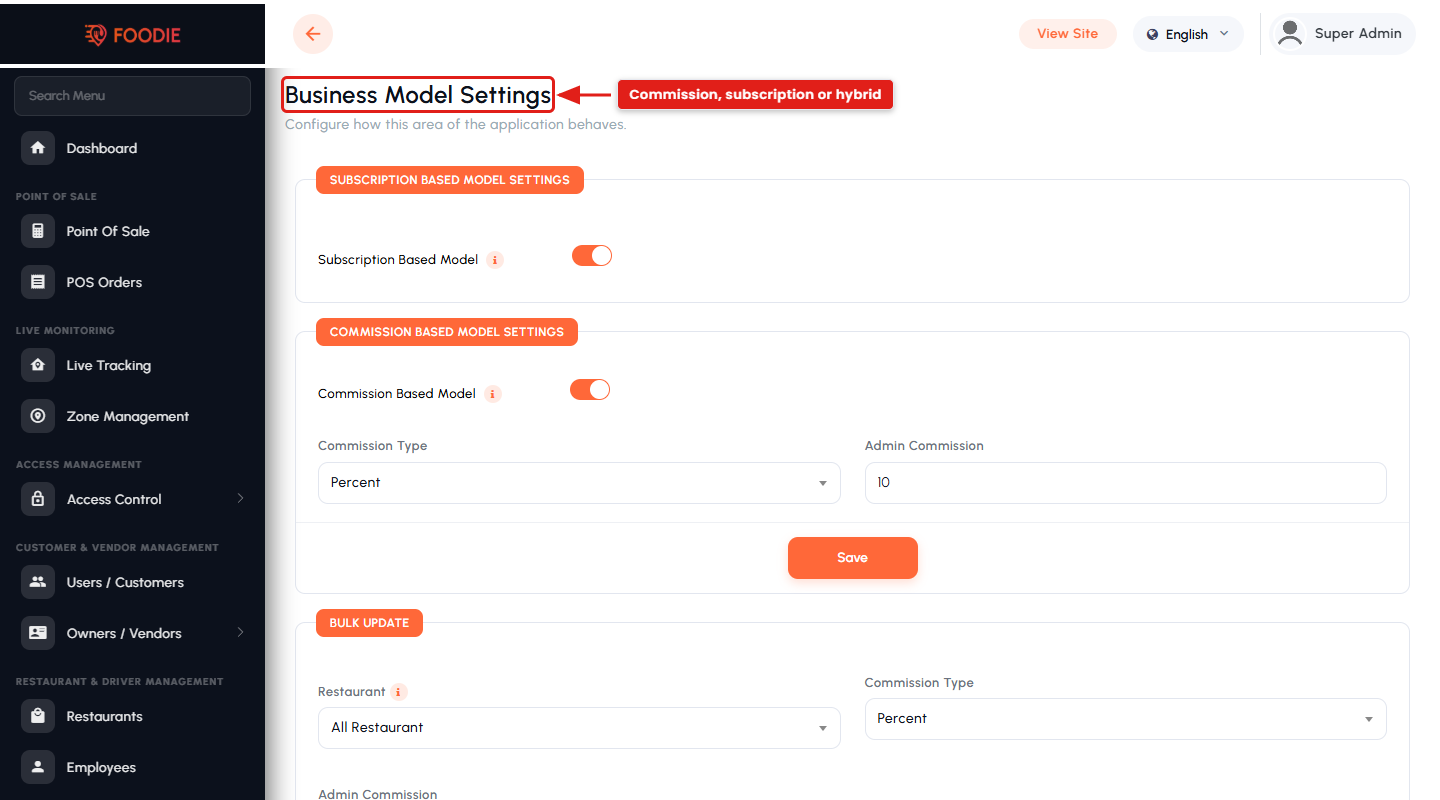
Subscription Plans. The plans vendors can subscribe to — name, duration, price and included features such as the number of items they may list, priority placement or a reduced commission rate. Together with Business Model Settings these define how the platform earns.
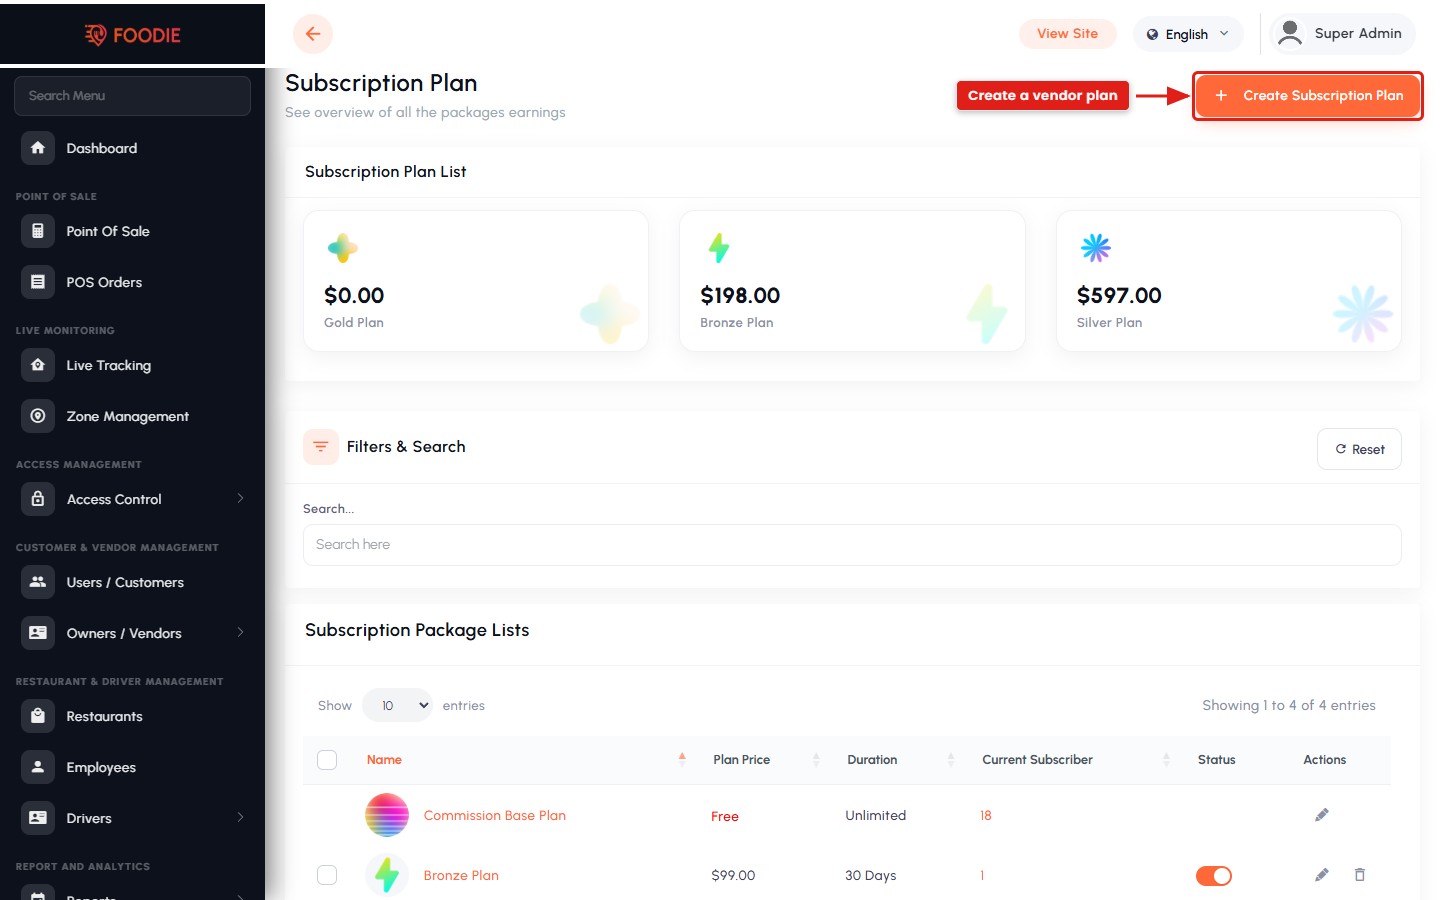
Vendor Subscription History. Which plan each vendor bought, when it started and when it expires, plus the payment behind it.
19.10. Order & Promotions Management
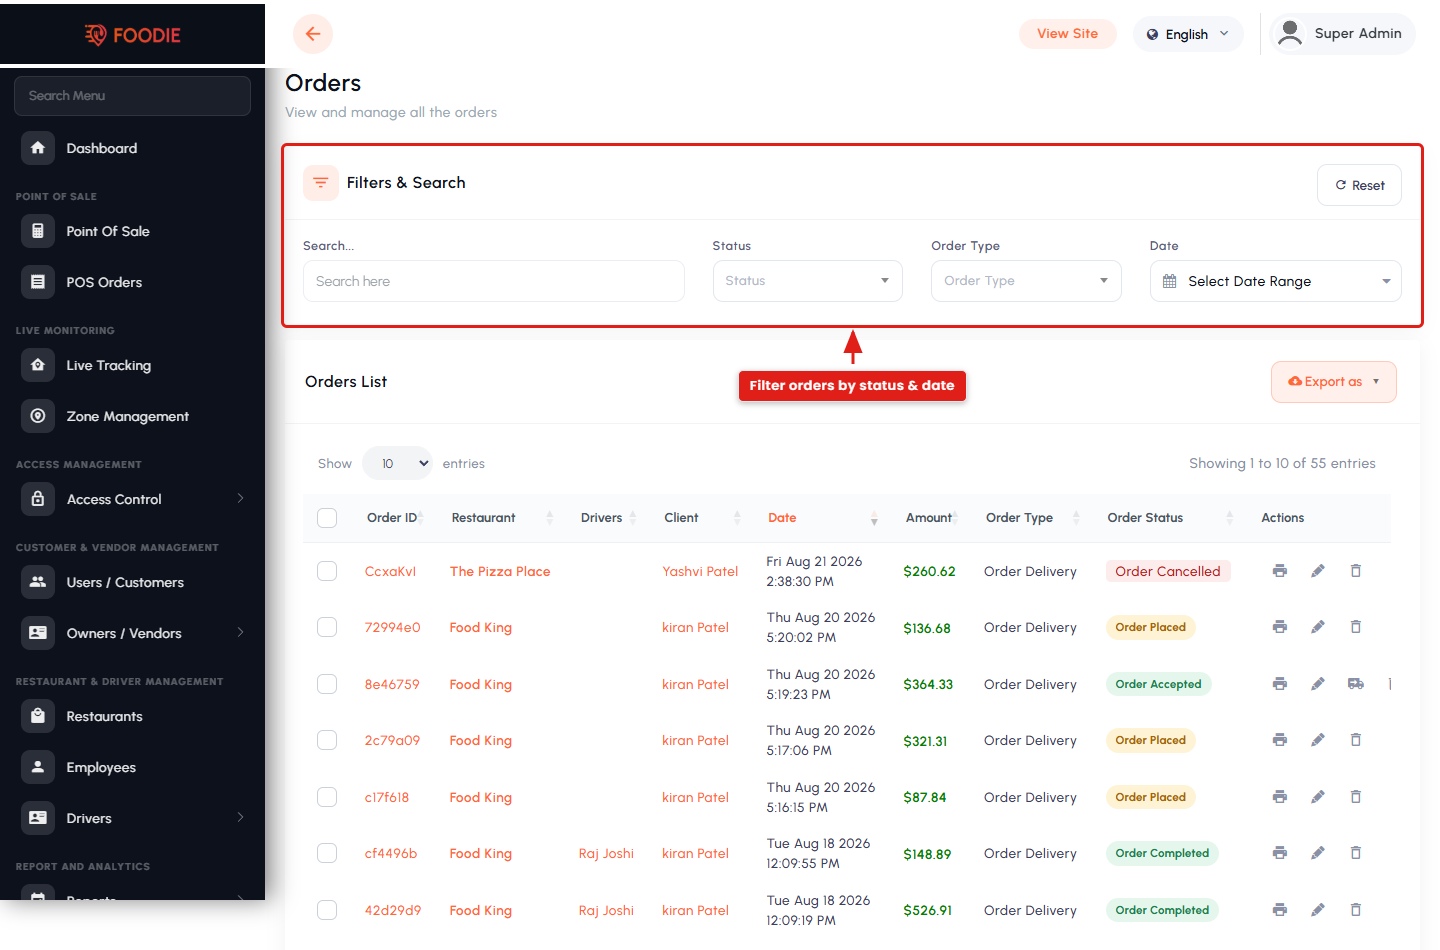
Orders. Every order placed on the platform, with order ID, customer, restaurant, assigned driver, payment status and delivery progress. Track the full lifecycle — placed, accepted, preparing, ready, picked up, on the way, completed — reassign a driver, update or cancel an order, and print the order slip.
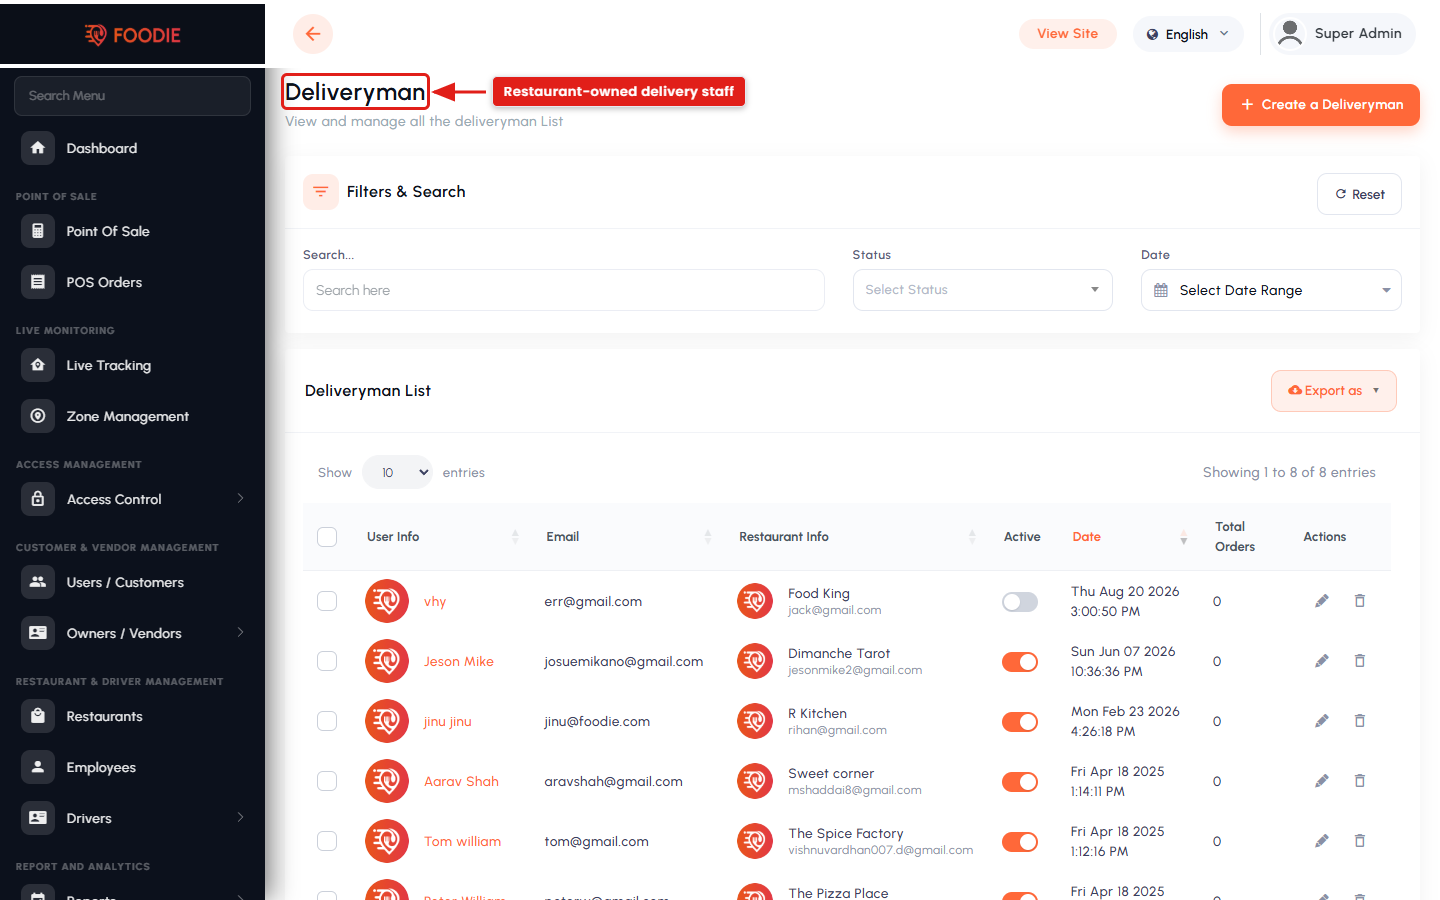
Deliveryman. Delivery staff who belong to a specific restaurant under the self delivery feature, rather than to the platform-wide driver pool. Useful for restaurants that prefer to run their own deliveries while still being visible to the admin.
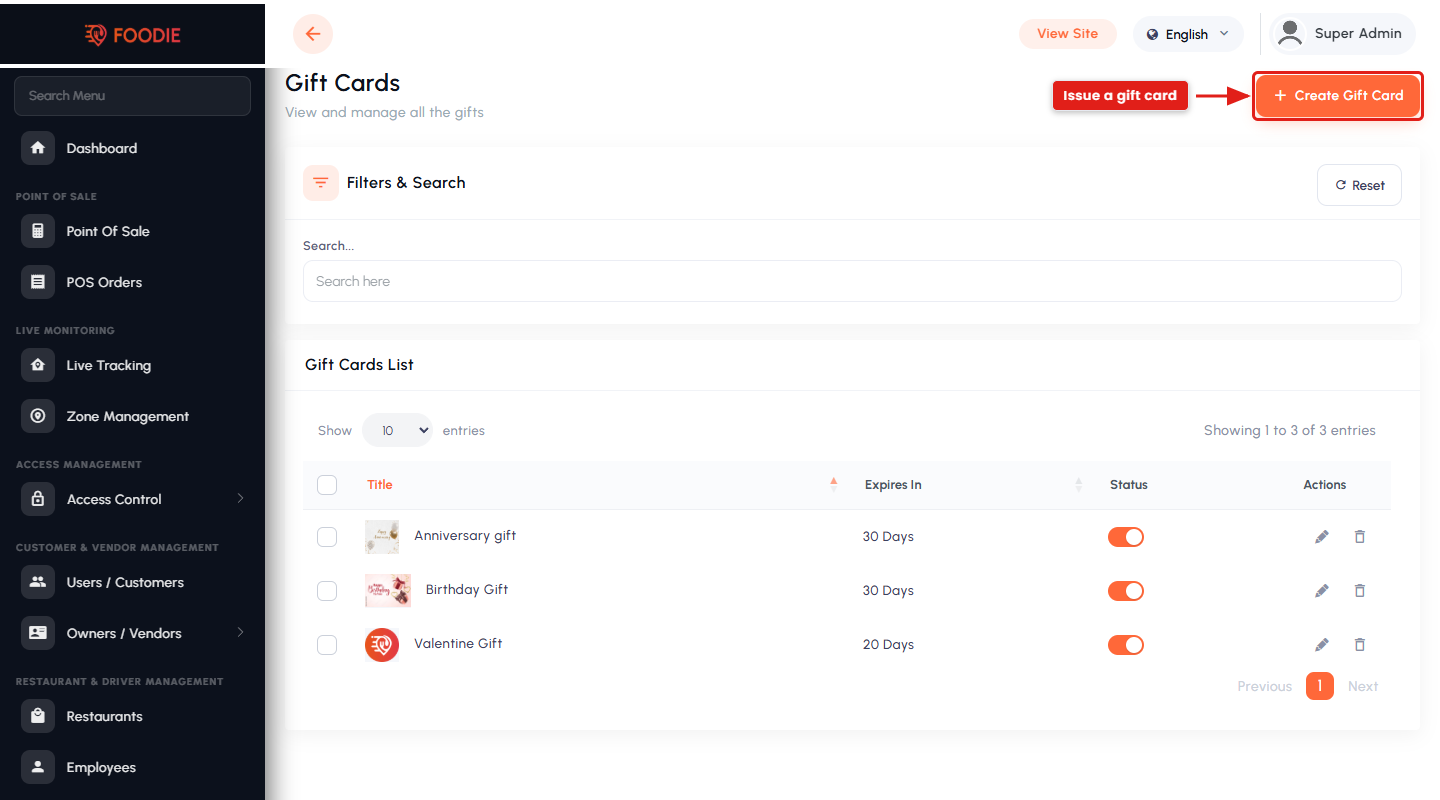
Gift Cards. Digital gift cards with a value, validity period and usage limits. Customers buy them, redeem them at checkout or send them to someone else; the panel tracks each card's remaining balance and redemption history.
Coupons. Discount codes applied at checkout. Define the code, discount type (percentage or fixed), validity dates, usage limits and which restaurants or categories they apply to. Eligibility is validated automatically when the order is placed.
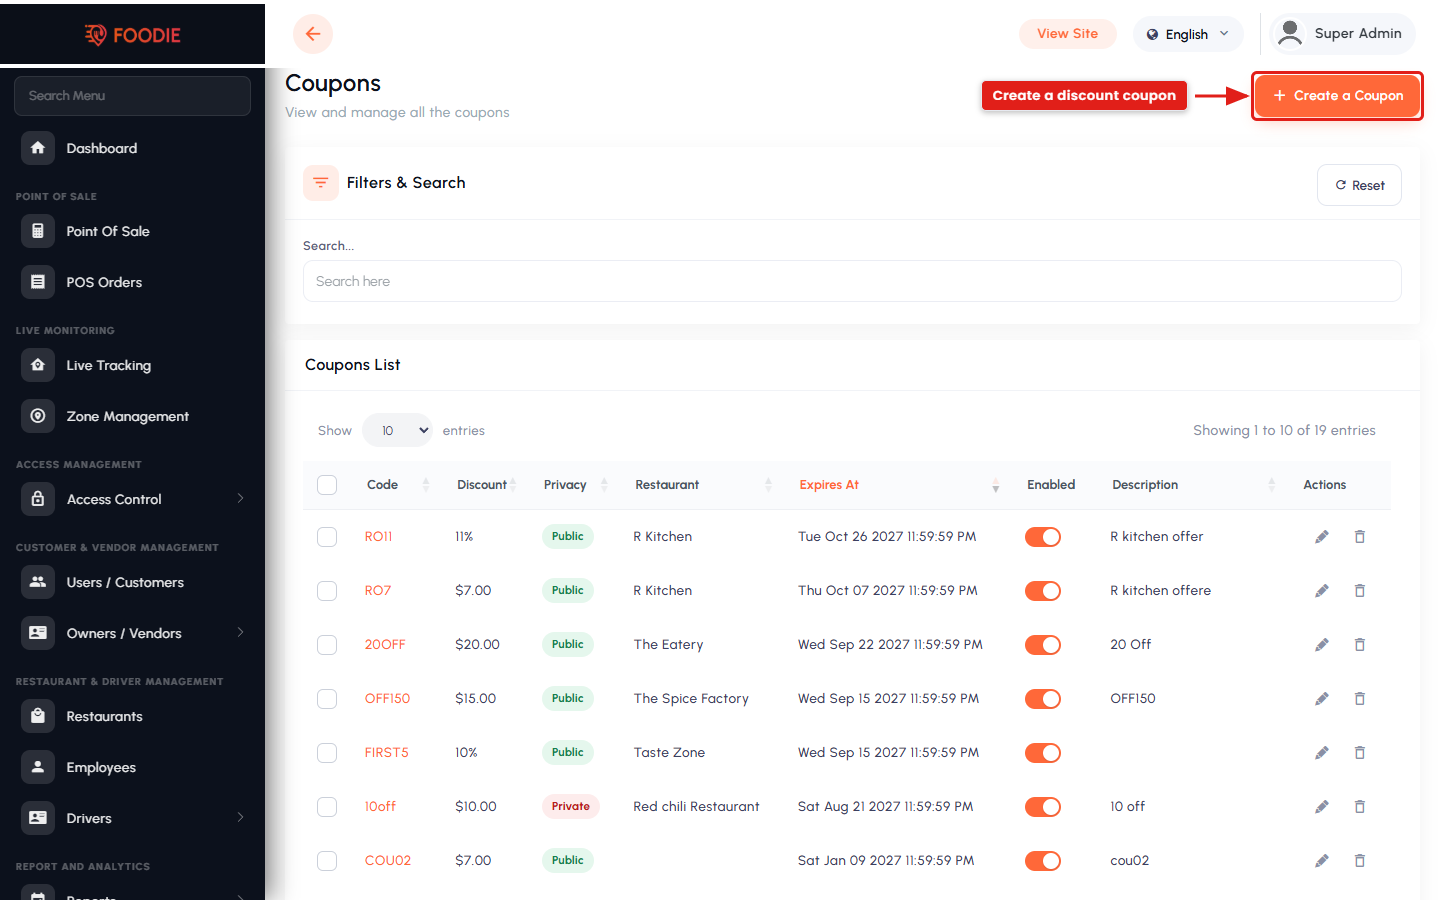
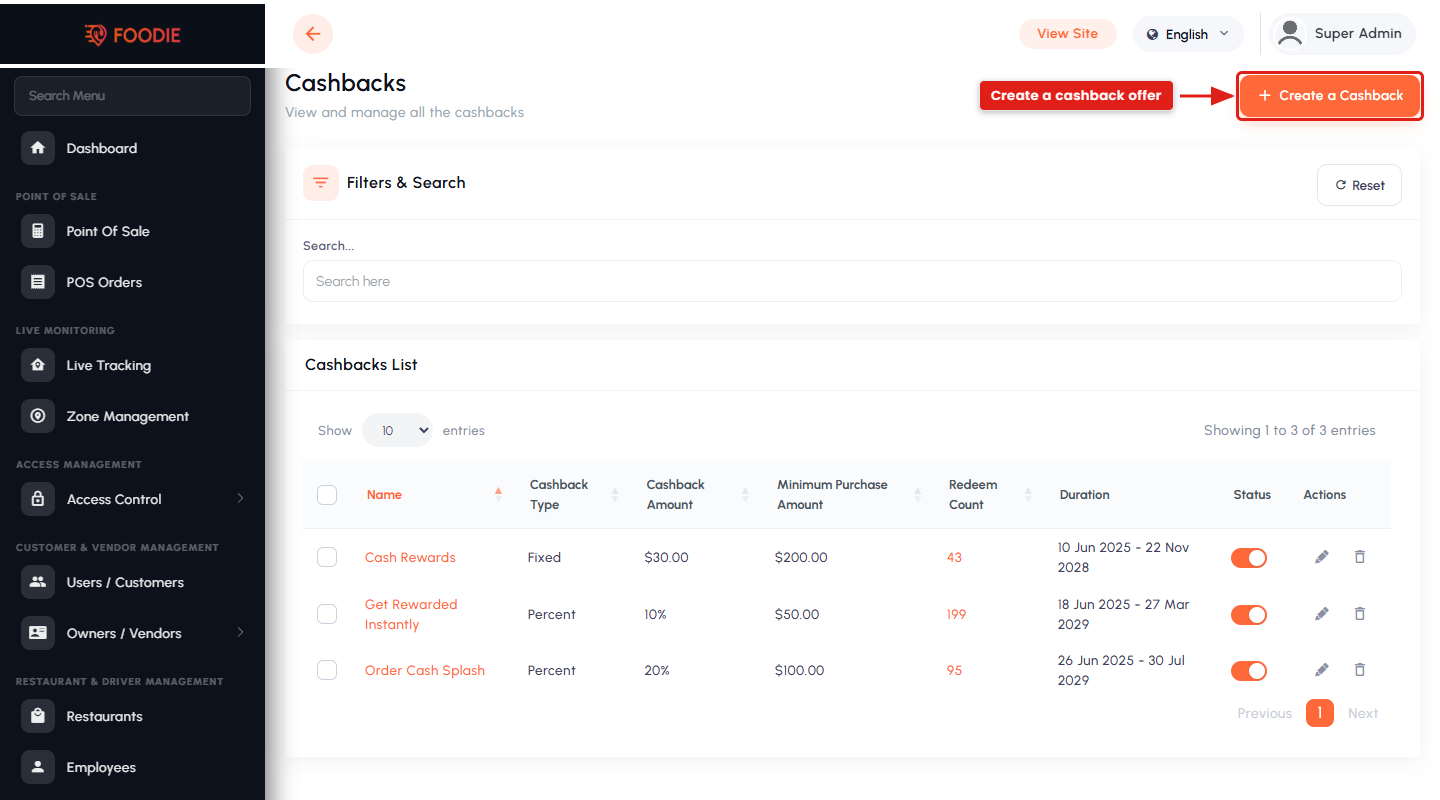
Cashback. Reward customers with a percentage or fixed amount credited to their wallet after a qualifying order. Set eligibility rules, minimum order values, maximum cashback and restaurant-specific campaigns.
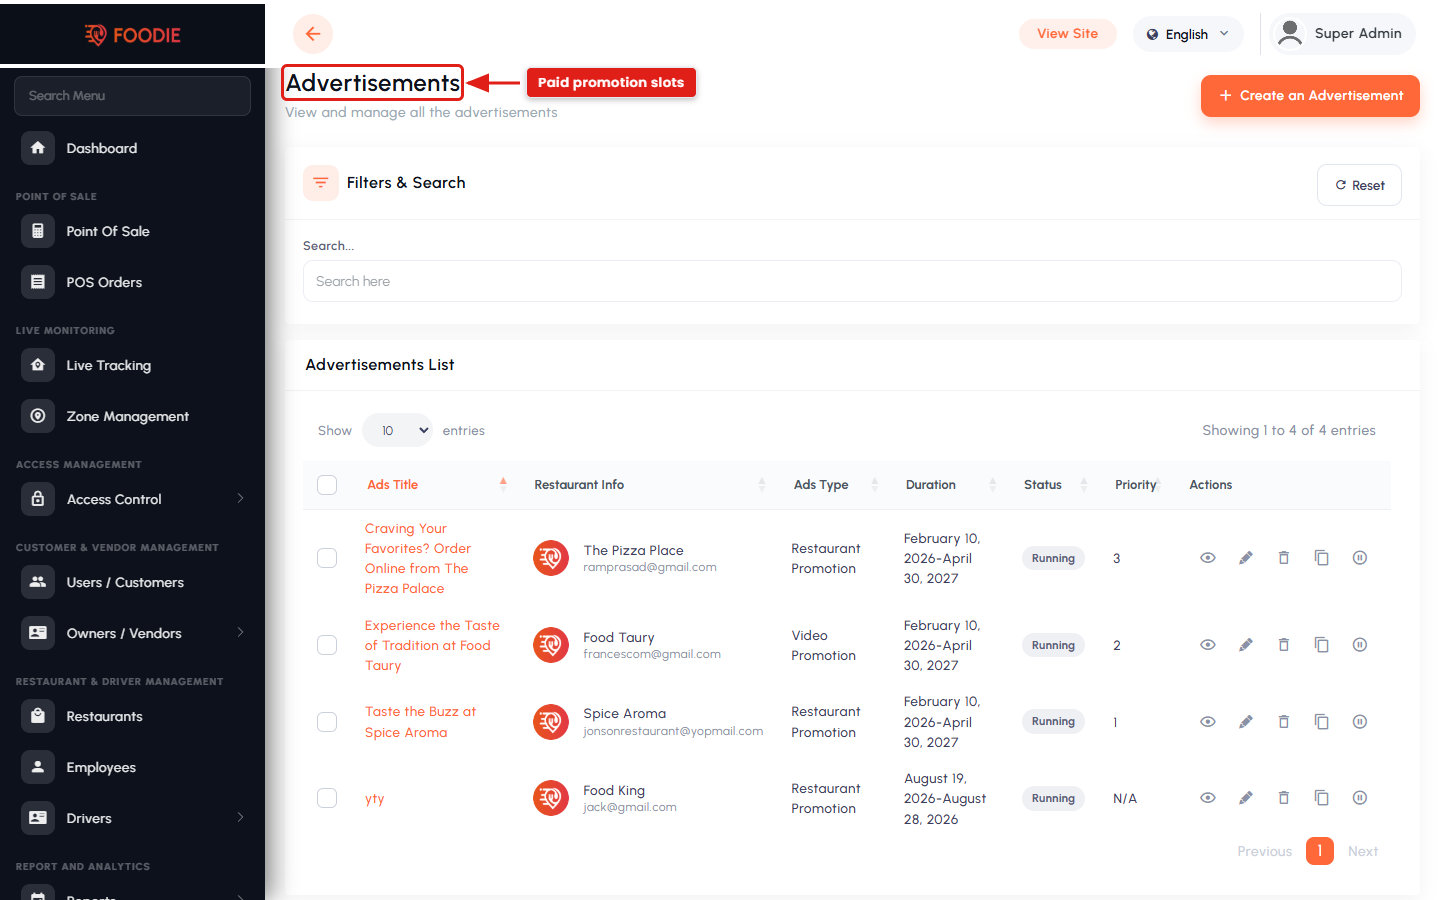
Advertisements. Paid promotional slots shown in the apps and on the website — title, banner, duration and placement, linked to a restaurant or a specific item. Restaurants submit ad requests from their panel; Ad Requests is where you approve, reject or chat about them.
Documents. The verification queue — review the files vendors and drivers uploaded against the required document types, then approve or reject each submission.
19.11. Notifications Management
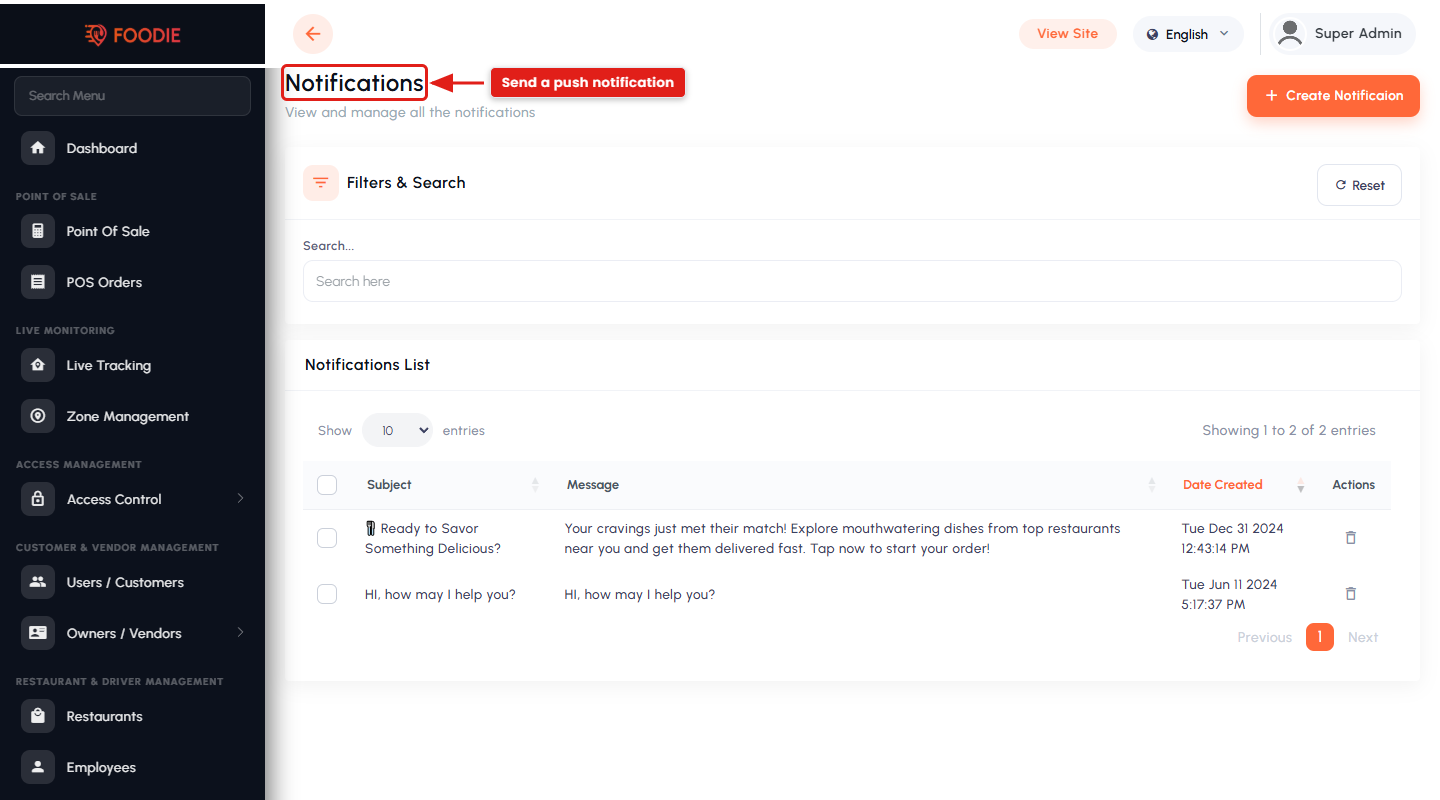
General Notifications. Compose and send a push notification to customers, vendors or drivers — announcements, promotions or system alerts — targeted by user type.
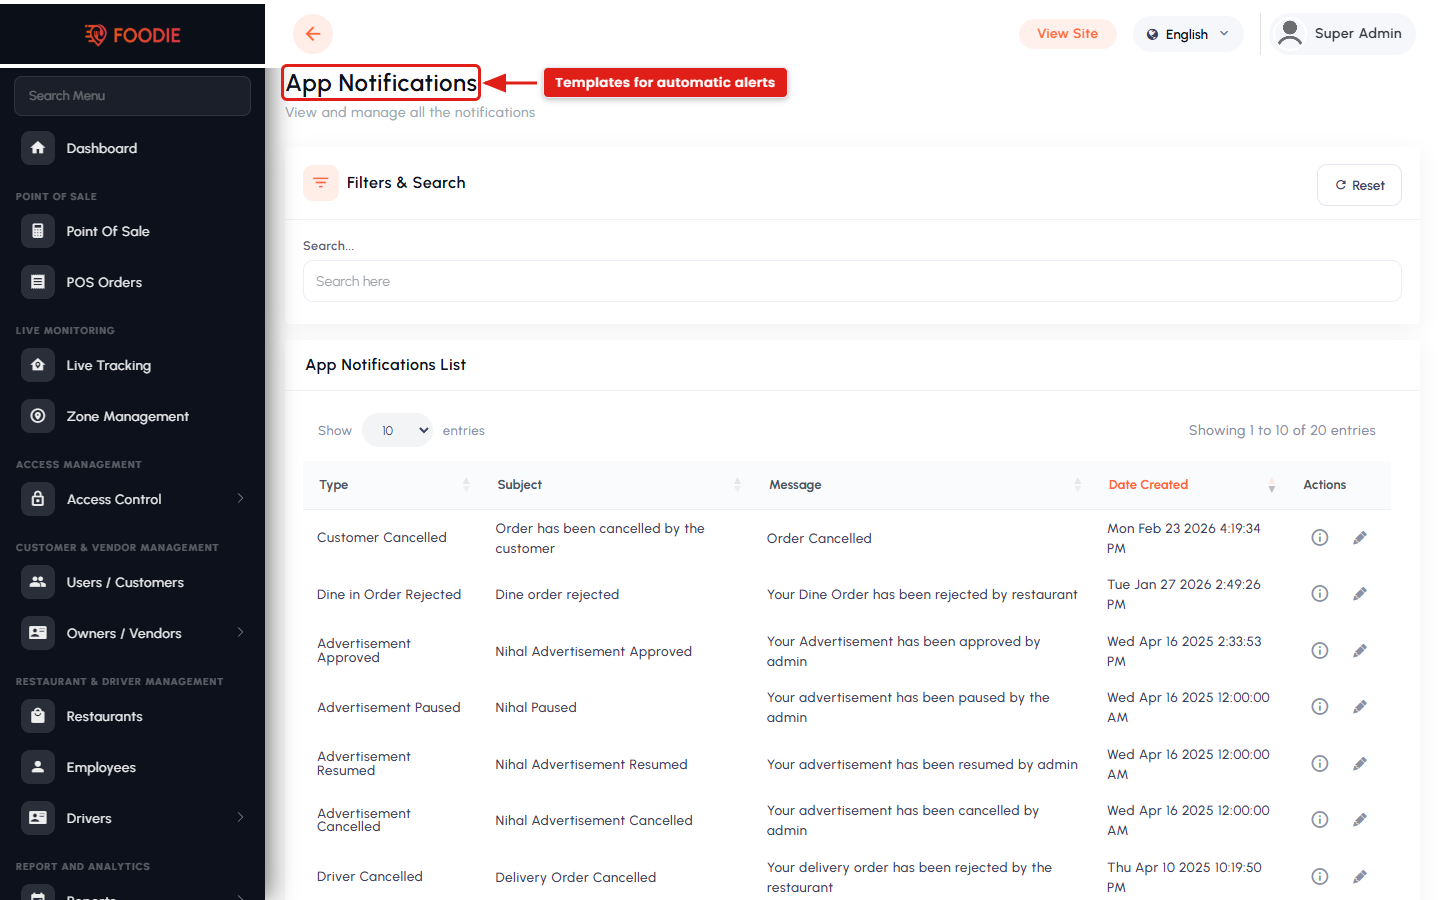
Dynamic Notifications. The templates behind automatic notifications (order accepted, driver assigned, order delivered, ad approved and so on). Edit the title and body of each event without touching code.
19.12. Help & Support
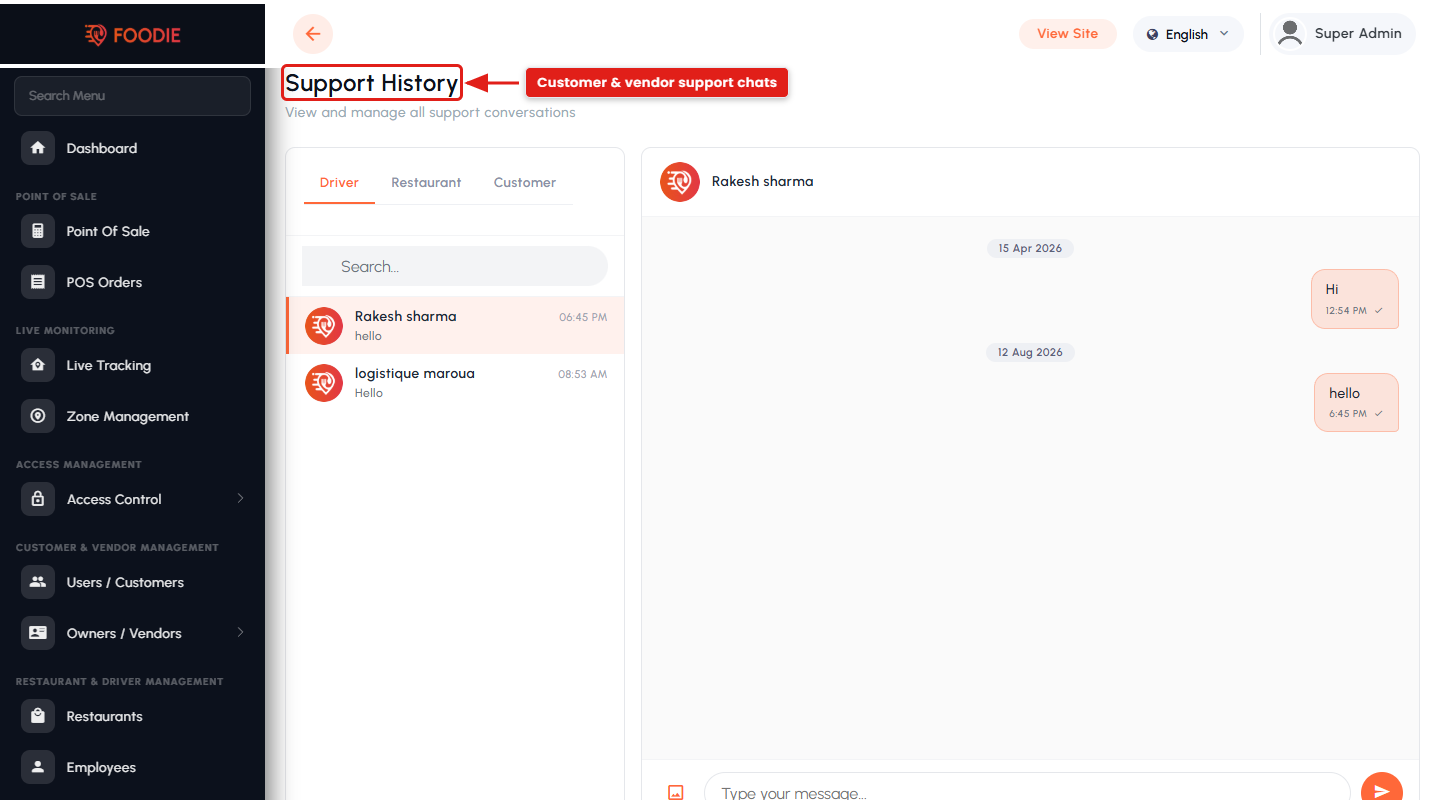
A single place to handle inbound conversations — questions, complaints and support requests from customers, vendors and drivers. Chats are threaded per user, and the support history keeps a record of what was asked and how it was resolved.
19.13. Disbursements
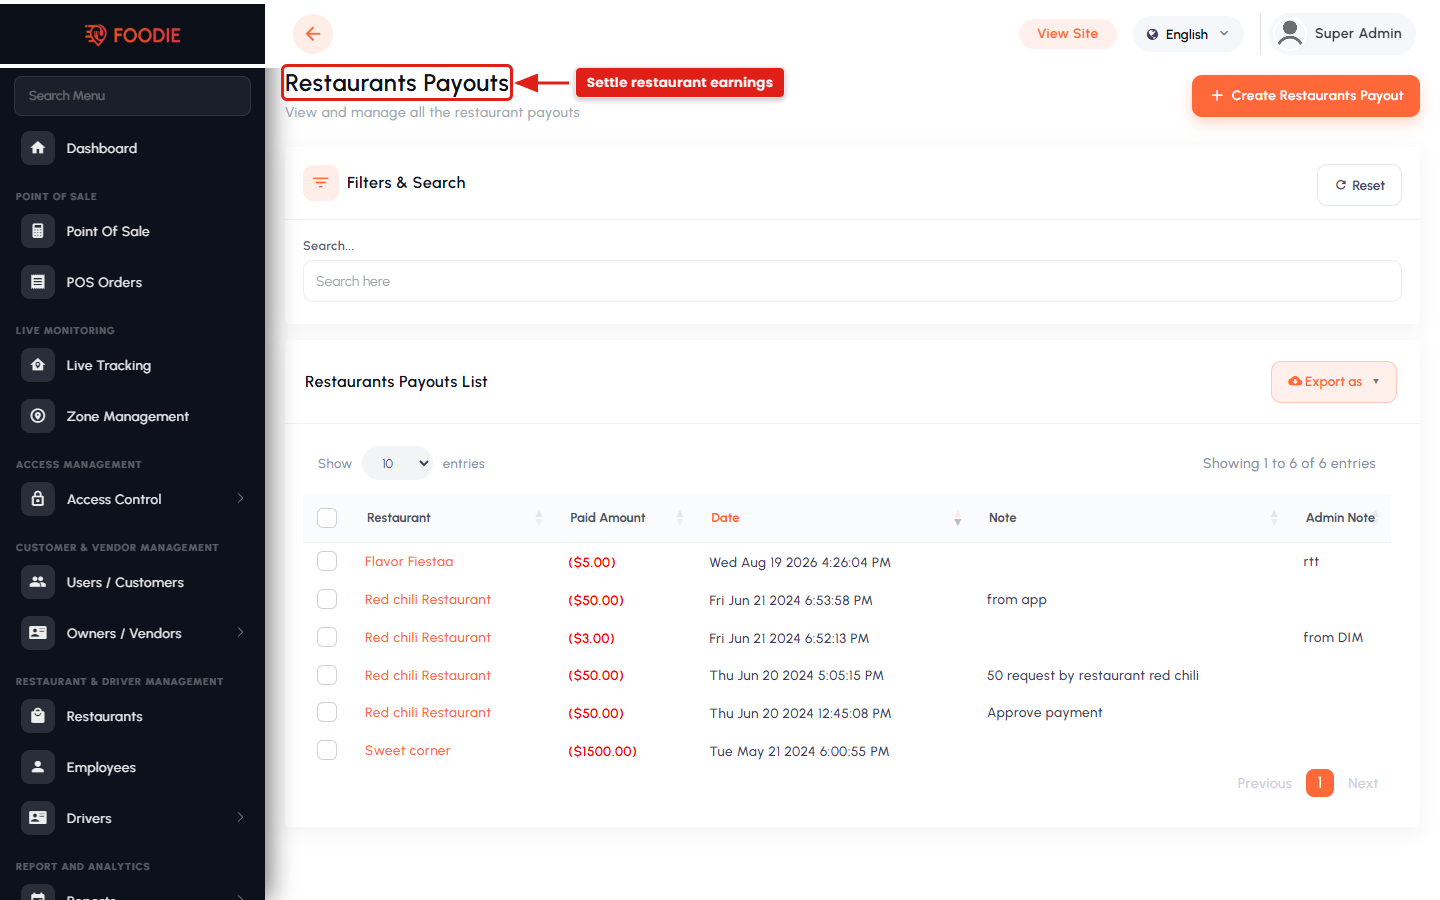
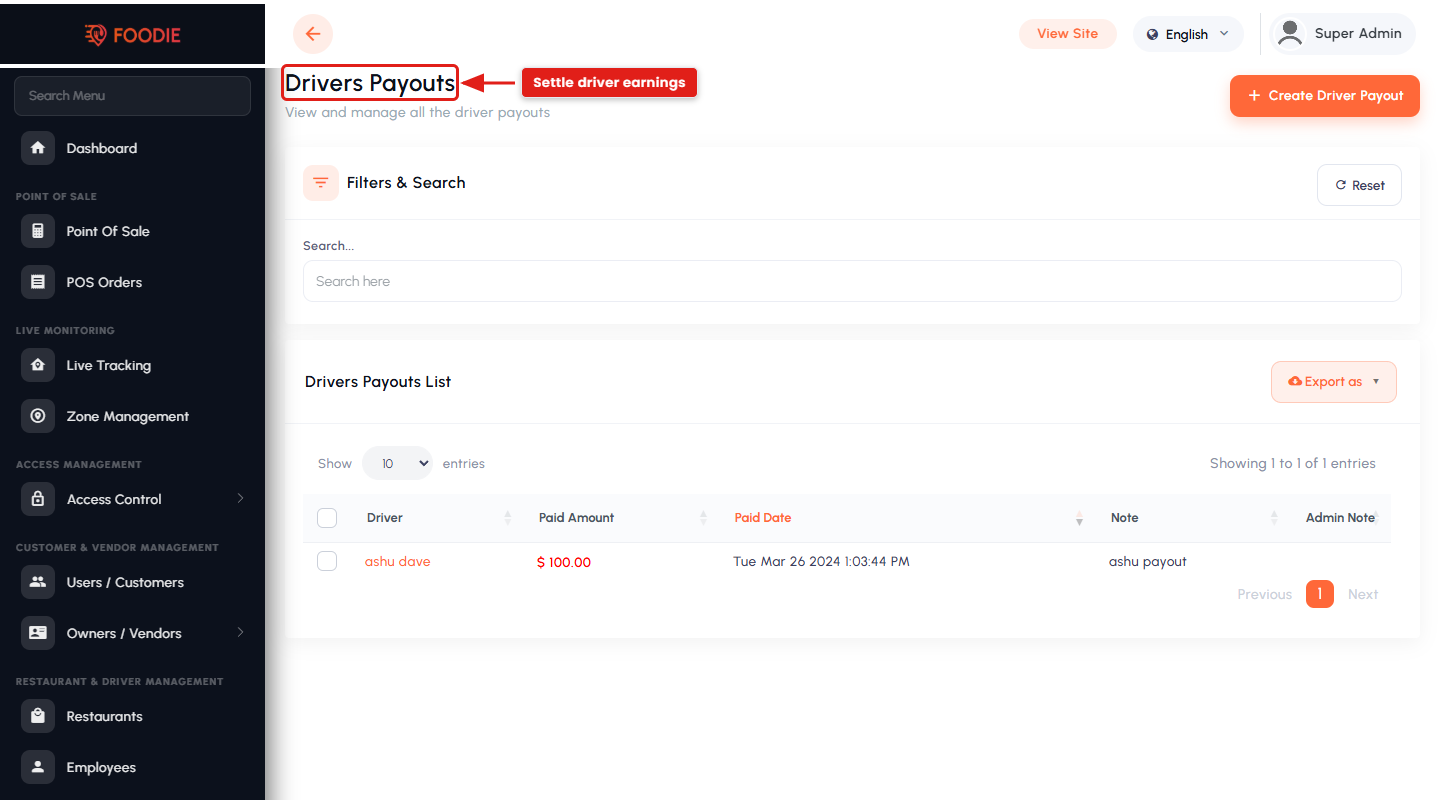
Restaurant Disbursements and Driver Disbursements track what the platform owes and has paid out. Each record shows gross earnings, commission deducted, payment status and transaction history, so settlements stay transparent. Payout requests raised from the Restaurant Panel or the Driver App land here for approval.
19.14. Design & Content Management
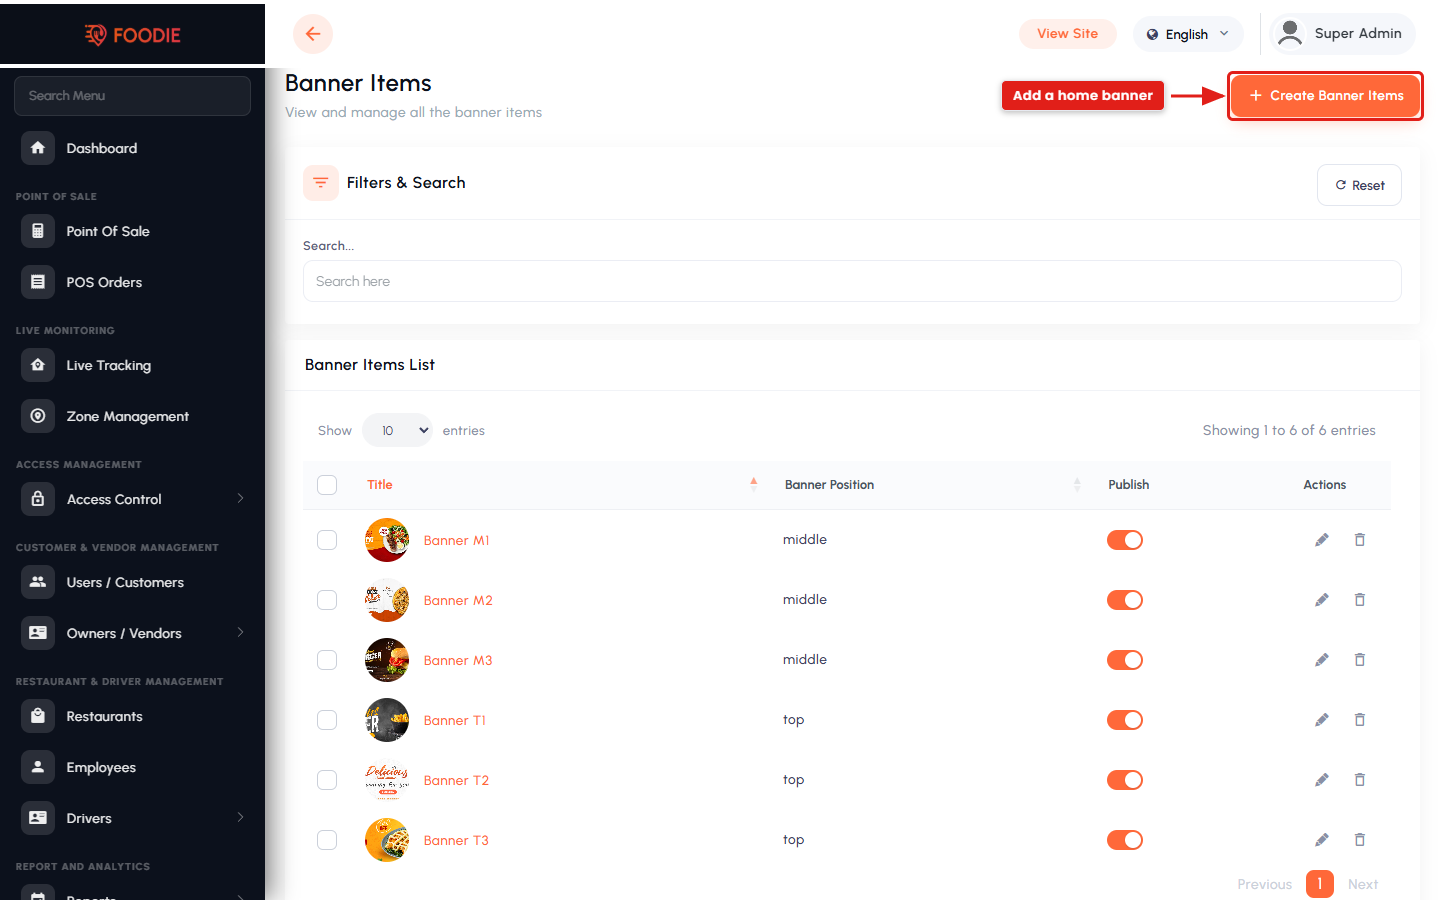
Banner / Menu Items. The promotional banners shown on the home and category screens — title, image, display order and link target (restaurant, food item or custom URL).
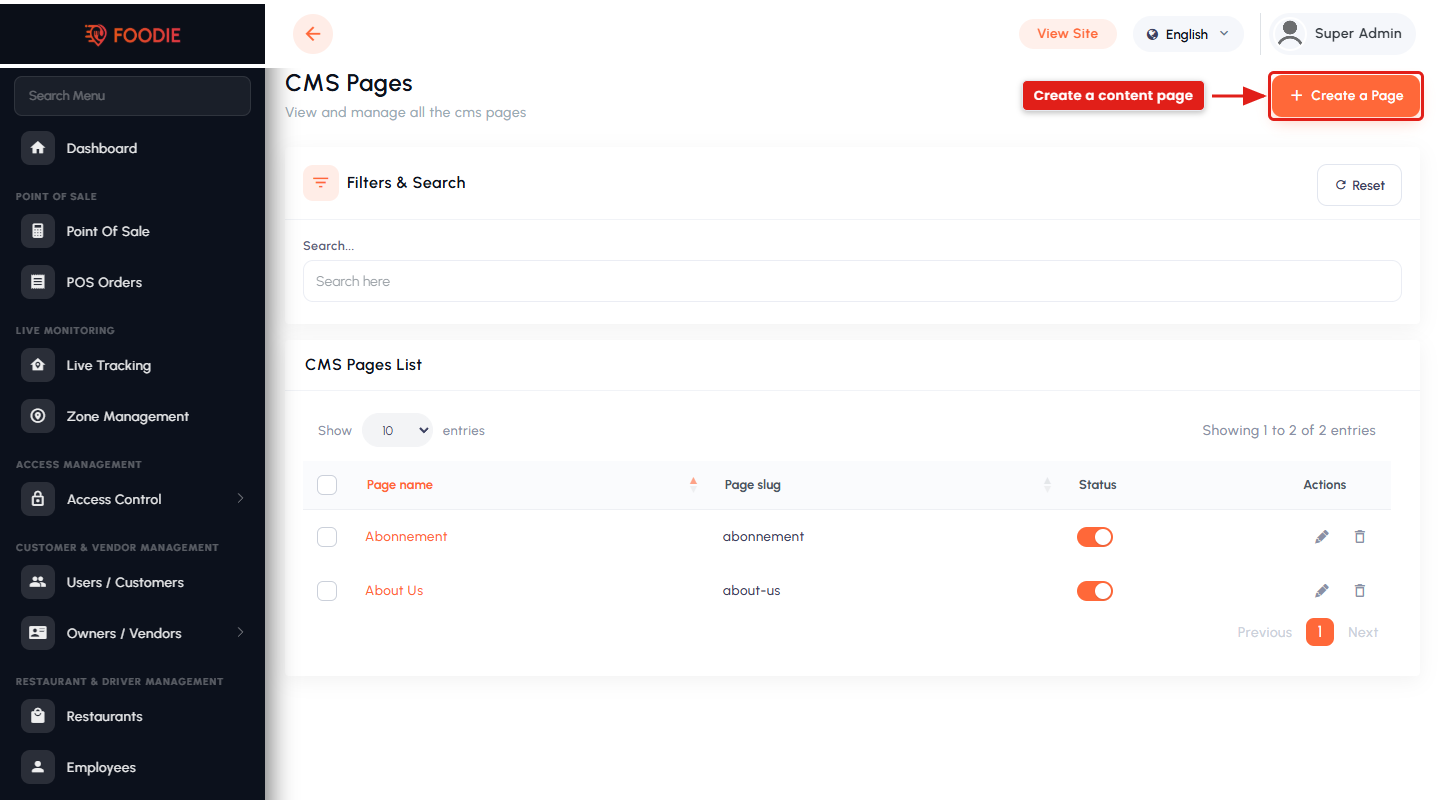
CMS Pages. Static content pages such as About Us, Privacy Policy, Terms & Conditions and FAQs, edited in a rich-text editor and published to the website and apps.
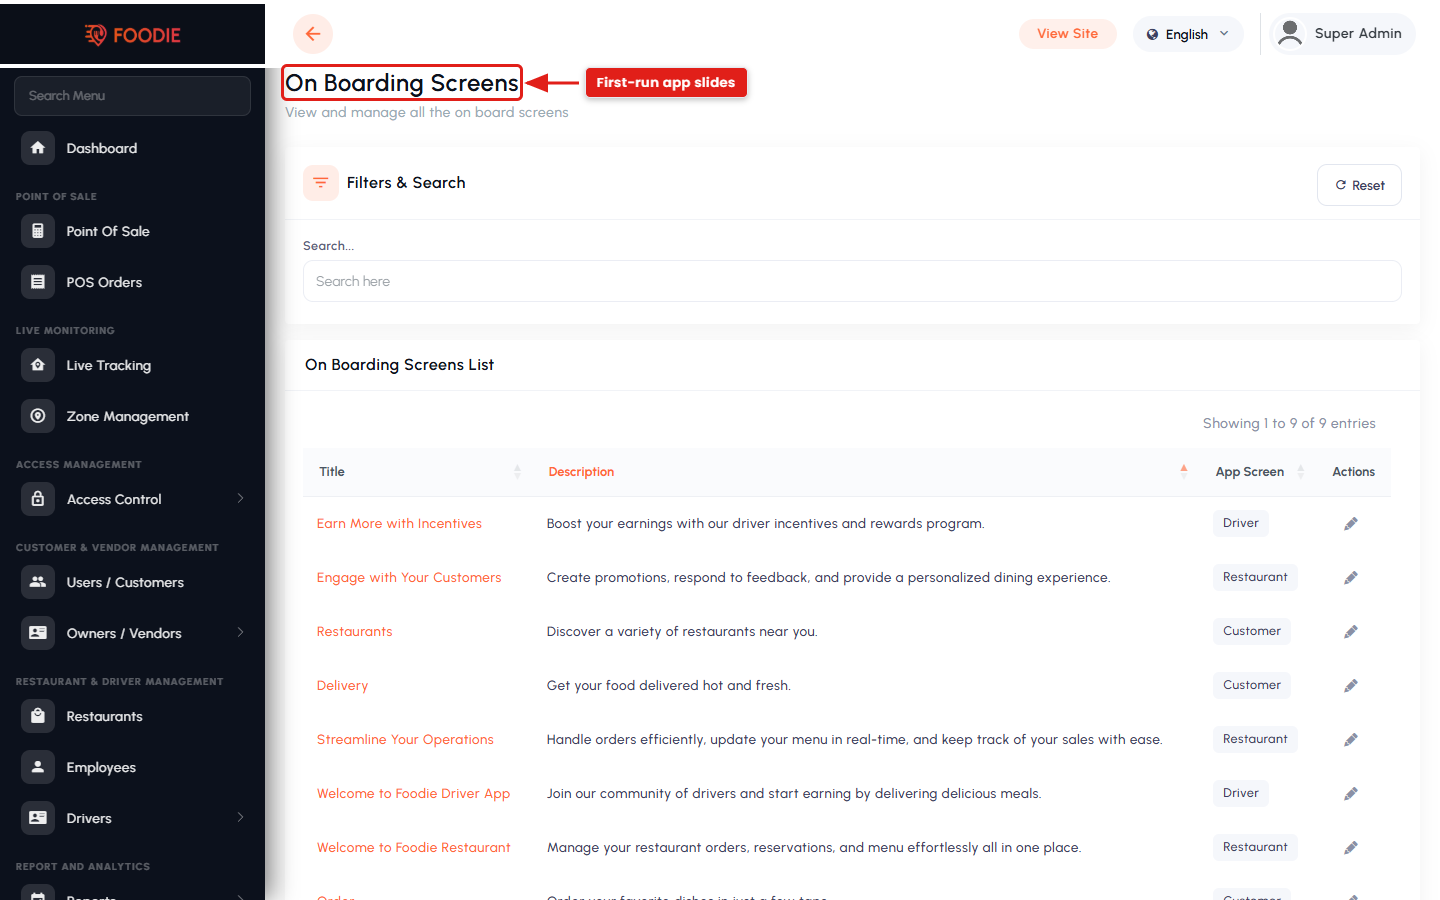
Onboarding Screens. The introductory slides new users see the first time they open the app — title, description and image per slide.
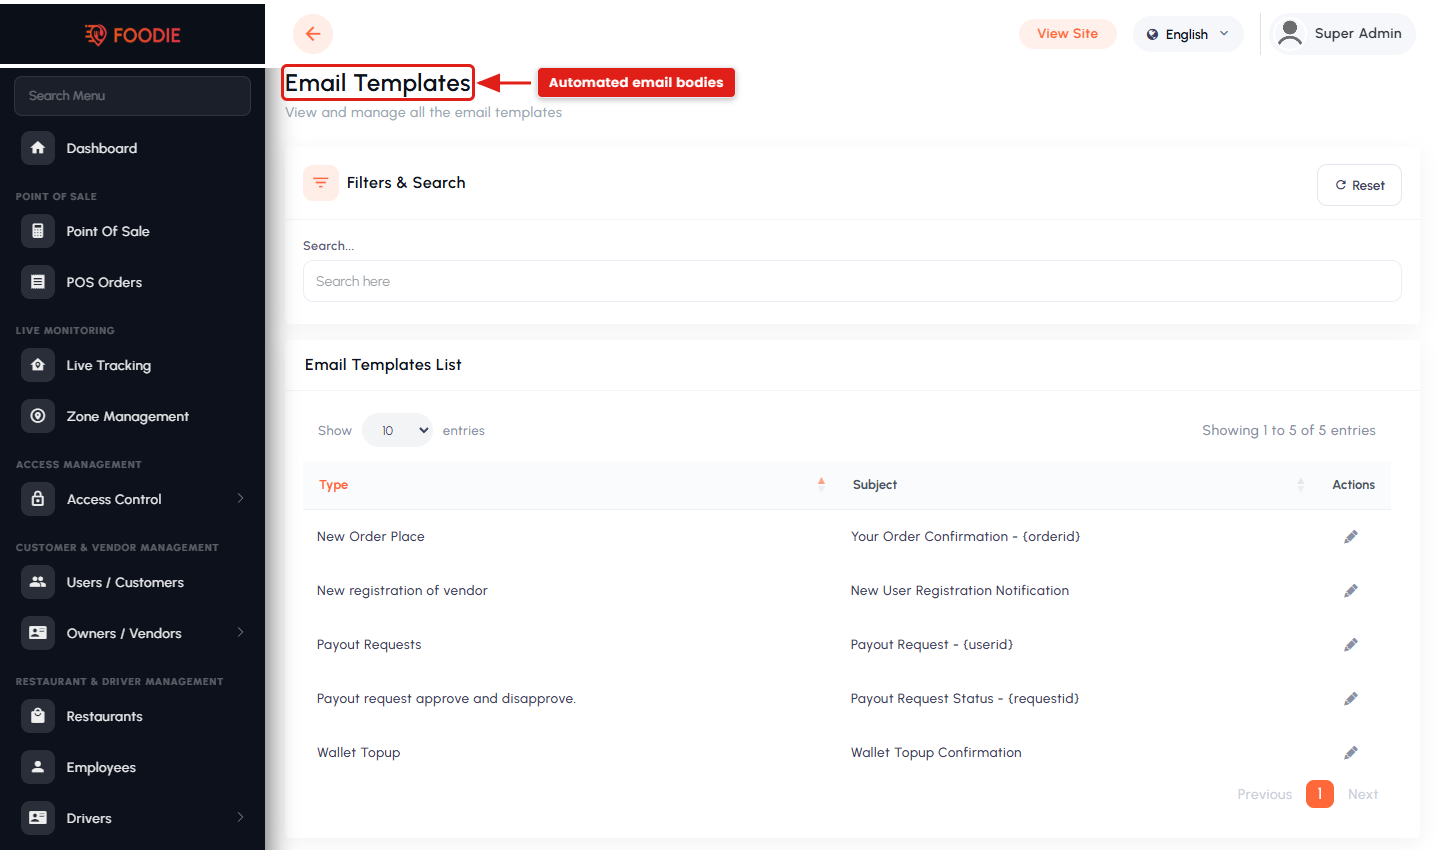
Email Templates. The templates behind every automated email — registration, order updates, password reset, vendor approval, promotions. Each template supports dynamic variables so the content is personalised while the tone stays consistent.
19.15. Localisation & Payments
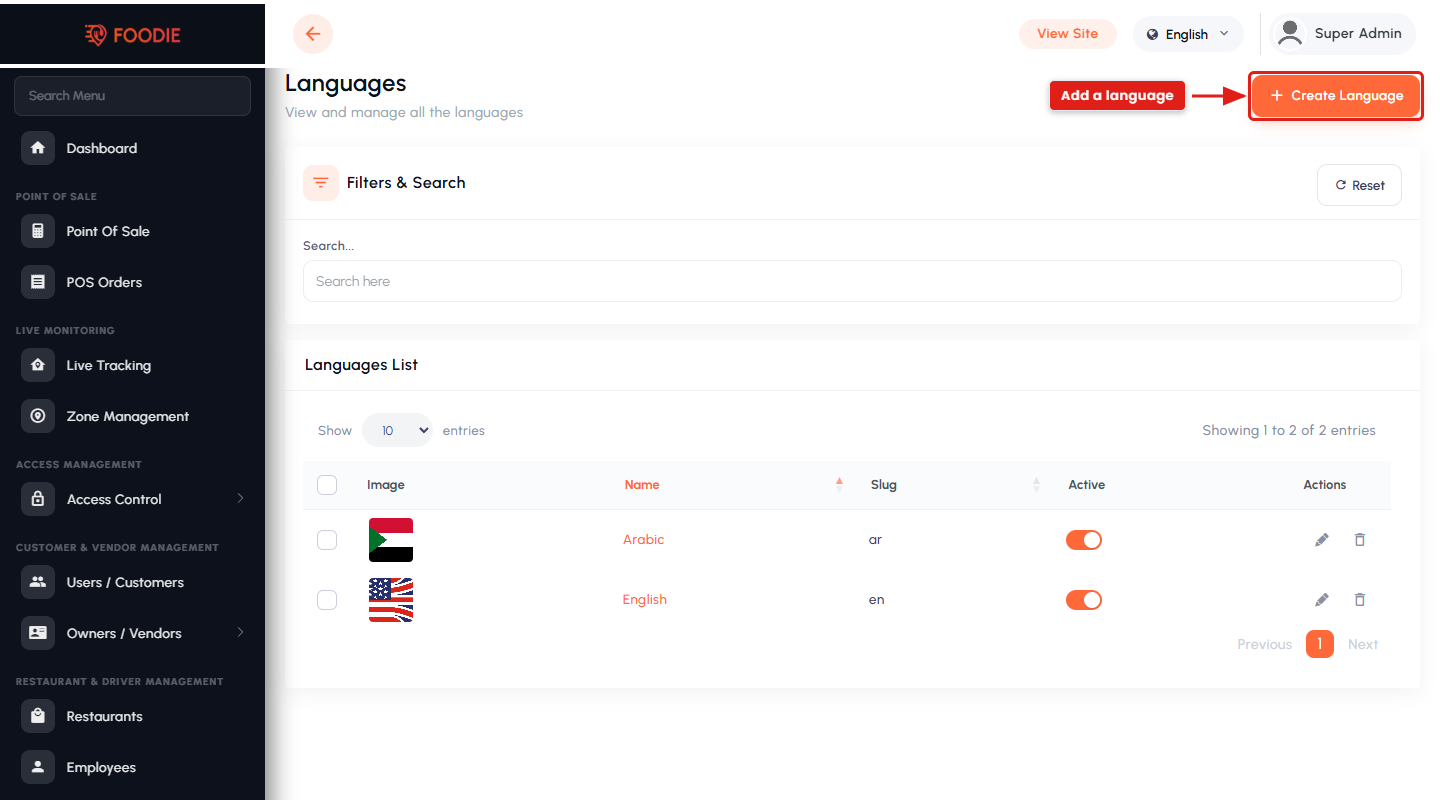
Languages. The languages available across the panel and apps. Add a language, edit its translations, and set the default locale. English and Arabic (RTL) ship by default.
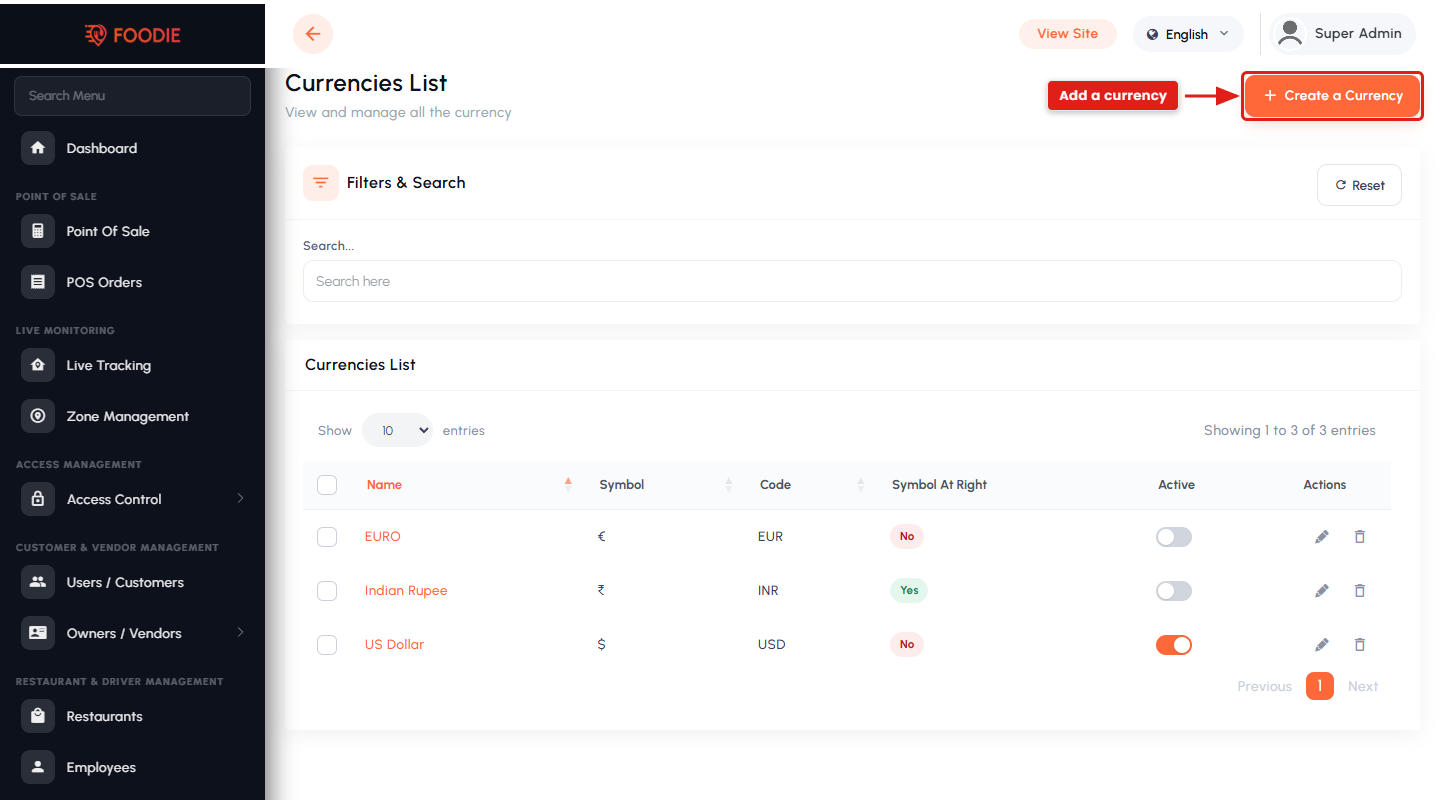
Currencies. Currency code, symbol, symbol position, decimal digits and exchange rate, with one marked as default — so prices render correctly in every region you operate in.
Taxes. Define tax types (GST, VAT, local taxes) and their rates, country by country. Taxes support several scopes — product level, order level, tax on the delivery fee, on the packing charge and on the platform fee.
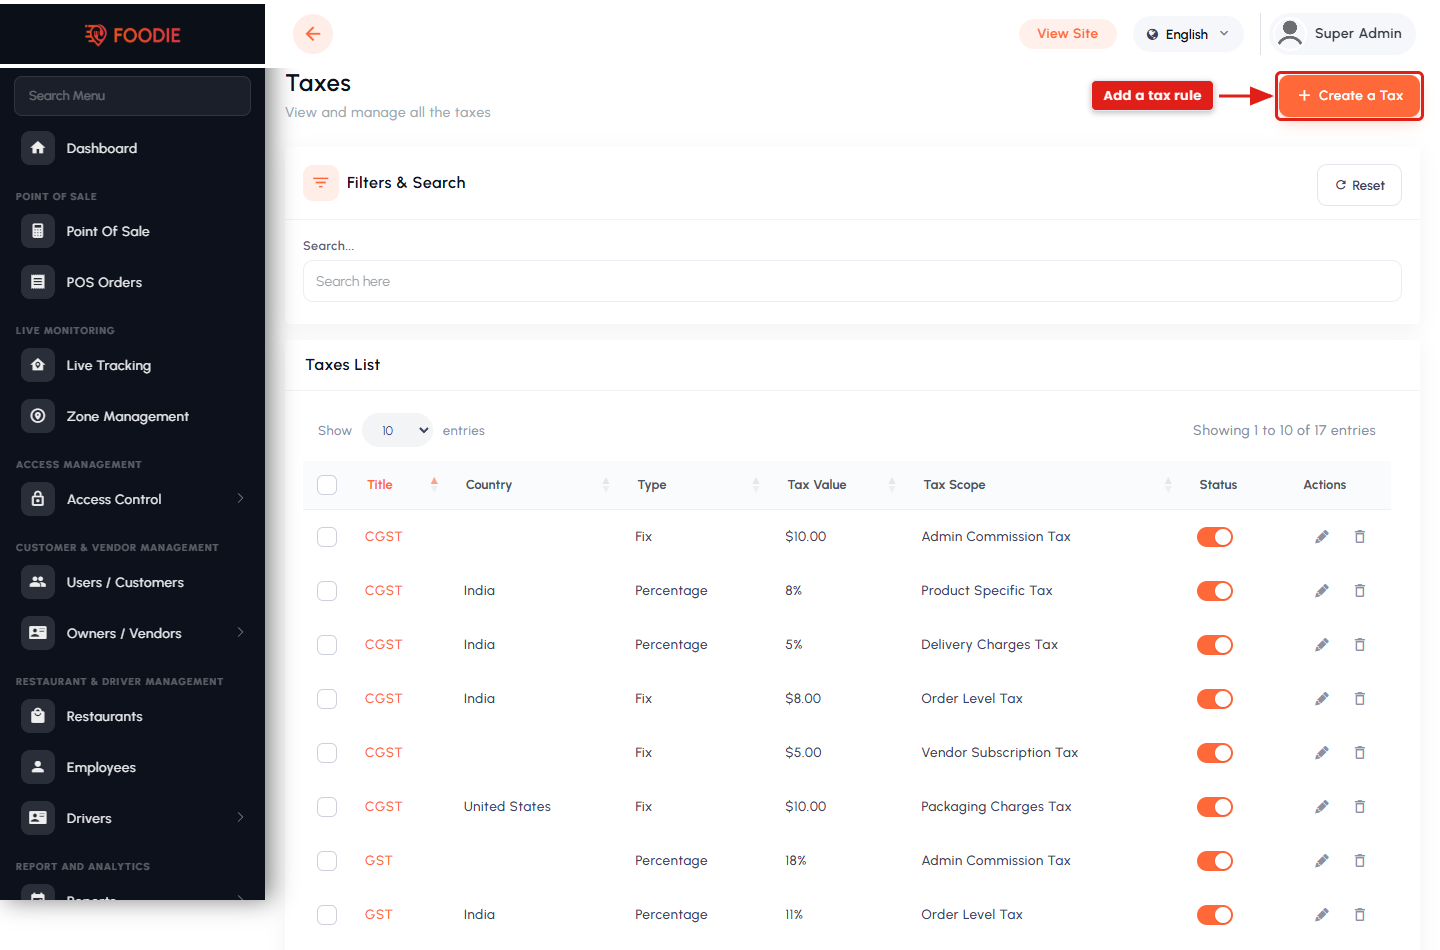
Note: Admin Commission Tax and Vendor Subscription Tax are used only in the admin tax report, to calculate tax on platform income.
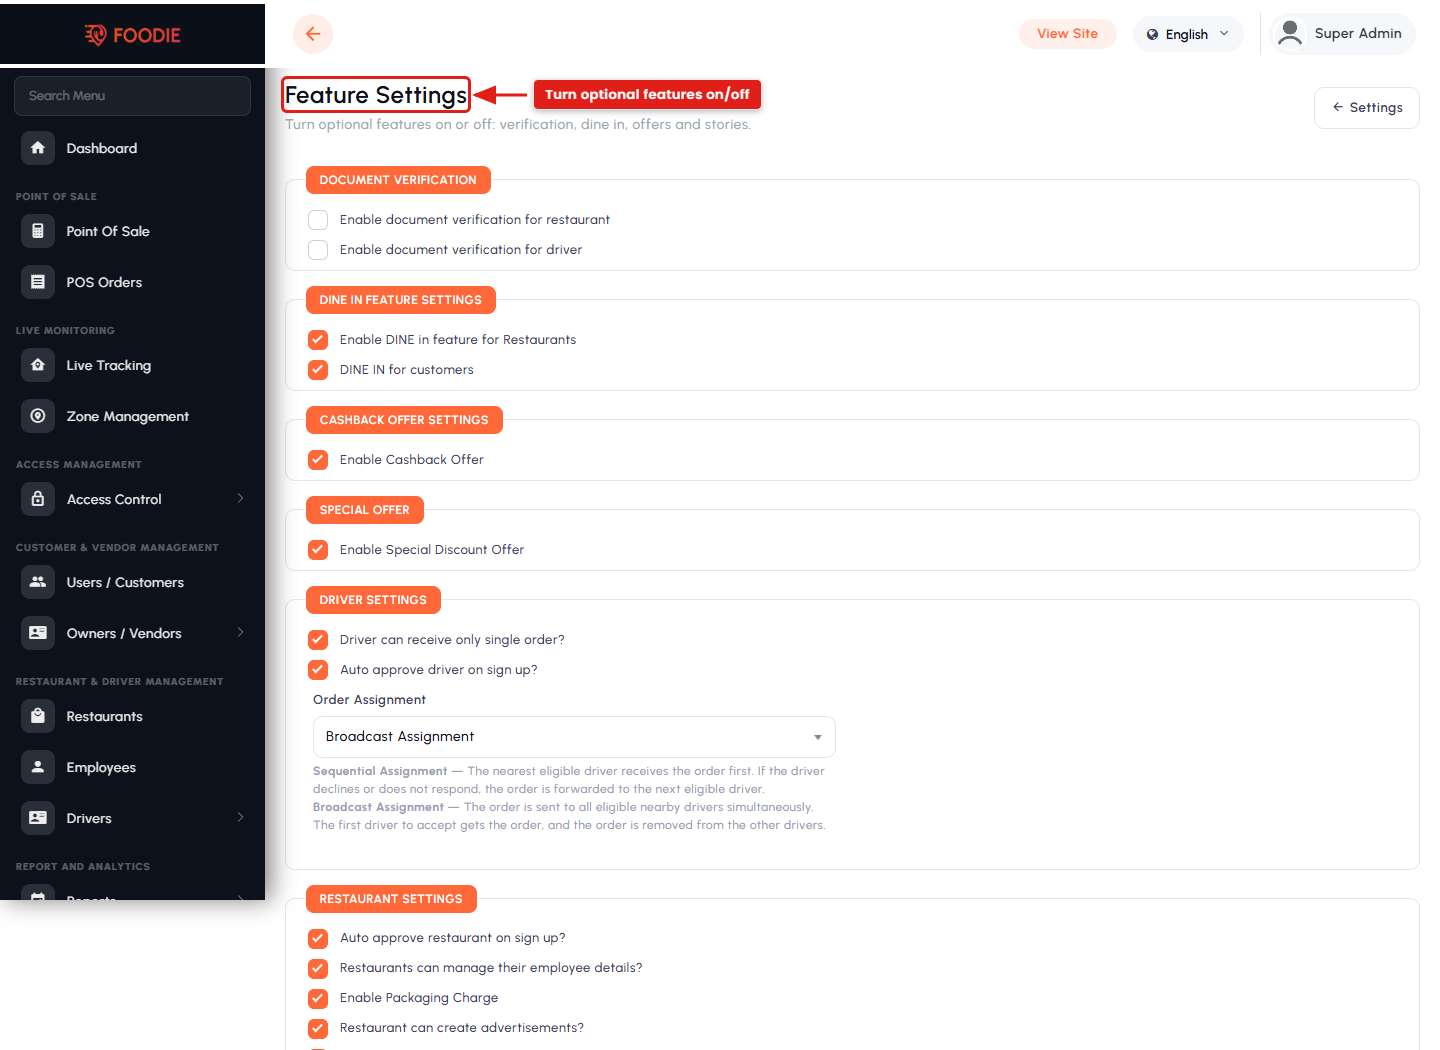
Which scope applies to customers is chosen under Settings → Feature Settings. When Platform Fee and Packing Charge are enabled, the configured tax applies to those components too.
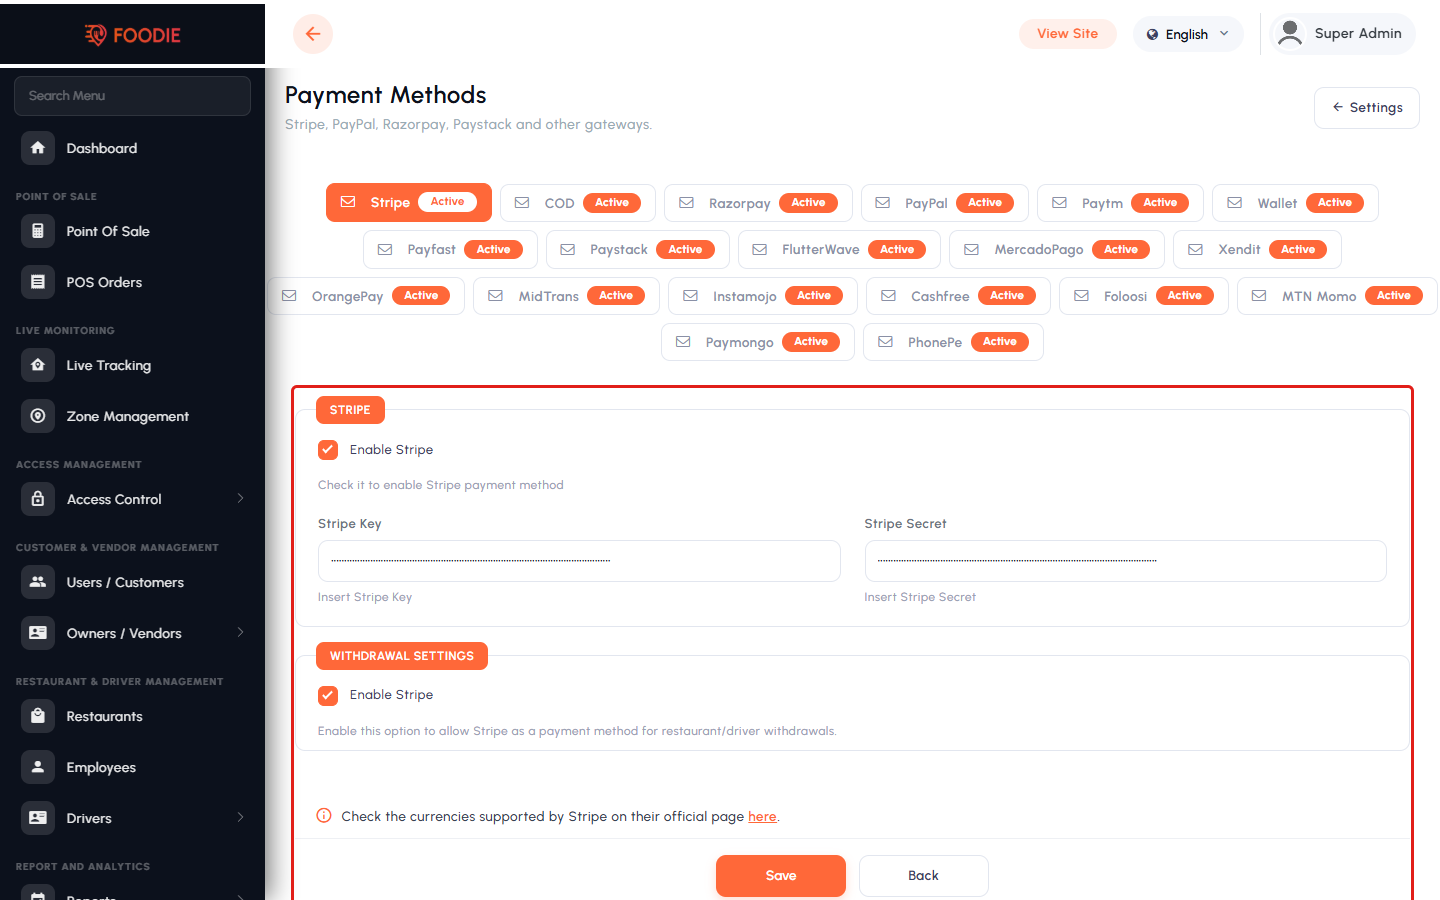
Payment Methods. Enable and configure the gateways customers may pay with — see Payment Gateway Setup for the full list and the credentials each one needs.
19.16. Settings & Configurations
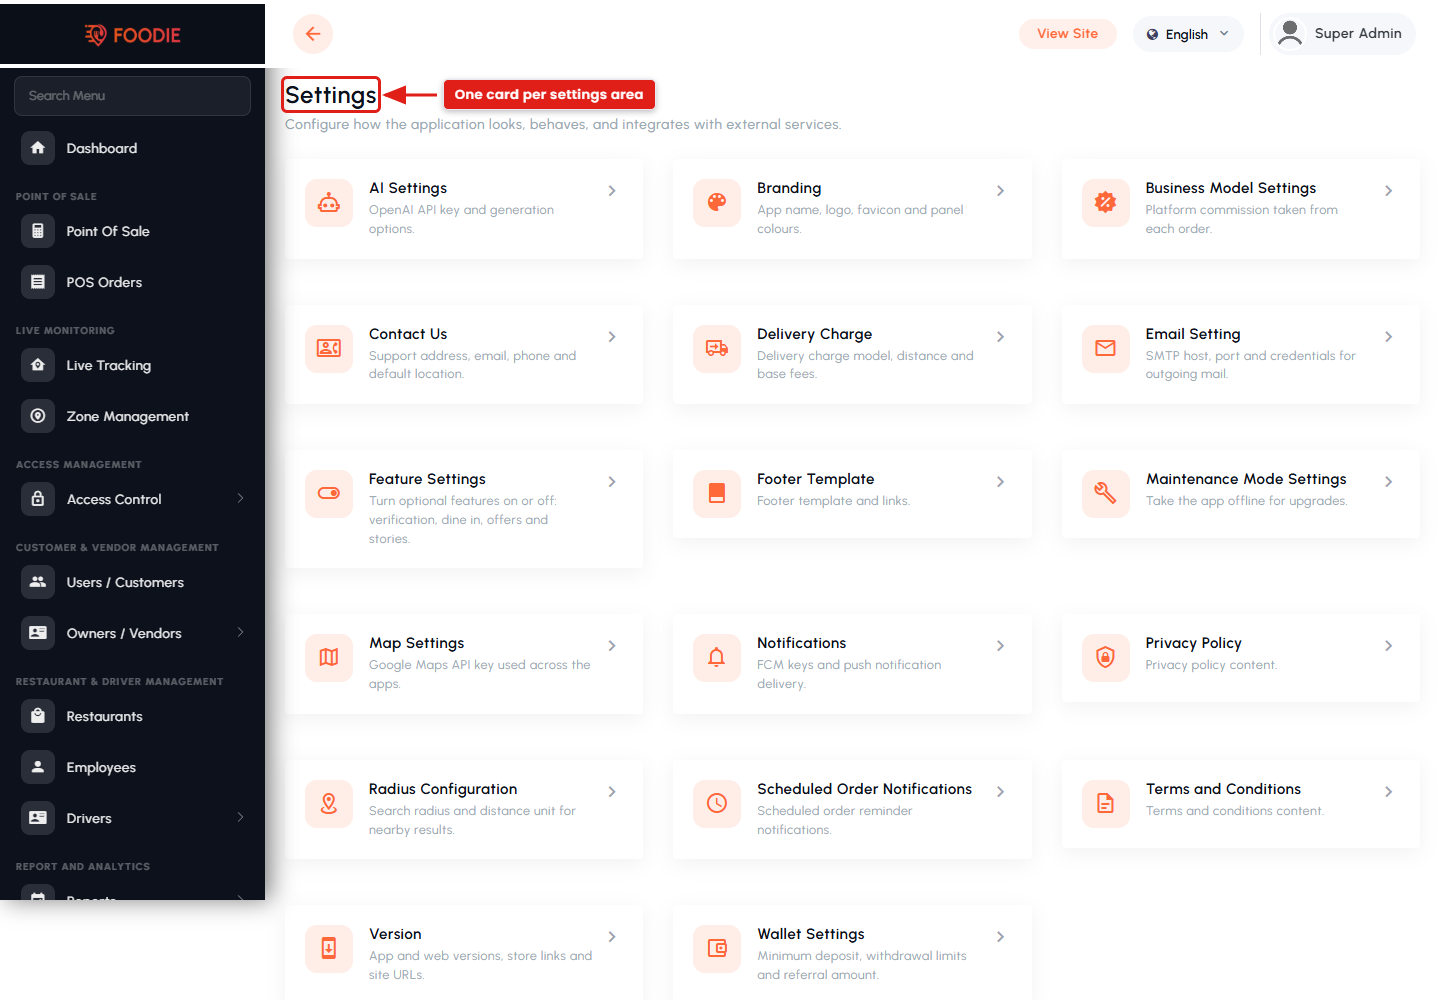
Settings opens a hub of cards, one per settings area, rather than a long menu. The areas are:
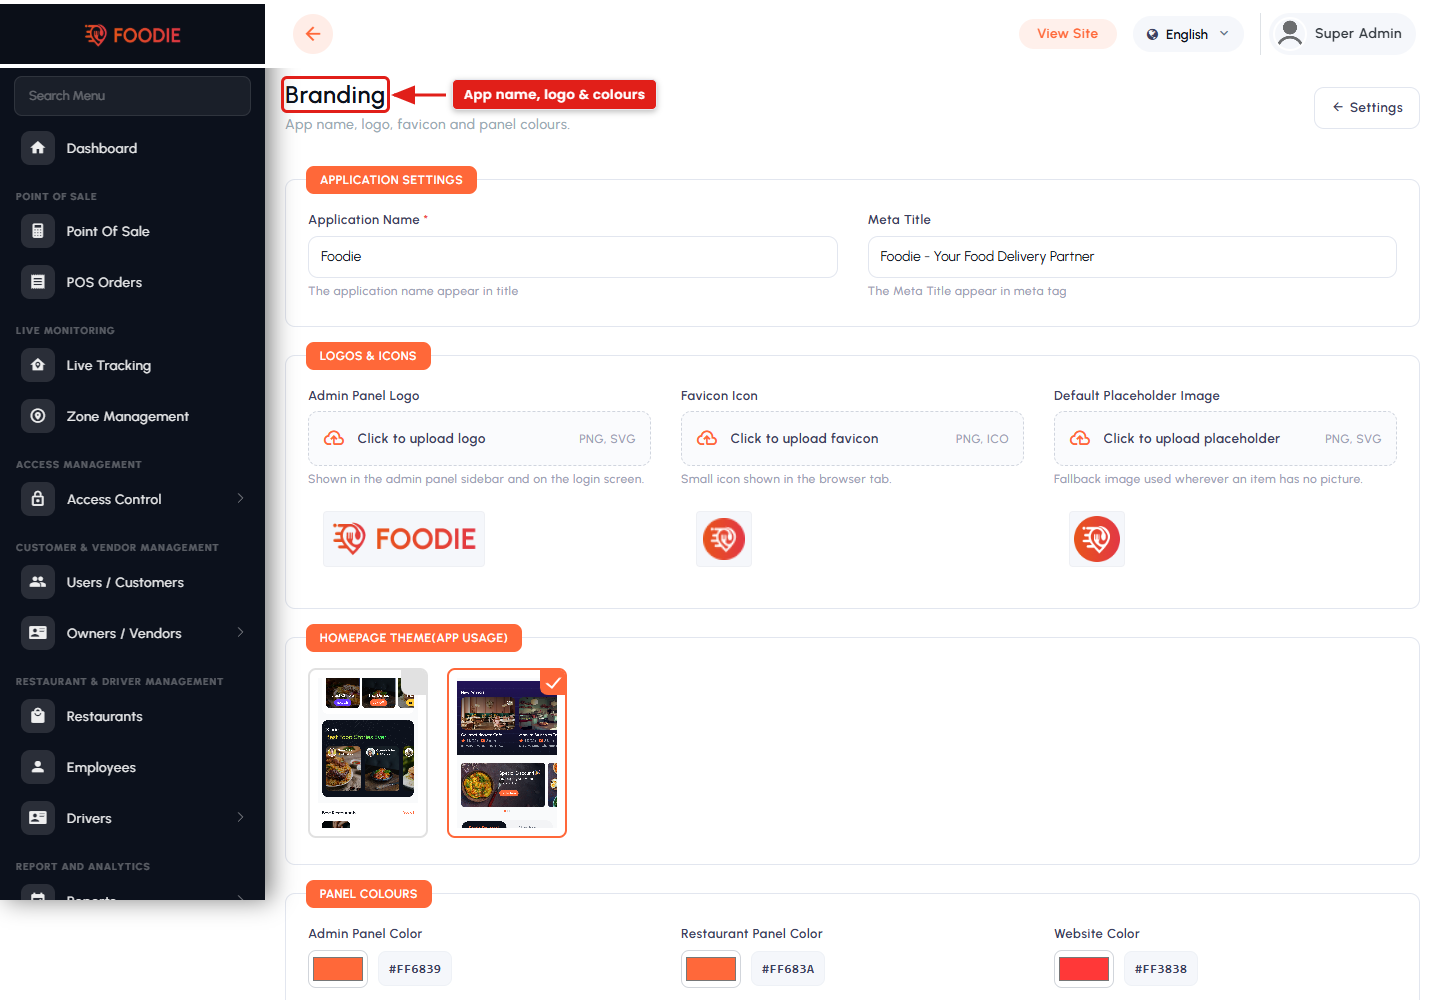
- Branding — app name, logo, favicon and panel colours.
- Notification Settings — FCM credentials and push delivery.
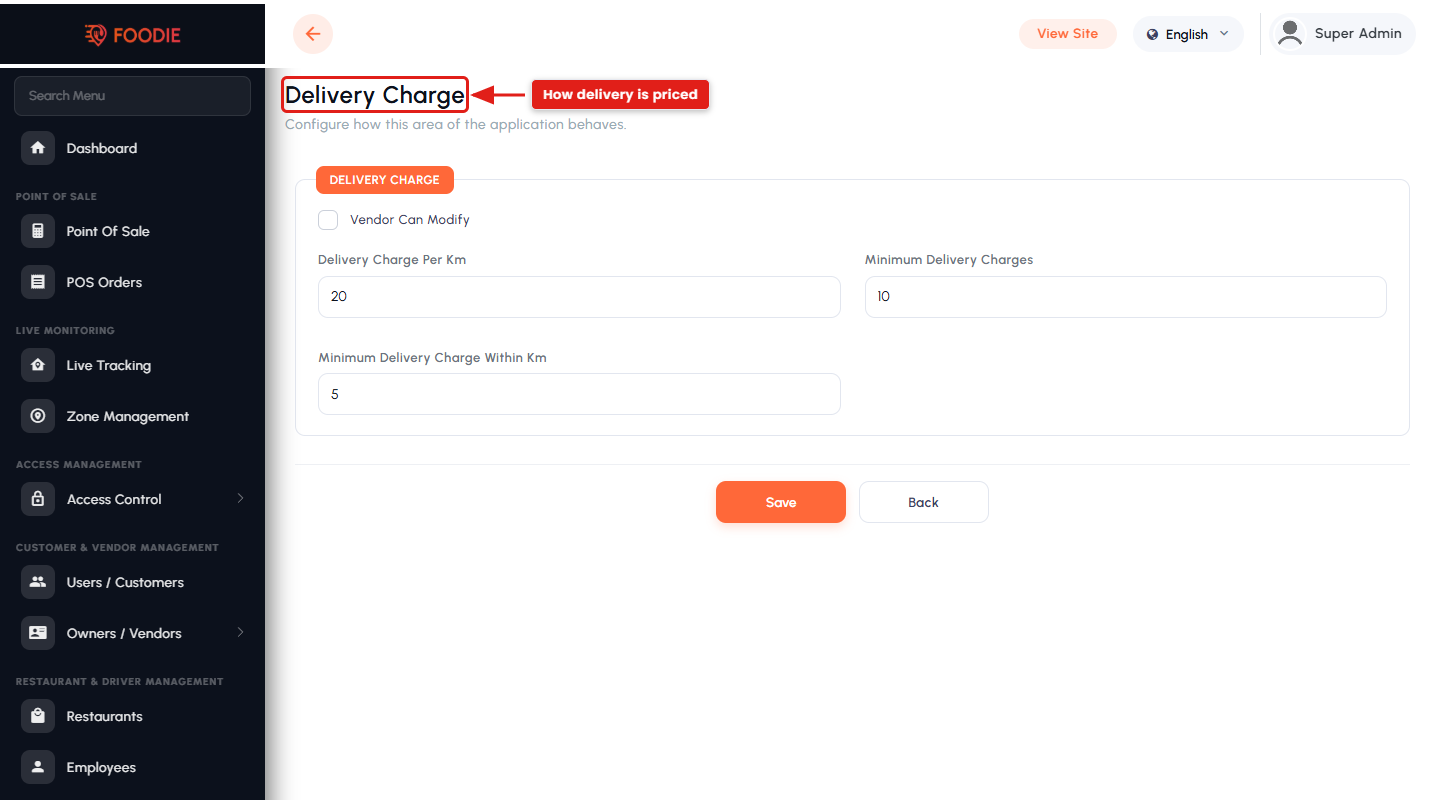
- Delivery Charge — the delivery-charge model, distance rates and base fees.
- Business Model — commission, subscription or hybrid, and the platform commission rate.
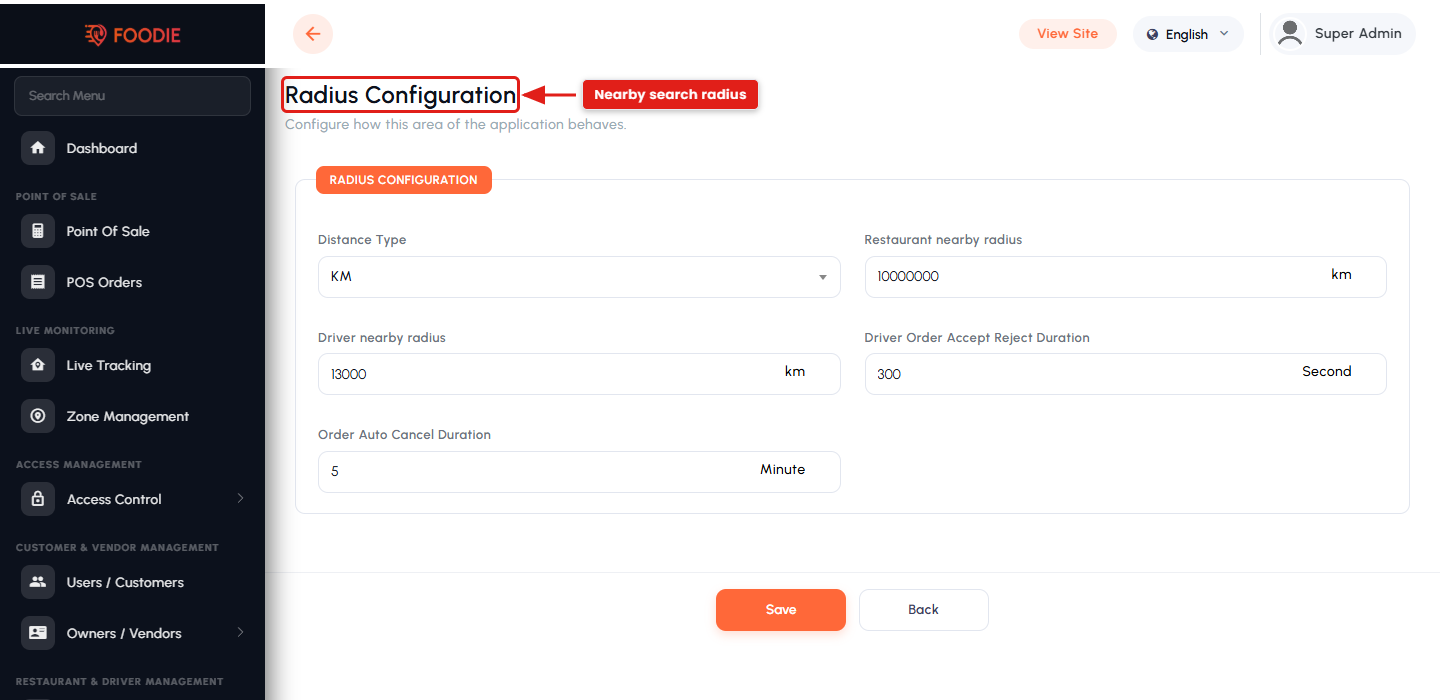
- Radius Configuration — search radius and distance unit for nearby results.
- Feature Settings — the optional features, gathered into one screen: document verification, dine-in (for restaurants and for customers), restaurant stories, advertisements, self delivery, employee management, auto-approve restaurants, platform fee, packaging charge, tax scope and the order-assignment mode (broadcast or sequential) with its ringtone.
- Map Settings — the Google Maps API key used across the apps and panels.
- AI Settings — the OpenAI API key and generation options.
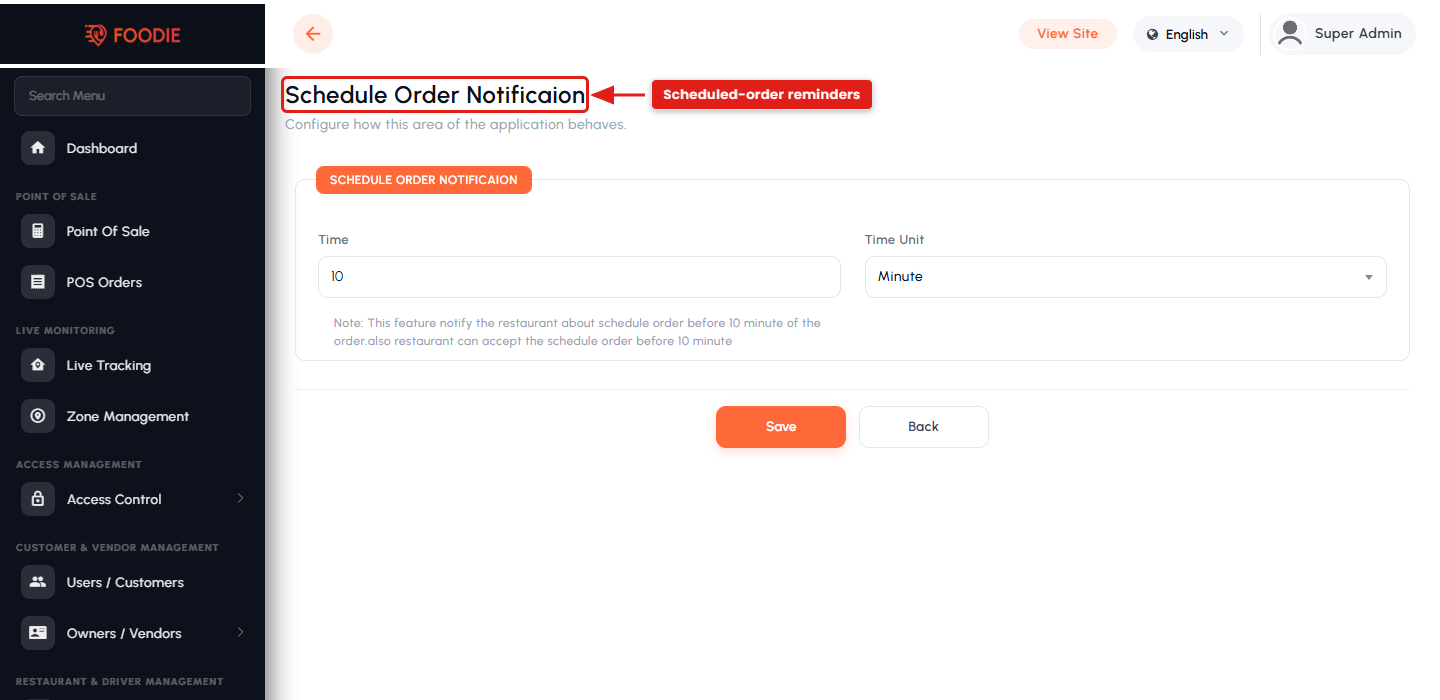
- Schedule Order Notification — how far ahead scheduled-order reminders are sent.
- Contact Us — support address, email, phone and default location.
- Wallet Settings — wallet top-up rules and limits.
- Email Settings — SMTP host, port and credentials for outgoing mail.
- Version — app and web version numbers, store links and force-update behaviour.
- Maintenance Mode — take the platform offline while you upgrade.
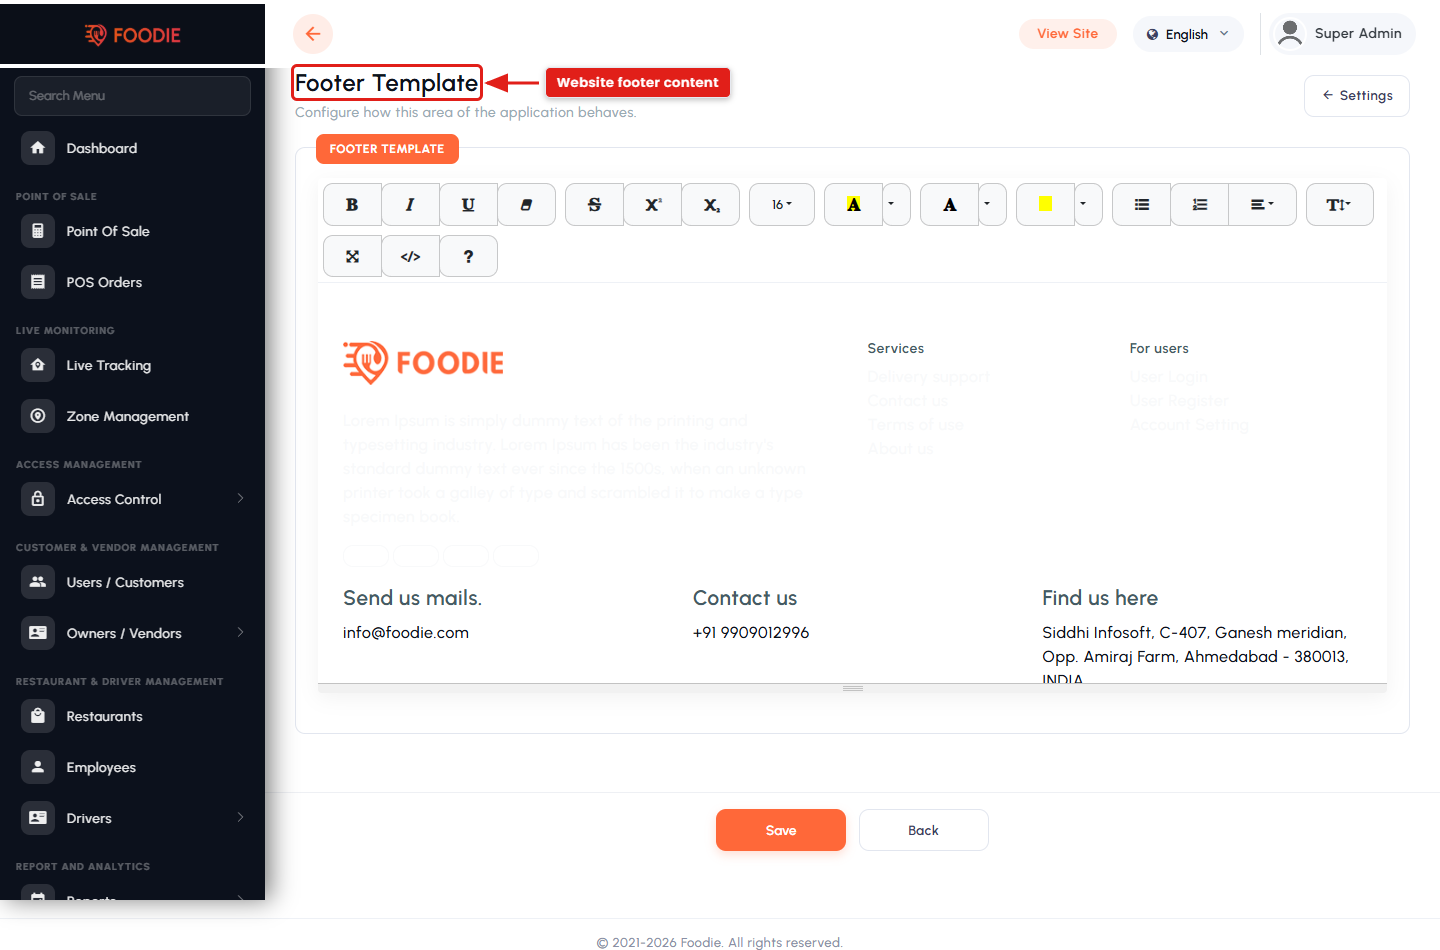
- Footer Template — footer links, contact details, social icons and copyright text.
- Terms & Conditions and Privacy Policy — the legal content shown in the apps and on the website.
20. Cron & Scheduled Tasks
Foodie runs two recurring jobs from the Admin Panel, both triggered by Laravel's scheduler:
app:auto-cancel-order— cancels orders that were never accepted within the window you configure.app:send-scheduled-order-notification— sends reminders for orders customers scheduled for later.
Both shell out to the Node scripts in storage/app/firebase/, so they will not run until the
Node path is set.
20.1. Configure the Node binary path
Set NODE_PATH in the Admin Panel's .env to the absolute path of your Node
executable — for example /usr/local/bin/node on Linux, or
C:/Program Files/nodejs/node.exe on Windows. Find it with which node (see
Installing Node.js & npm).
NODE_PATH='/usr/local/bin/node'
20.2. Add the Laravel scheduler to cron
Add a single cron entry that runs the scheduler every minute. Laravel then decides which of its commands are due.
* * * * * cd /path-to-your-admin-panel && php artisan schedule:run >> /dev/null 2>&1
In cPanel, open Cron Jobs, choose Once Per Minute, and paste the command.
Please note: use the correct PHP binary path for your server
(/usr/local/bin/php is common but varies), point the command at your own admin-panel
directory, and make sure the panel's files are readable and storage/ is writable by
the cron user.
20.3. Timing values
The cron entry only decides how often Laravel is asked. The actual timings come from the admin panel: the auto-cancellation window under Settings, and the reminder lead time under Settings → Schedule Order Notification.
21. Payment Gateway Setup
Customer payments, vendor subscription payments and wallet top-ups all run through the gateways you enable under Payment Methods in the admin panel. Credentials are stored in Firestore and read server-side by the panels, so secret keys are never bundled into the mobile apps. Each gateway has a sandbox/live toggle — test in sandbox before switching to live.
Foodie integrates 18 online payment gateways, plus Cash on Delivery and the in-app Wallet:
- Stripe, Apple Pay, PayPal, Razorpay, Paytm, PayFast, Paystack, Flutterwave, MercadoPago, Xendit, OrangePay, MidTrans, MTN MoMo, PhonePe, Cashfree, Instamojo, Foloosi and PayMongo.
21.1. How to enable a gateway
- Go to Payment Methods in the admin sidebar and open the gateway's tab.
- Tick Enable.
- Paste the credentials from that provider's dashboard.
- Choose sandbox or live mode.
- Click Save.
21.2. Credentials each gateway needs
- Stripe — Stripe Key (publishable) and Stripe Secret.
- Apple Pay — enable the toggle; it runs on top of the Stripe configuration on supported iOS devices.
- PayPal — PayPal App ID (Client ID), PayPal Secret and the Live Mode toggle.
- Razorpay — Razorpay Key and Razorpay Secret.
- Paytm — Merchant ID, Merchant Key and the environment (test/production).
- PayFast — Merchant ID, Merchant Key, plus Return, Cancel and Notify URLs.
- Paystack — Paystack Key and Paystack Secret.
- Flutterwave — Public Key and Secret Key.
- MercadoPago — MercadoPago Key and Access Token.
- Xendit — Xendit API Key.
- OrangePay — Client ID, Secret, Auth token, plus Return, Cancel and Notify URLs.
- MidTrans — Merchant ID and Server Key.
- MTN MoMo — Primary Key, Secondary Key, Target Environment, Callback URL and expiry time in seconds.
- PhonePe — Merchant Key, Client Key, Client Secret, Salt Key and Flow ID.
- Cashfree — Client Key and Secret Key.
- Instamojo — Instamojo Key and Secret Key.
- Foloosi — Foloosi Merchant Key.
- PayMongo — PayMongo Secret Key.
- Cash on Delivery (COD) — no credentials; just enable it.
- Wallet — no credentials; enable it to let customers pay from their in-app wallet balance. Top-ups still go through one of the gateways above.
Callback URLs. Gateways that redirect back to your site (PayFast, OrangePay, MTN MoMo and others) need their Return / Cancel / Notify URLs pointing at your live HTTPS domain, and the same URLs whitelisted in the provider's own dashboard. Payments will appear to "hang" on the gateway page if these do not match.
21.3. Where the secret keys are used
Gateways that use a secret key perform their sensitive operations — creating and verifying transactions — server-side inside the Laravel panels. The browser and the mobile apps send only non-sensitive data (amount, currency, reference); the panel reads the gateway's secret from the settings document the Admin Panel manages and talks to the provider itself, so no secret key is ever shipped in the apps or exposed to the browser.
This is also why the payment callback URLs must point at your live HTTPS domain: the provider redirects back into the panel, which then verifies the transaction before the order is marked paid.
22. Restaurant Panel Setup
The Restaurant (Vendor) Panel is the Laravel 12 application restaurant owners and their
employees log into. Upload the package to its own domain or subdomain (for example
restaurant.yourdomain.com) and extract it.
22.1. Upload the files
22.1.1. Connect over FTP/SFTP with FileZilla or a similar client — port 21 for FTP, port 22 for SFTP.
22.1.2. Transfer the ZIP file to the server, for example /var/www/html.
22.1.3. Extract it from the terminal or the cPanel File Manager:
unzip your-application.zip
22.1.4. Point the subdomain's document root at the project's public/
folder.
22.2. Configure the panel
22.2.1. Install the dependencies and generate the application key:
composer install
cp .env.example .env
php artisan key:generate
22.2.2. Create a MySQL database for this panel and import the
.sql file supplied with the Restaurant Panel package — through
phpMyAdmin → Import, or from the command line:
mysql -u your_db_user -p your_database < restaurant_panel.sql
There is no php artisan migrate step; the .sql file already contains the
tables and default data.
22.2.3. Add the same Firebase credentials you used for the Admin Panel, including the same database name:
APP_NAME=Restaurant
APP_URL=https://restaurant.yourdomain.com

DB_DATABASE=your_database
DB_USERNAME=your_db_user
DB_PASSWORD=your_db_password

FIREBASE_PROJECT_DB=(default)
FIREBASE_APIKEY=
FIREBASE_AUTH_DOMAIN=
FIREBASE_DATABASE_URL=
FIREBASE_PROJECT_ID=
FIREBASE_STORAGE_BUCKET=
FIREBASE_MESSAAGING_SENDER_ID=
FIREBASE_APP_ID=
FIREBASE_MEASUREMENT_ID=

# Required for "Sign in with Google"
GOOGLE_CLIENT_ID=
Note: use the same Firebase project and the same
FIREBASE_PROJECT_DB value for the Admin Panel, the Restaurant Panel, the Website Panel
and the mobile apps — that is what keeps all clients on one live dataset.
22.3. Google login
To enable "Sign in with Google" you need your Google Client ID.
Where to find it:
- Open your project in the Firebase Console.
- Go to Authentication → Sign-in method.
- Click Google in the provider list.
- Expand Web SDK configuration.
- Copy the Web client ID.
- Paste it into
GOOGLE_CLIENT_IDin the panel's.envfile.
Authorise your domains for the OAuth 2.0 client:
- Open the Google Cloud Console.
- Go to APIs & Services → Credentials.
- Open your OAuth 2.0 Client ID (Web application type).
- Add both panels under Authorized JavaScript origins:
https://yourdomain.comhttps://restaurant.yourdomain.com
- Add both under Authorized redirect URIs:
https://yourdomain.com/__/auth/handlerhttps://restaurant.yourdomain.com/__/auth/handler
Also add both domains under Firebase Console → Authentication → Settings → Authorized domains.
22.4. First login
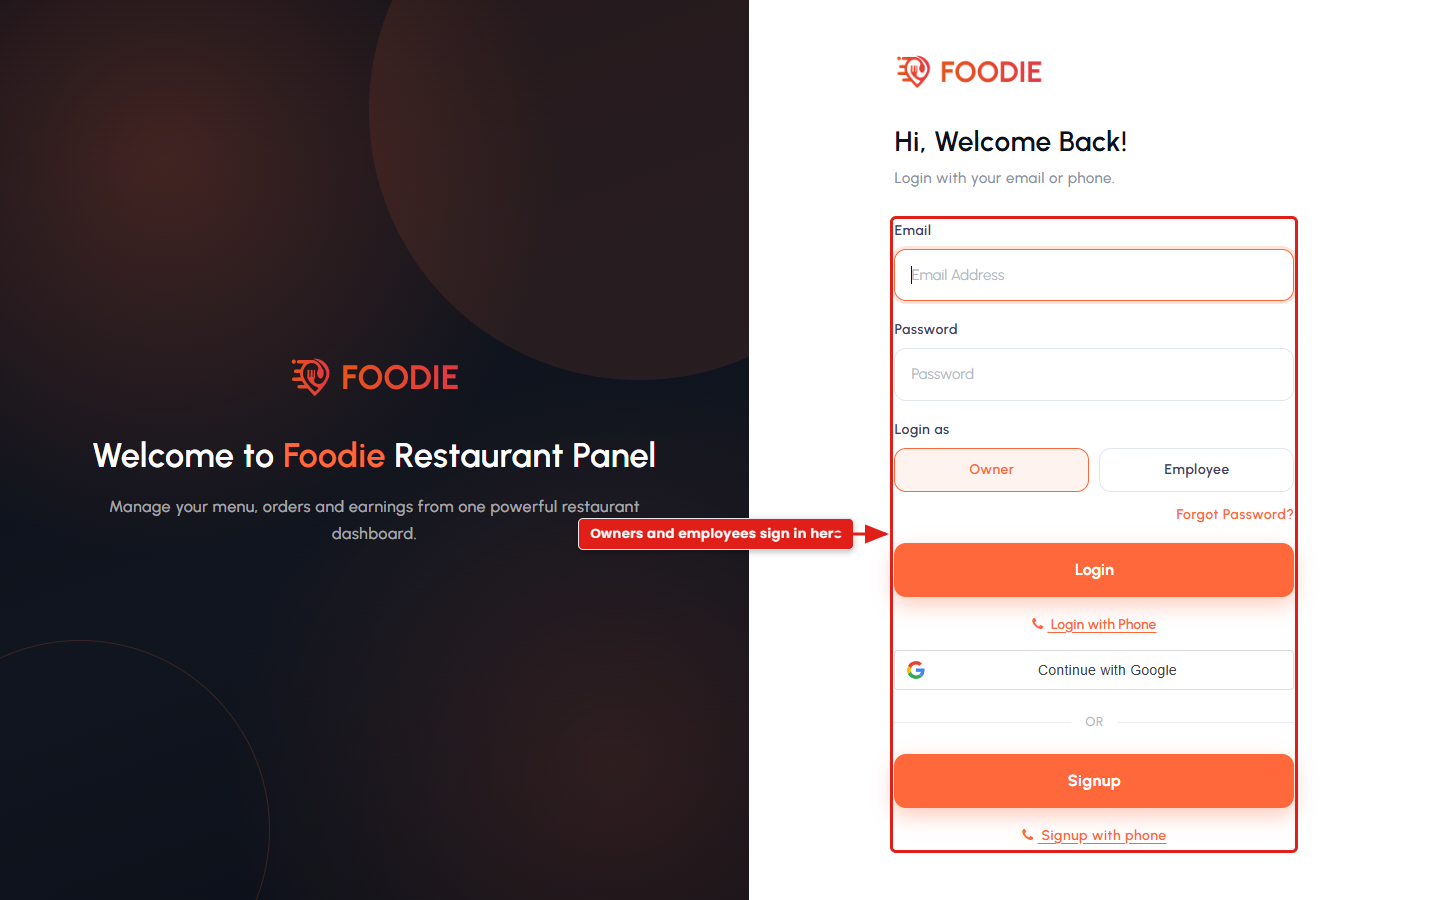
The panel is now ready at your chosen address, for example https://restaurant.yourdomain.com/. Restaurant owners register from this panel and then wait for admin approval (unless auto-approve restaurants is enabled under Settings → Feature Settings in the Admin Panel). If document verification is switched on, the owner must upload the required documents before the rest of the menu unlocks.
23. Restaurant Panel Menus Overview
The restaurant sidebar is built for the logged-in account, so it differs from one vendor to the next. An item appears only when the owner's account allows it and the matching platform feature is switched on in the Admin Panel — dine-in, advertisements, self delivery, employee management and document verification are all optional. Employees see only what their role permits.
23.1. Dashboard
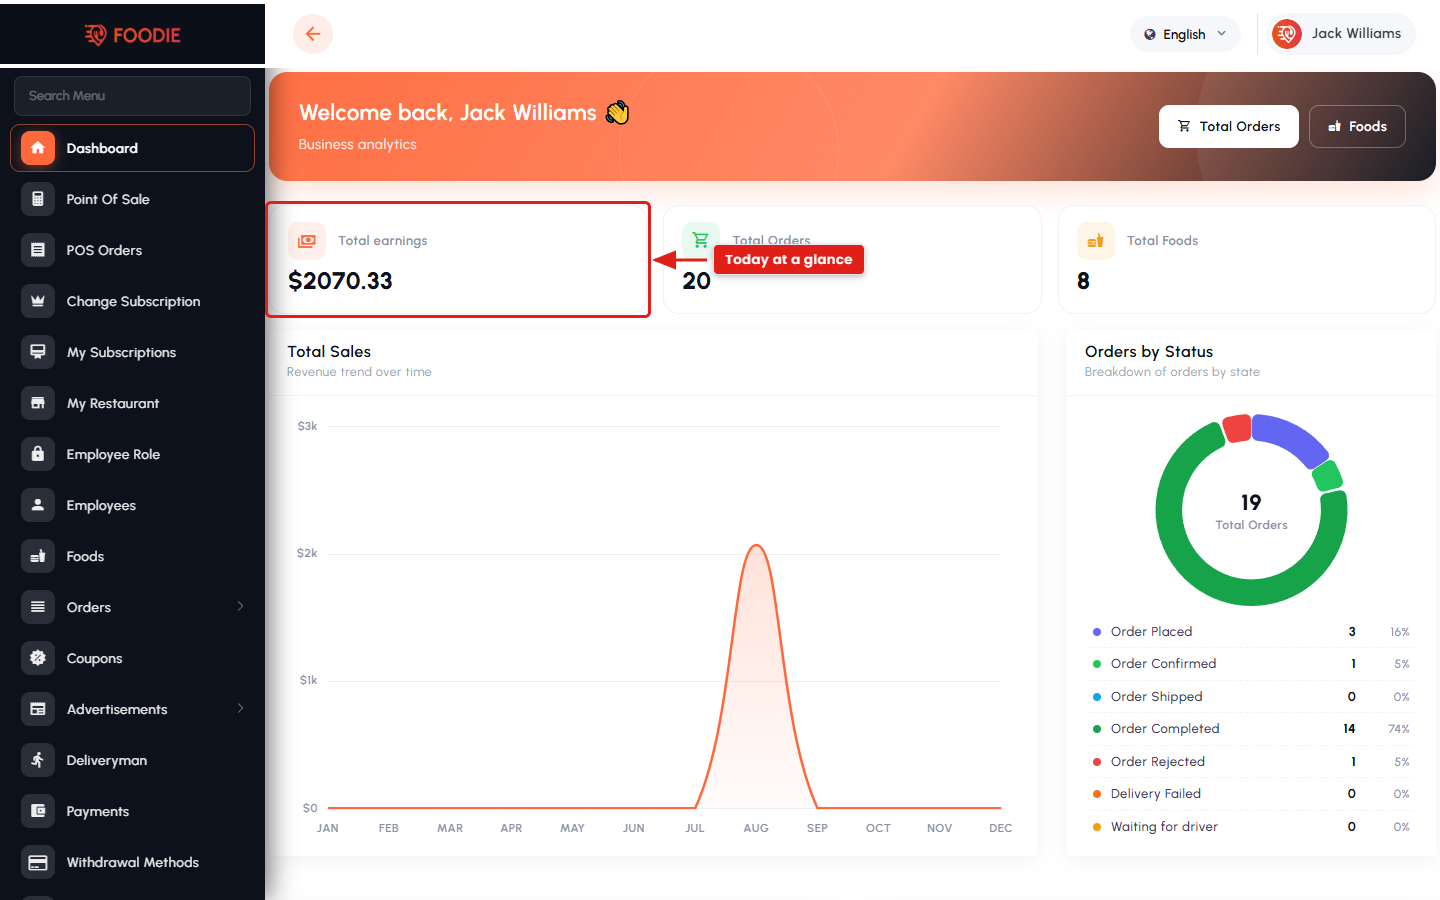
An overview of the restaurant's operations — active, ongoing and completed orders, latest orders, top-performing delivery staff and an earnings summary. It is the screen a restaurant keeps open during service.
23.2. Point of Sale
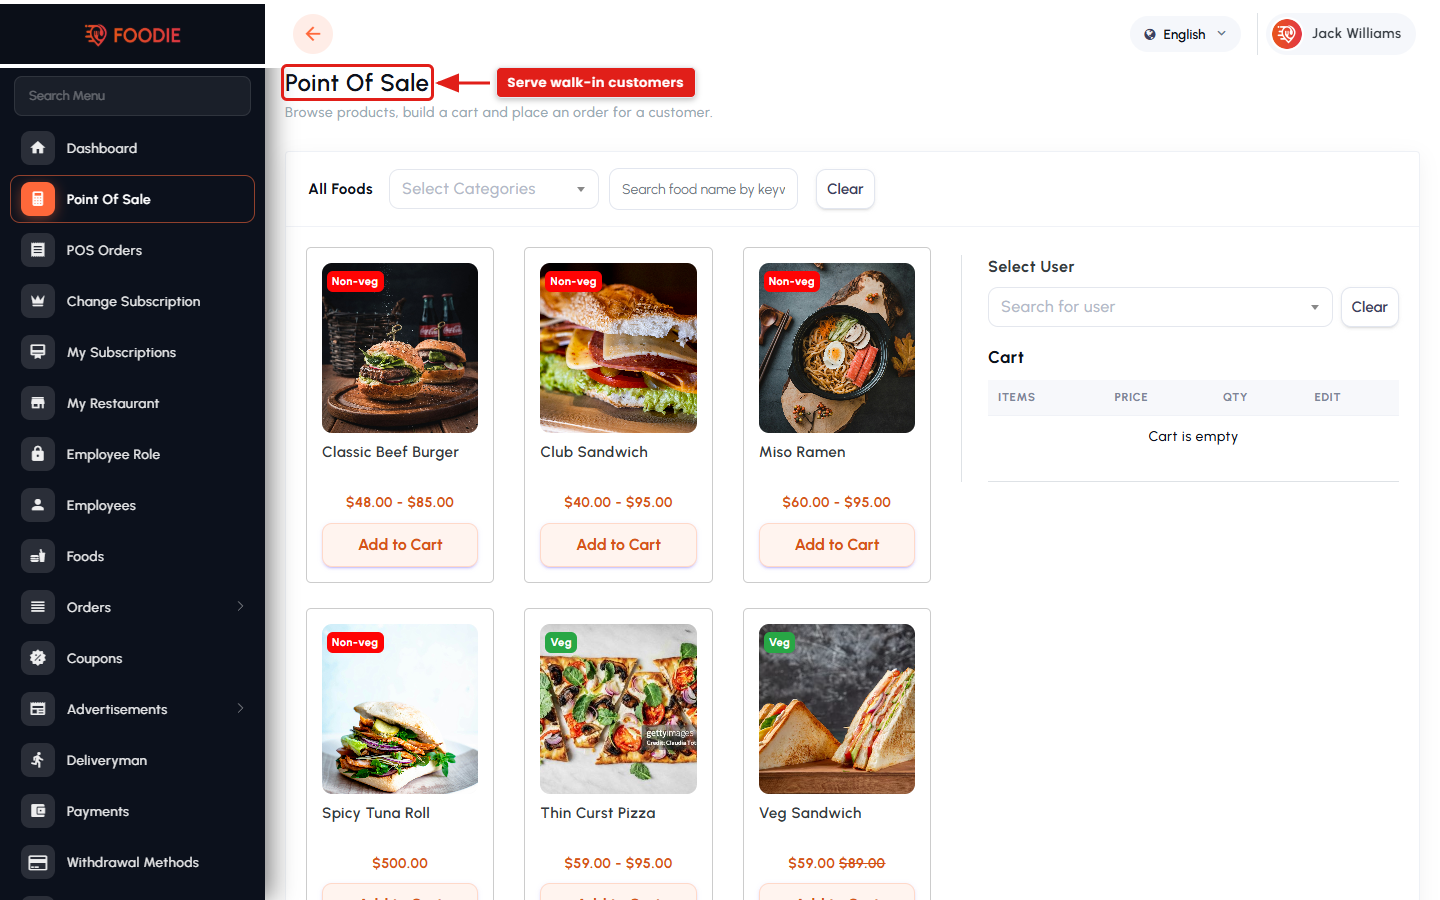
Take walk-in and counter orders from the panel: add items with add-ons and variants, apply taxes and discounts, and settle the payment. POS orders are recorded alongside app orders, so sales figures stay complete.
23.3. POS Orders
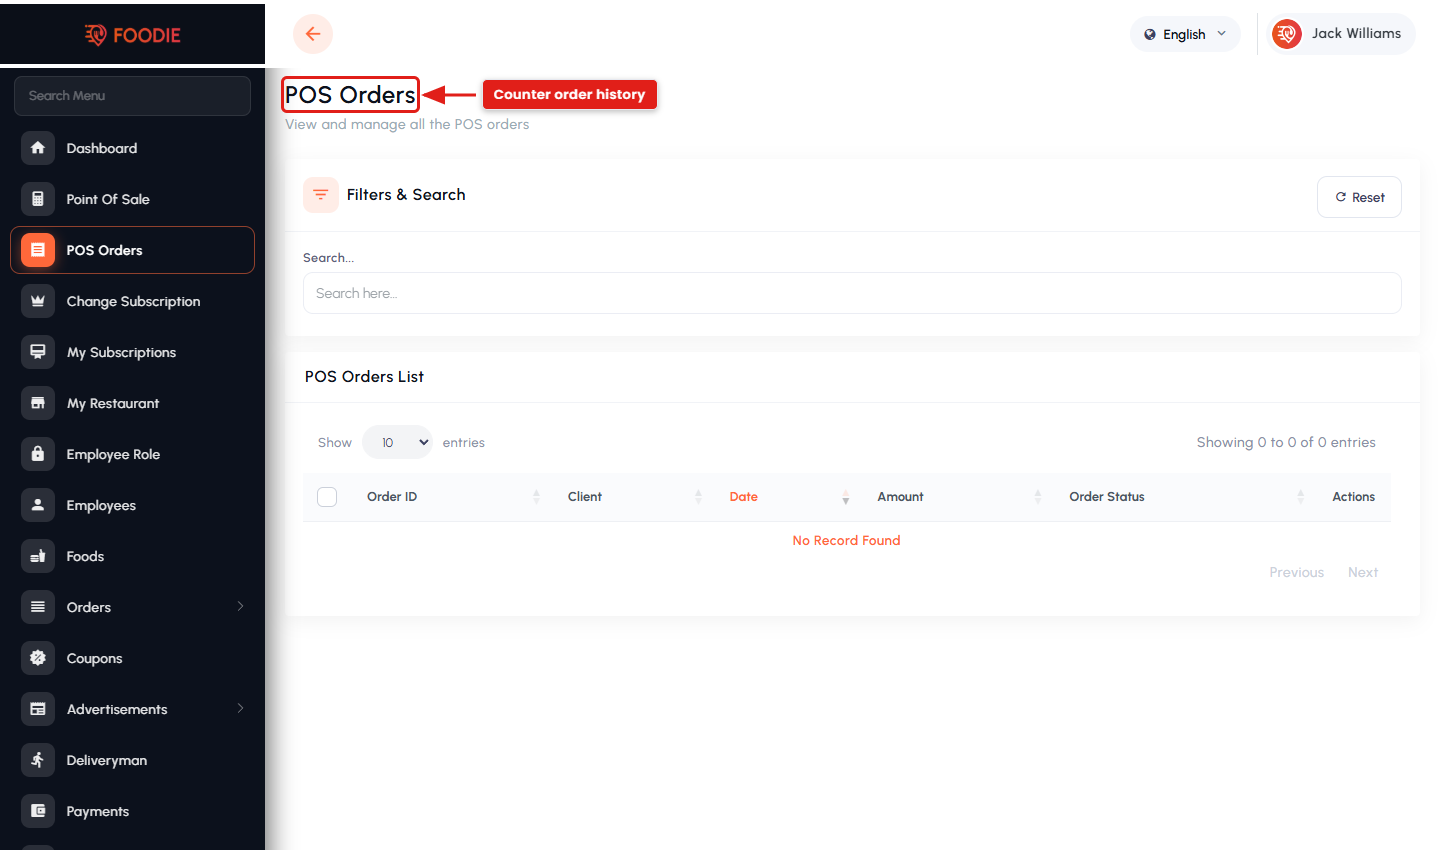
The history of orders created through the POS, with item breakdowns and totals — used for shift reconciliation and for resolving counter disputes.
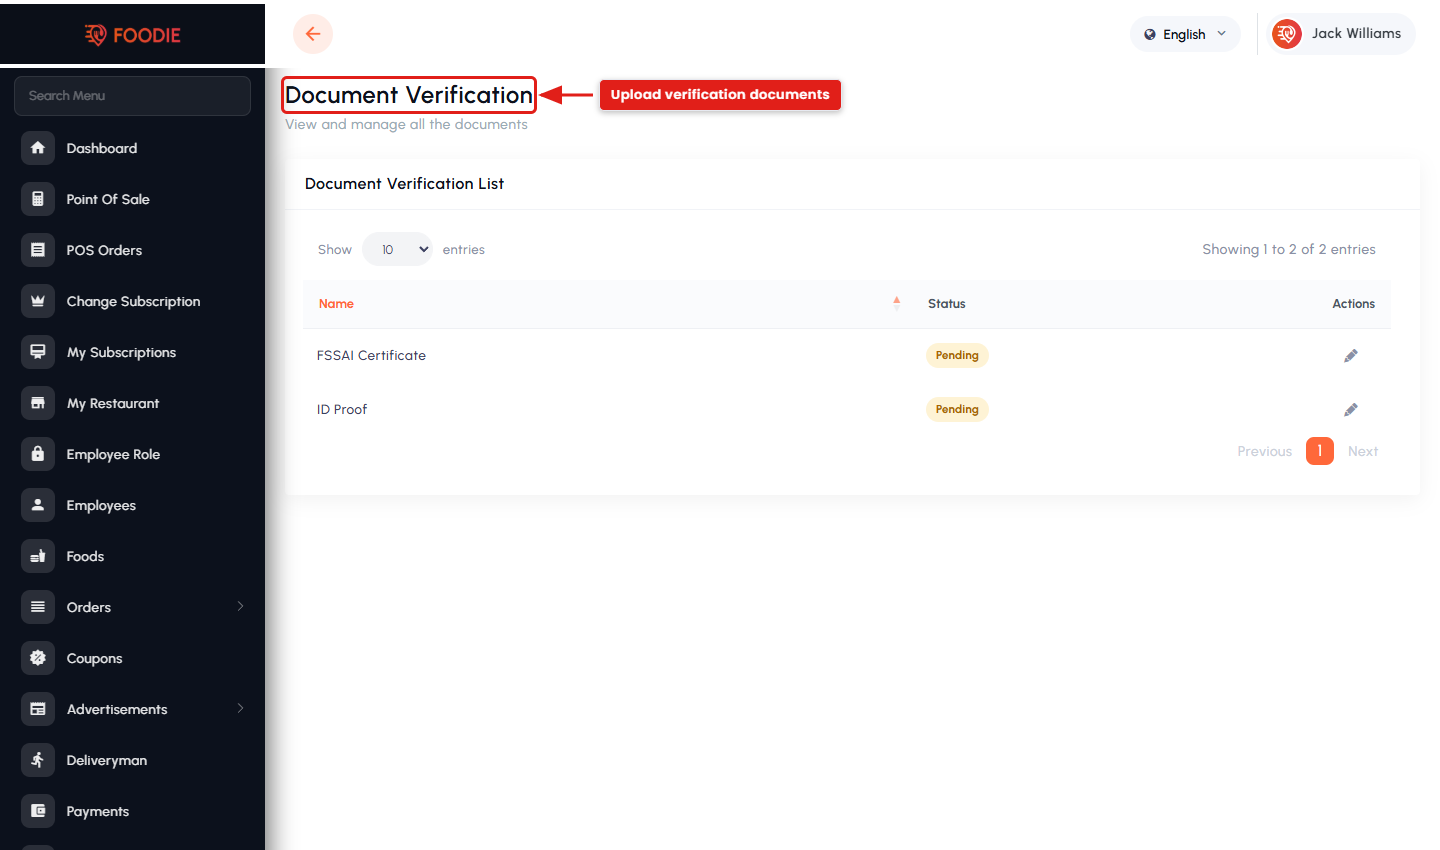
23.4. Documents
Where the owner uploads the documents the platform requires — identity proof, business licence, food-safety certificate and any others the admin defined. The account stays limited until the admin approves them. This menu is hidden when restaurant document verification is turned off.
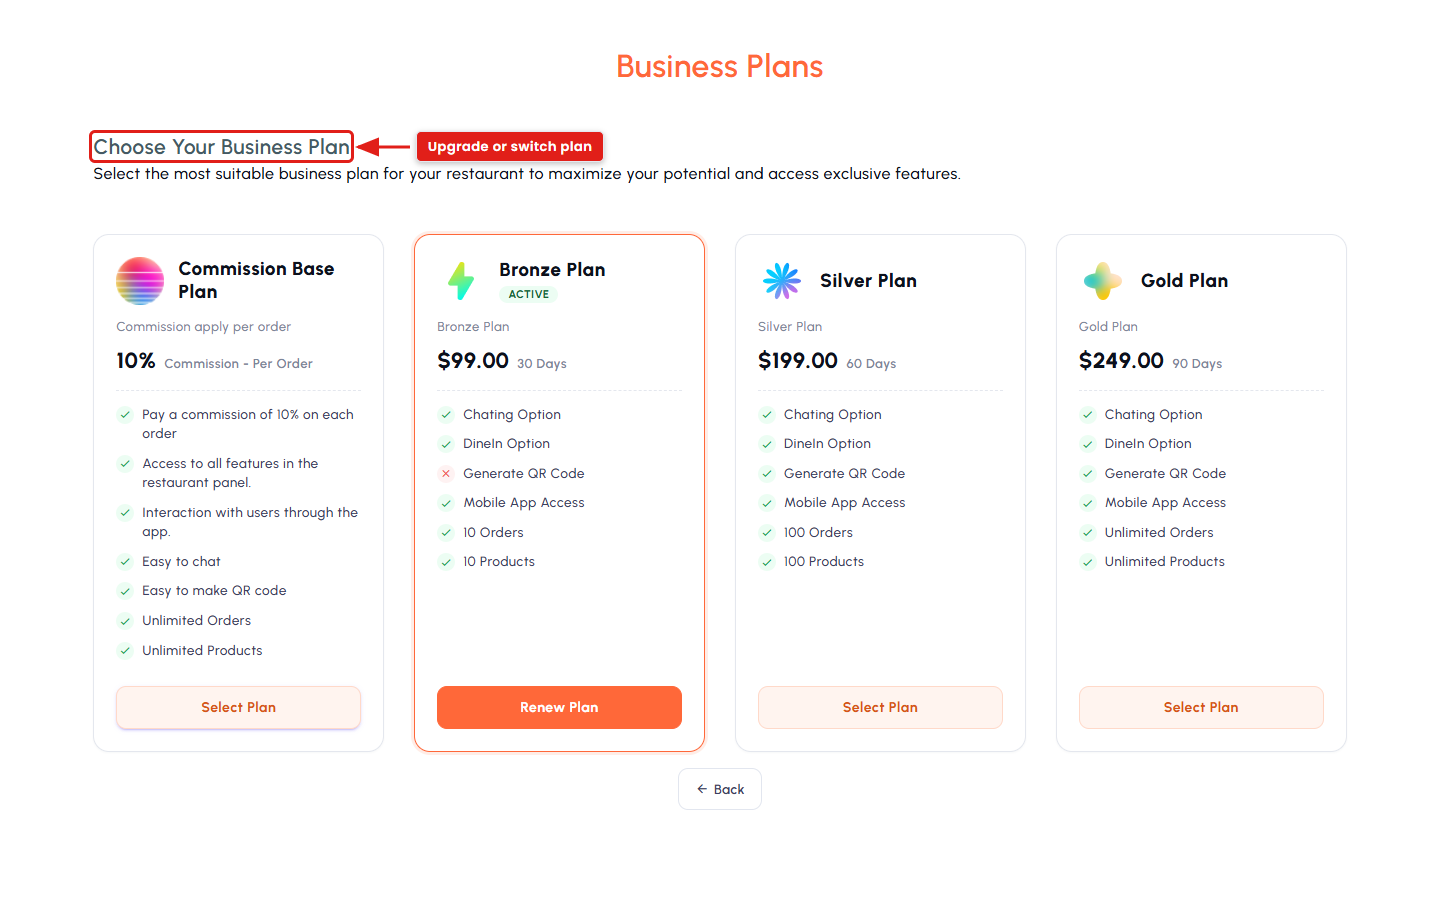
23.5. Change Subscription
Browse the available plans with their pricing and features, then upgrade, downgrade or switch. Shown when the platform runs on the subscription or hybrid business model.
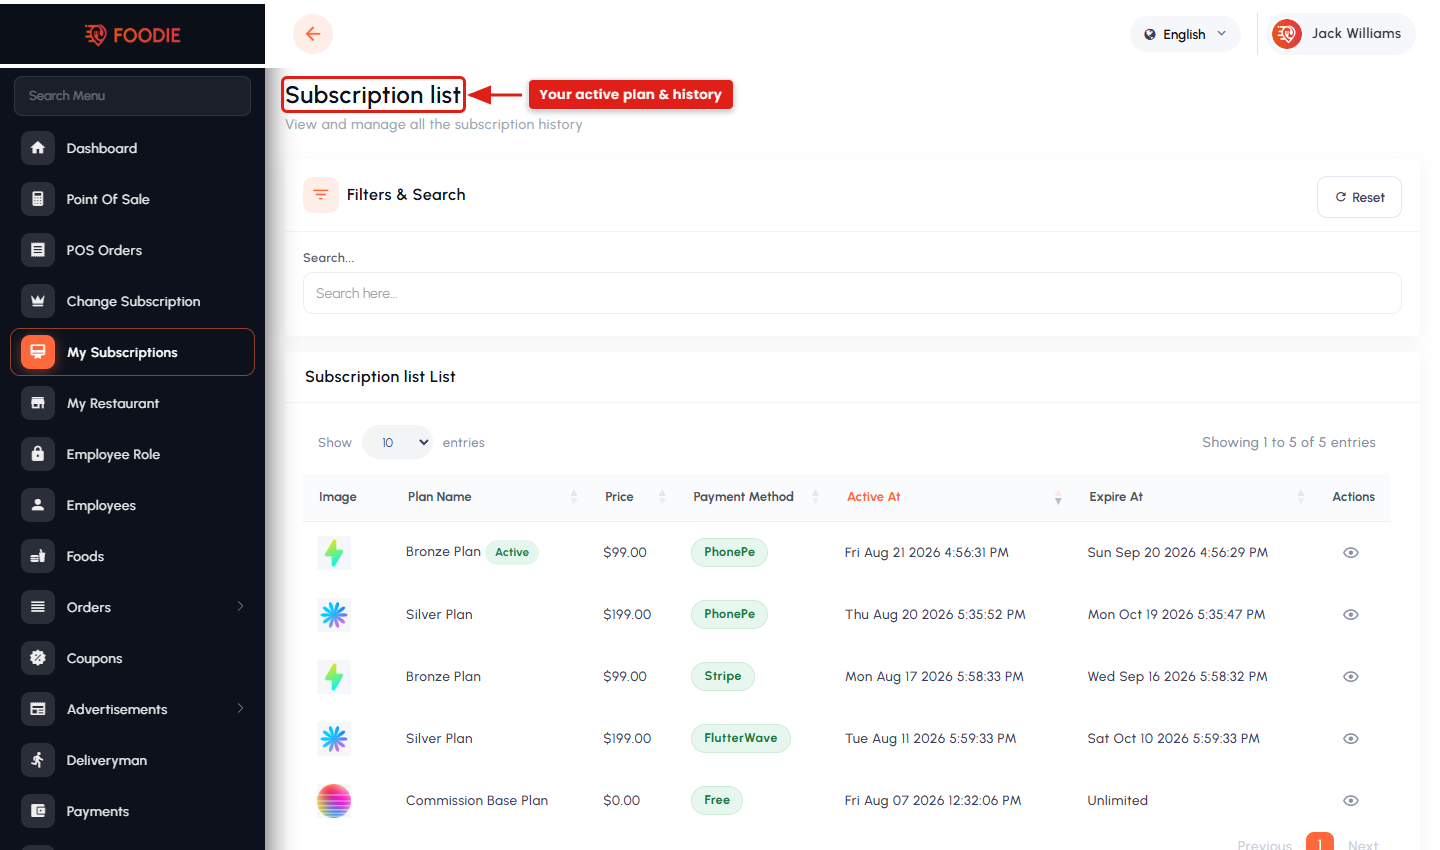
23.6. My Subscriptions
The owner's current and past subscriptions — plan, start and expiry dates, included features, payment history and renewal options.
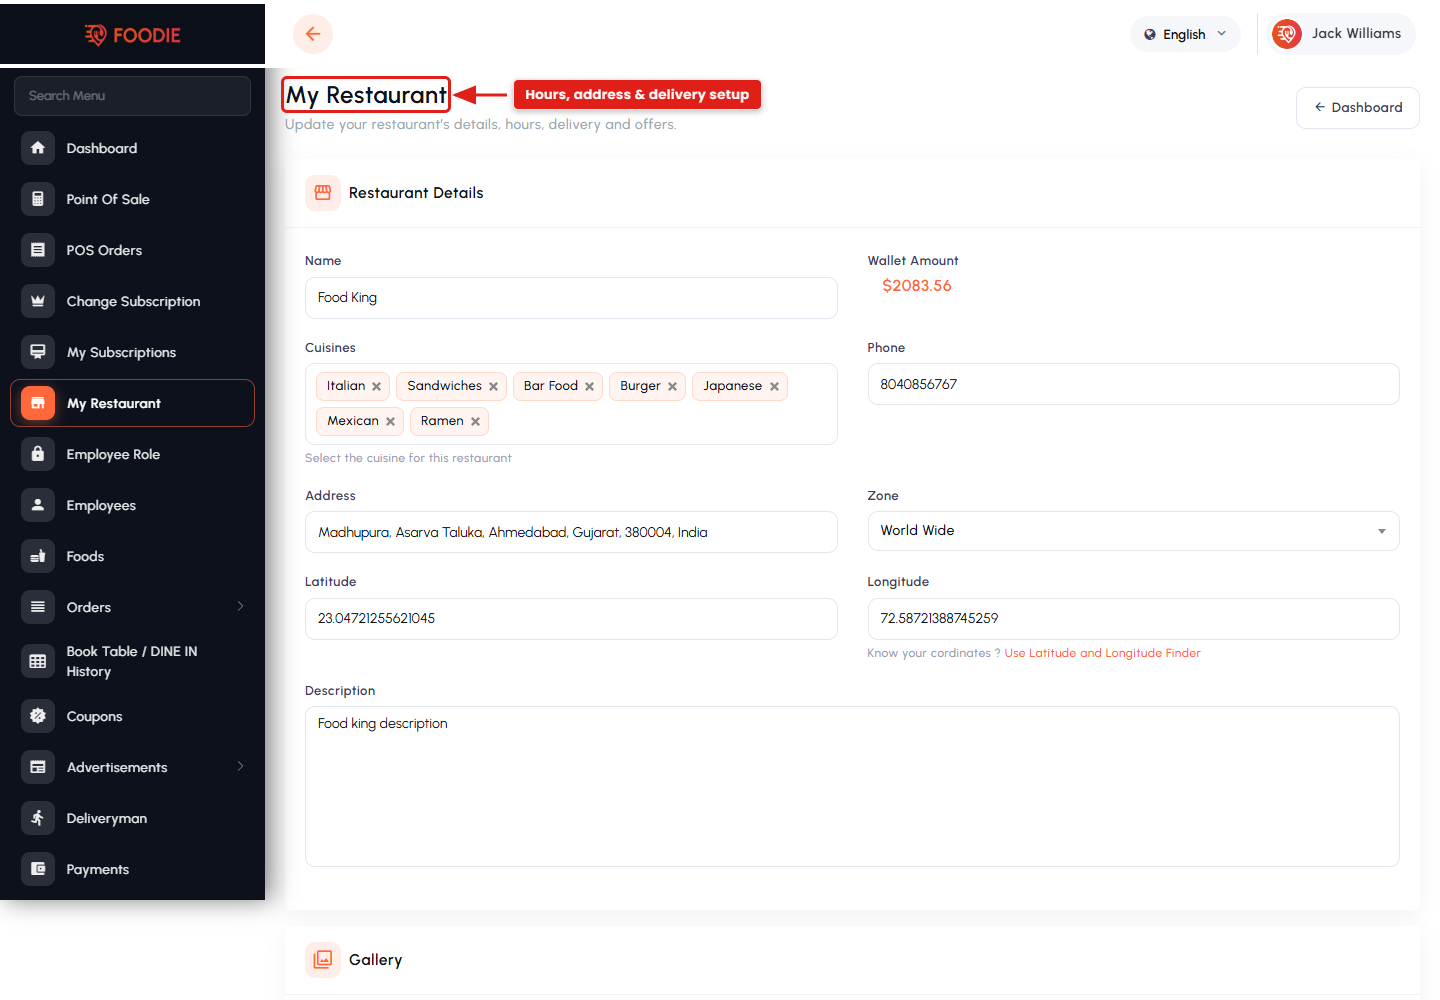
23.7. My Restaurant
All the details of the owner's own restaurant: name, logo and photos, address and map pin, contact details, opening hours, delivery settings, delivery radius, tax details and the open/closed status. Keeping this accurate is what makes the restaurant show up correctly in customer search.
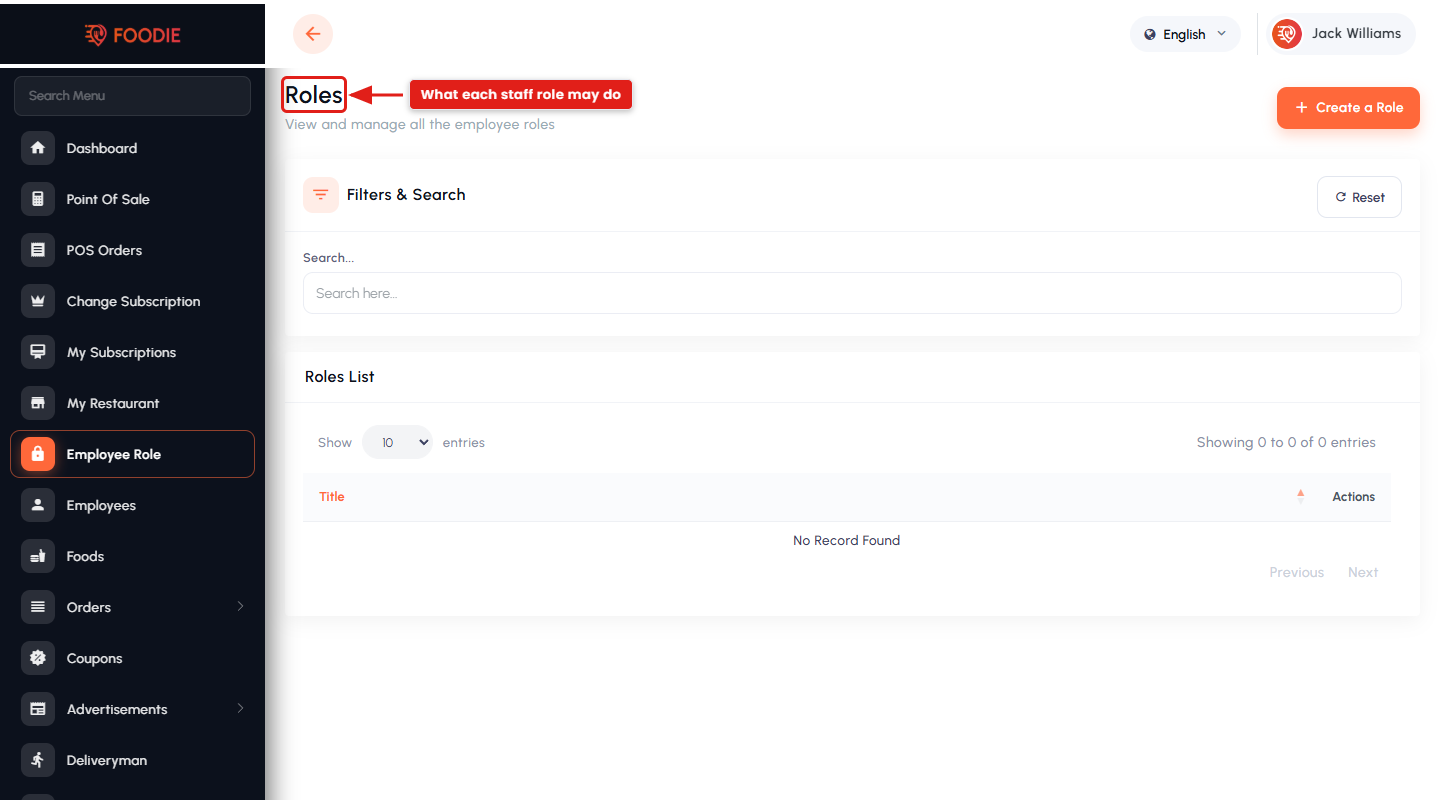
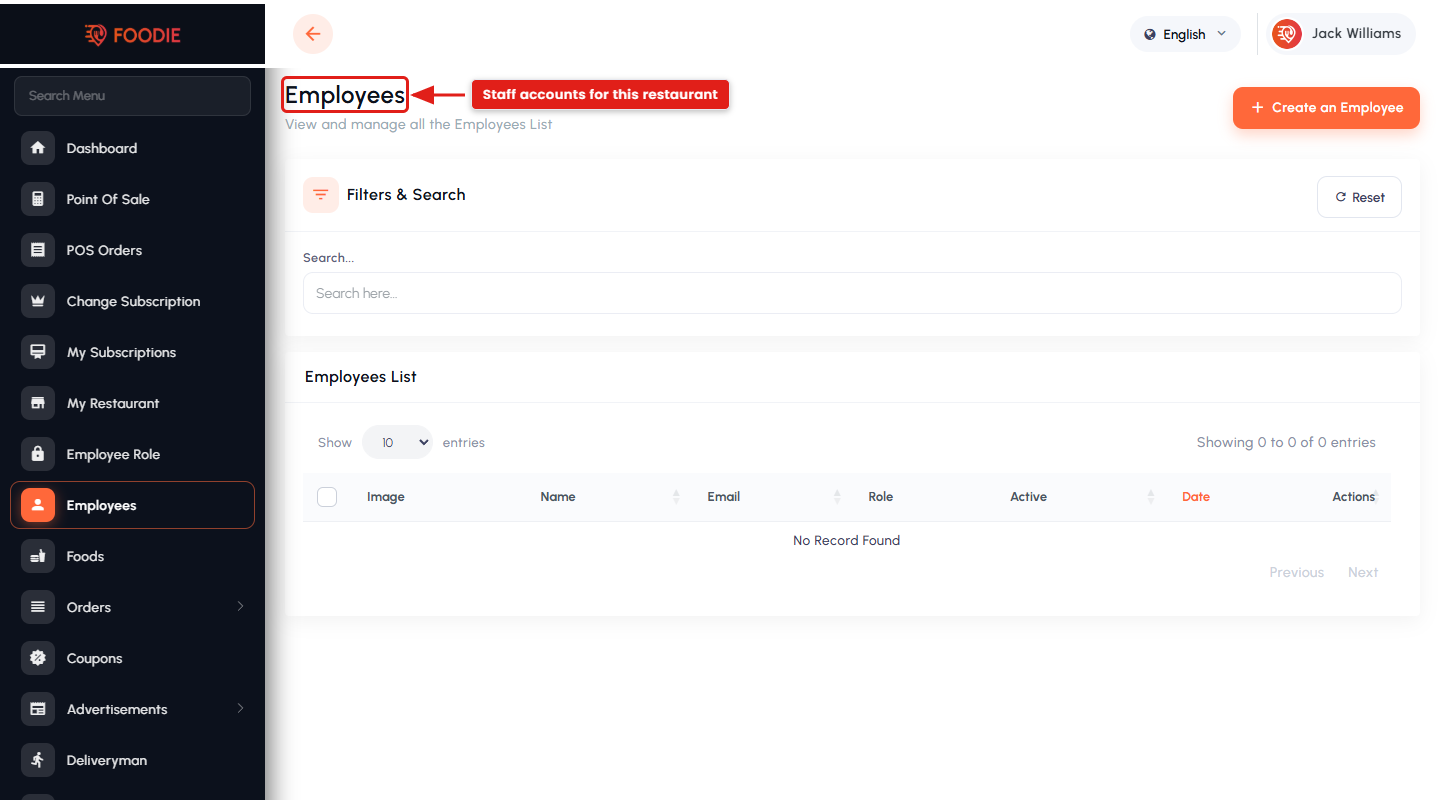
23.8. Employee Roles & Employees
When employee management is enabled, the owner can create roles that limit which panel screens a staff member may use, then create employee accounts and assign those roles. It lets a manager handle orders without seeing payouts, for example.
23.9. Foods
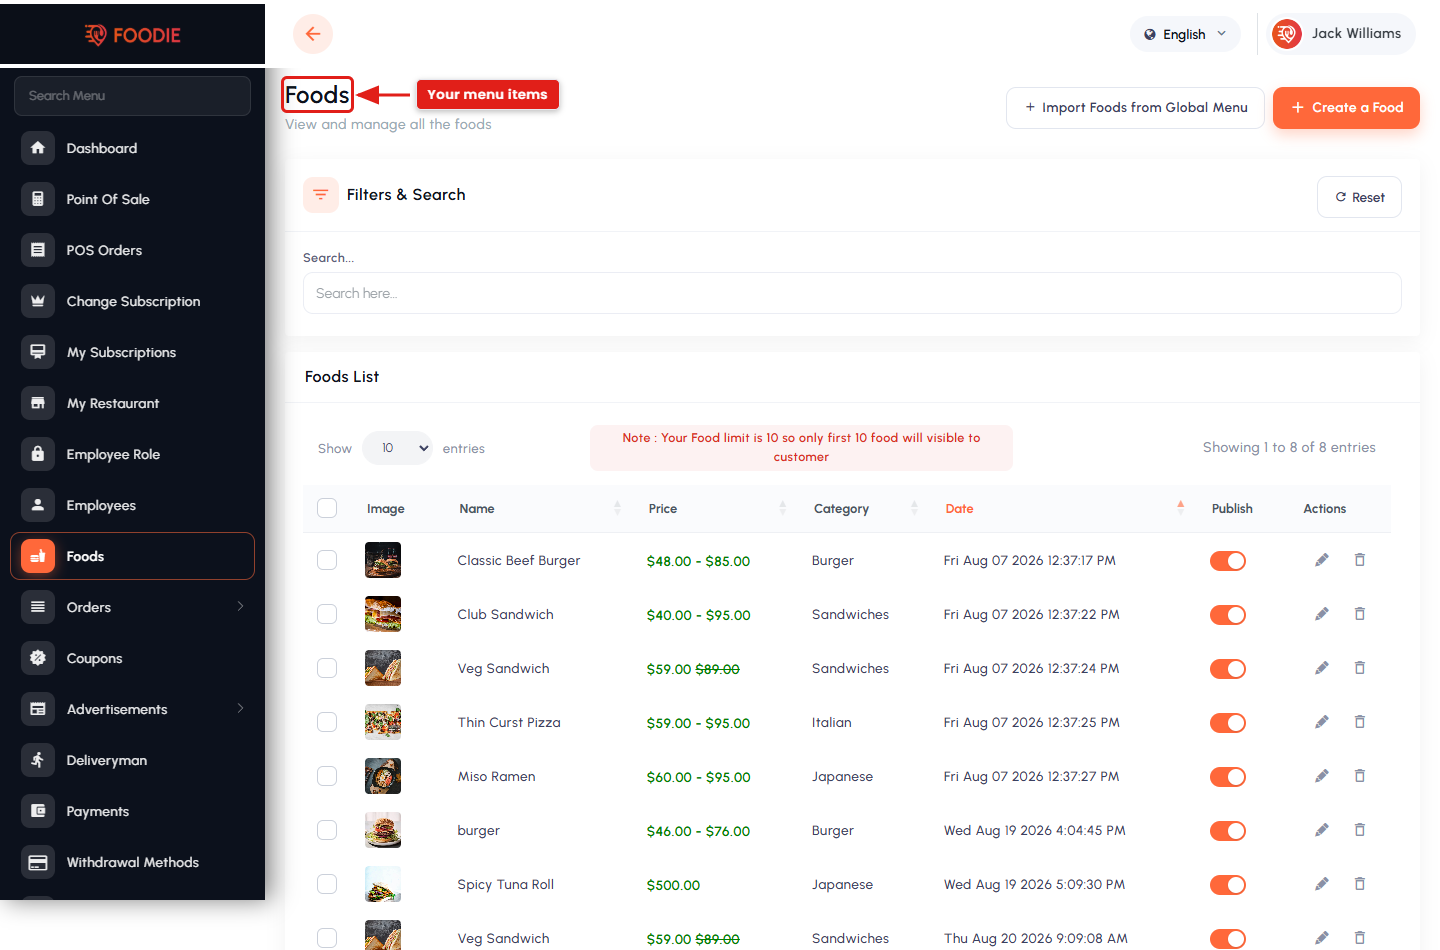
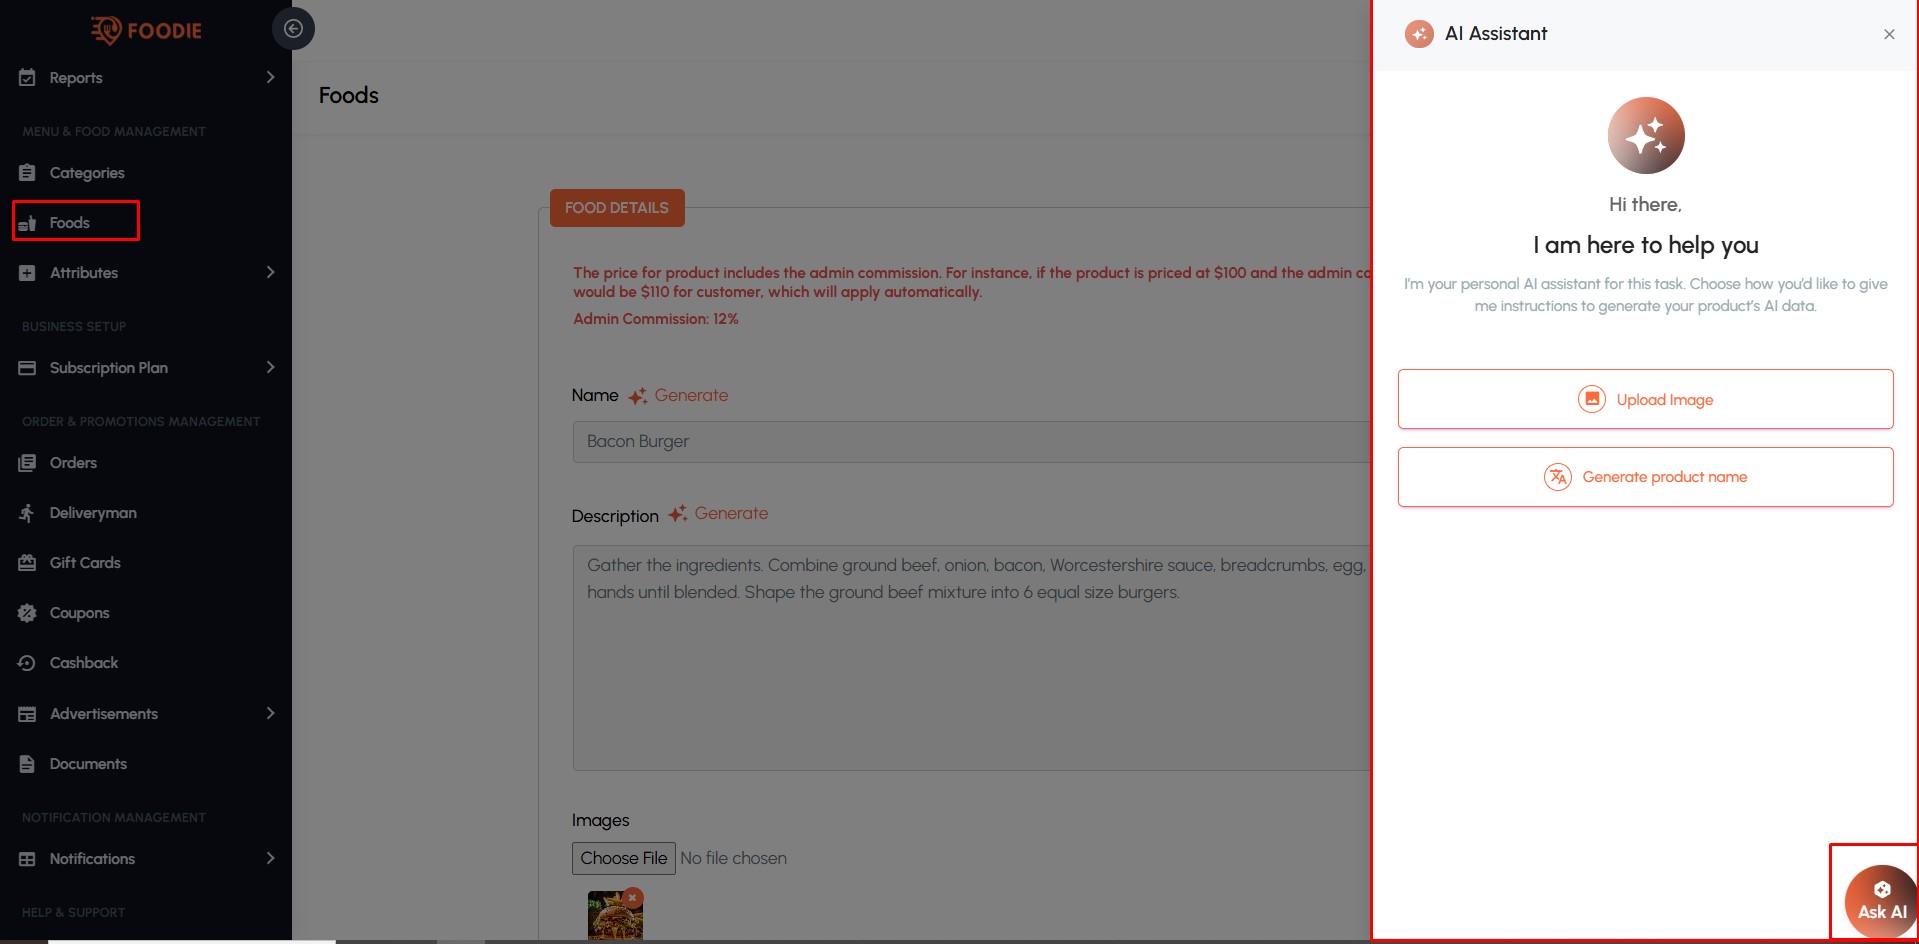
The restaurant's menu. Add, edit or remove items with name, category, price, description, images, availability, add-ons and variants such as size or flavour. Items can also be pulled in from the admin's global menu, which populates a new restaurant in minutes, and the AI assistant can draft an item's details from its photo and title.
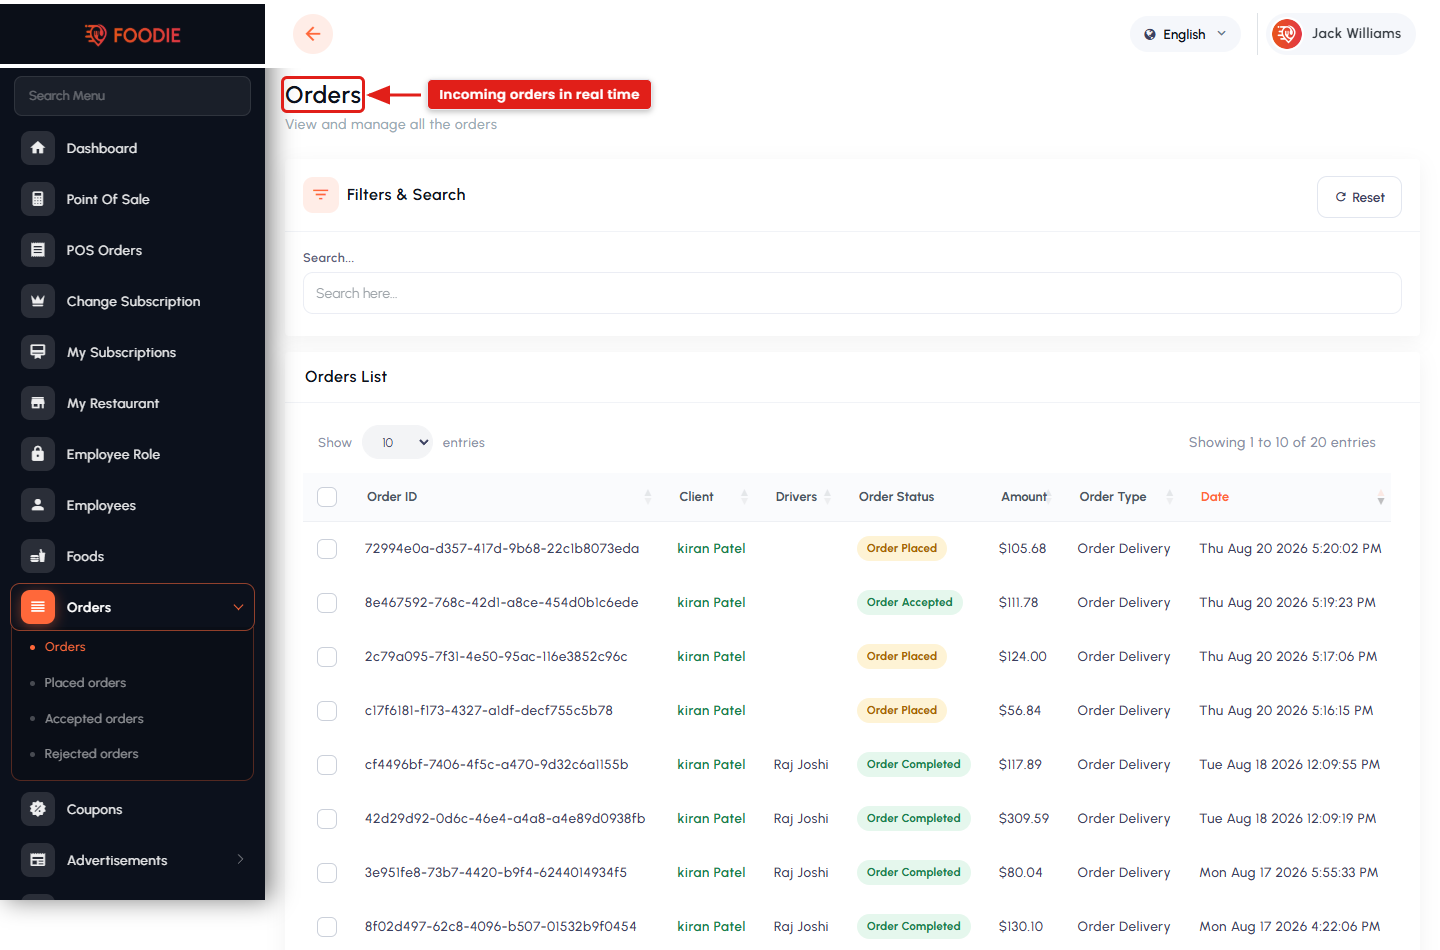
23.10. Orders
Every order the restaurant receives, with the customer, items, totals, payment status and delivery type. Move an order through its states in real time — accepted, preparing, ready for pickup, handed to the driver, delivered — assign a deliveryman when self delivery is on, cancel when necessary, and print the order slip.
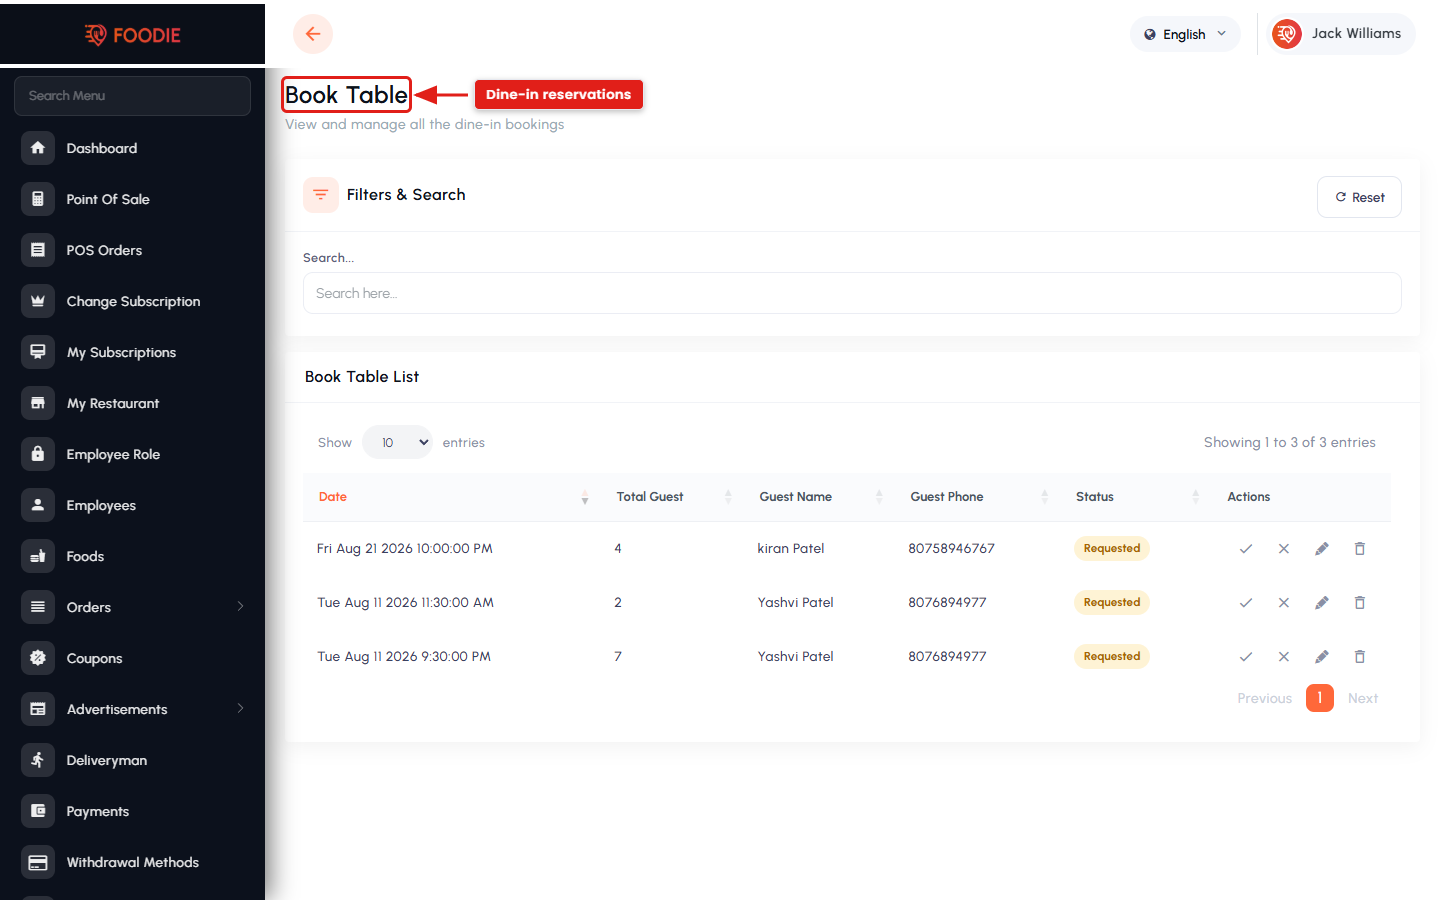
23.11. Book Table / Dine-In History
Table booking and dine-in requests: customer name, contact, number of guests, date and time slot. Confirm, modify or cancel a reservation, and review past and upcoming bookings. Shown when the dine-in feature is enabled for restaurants.
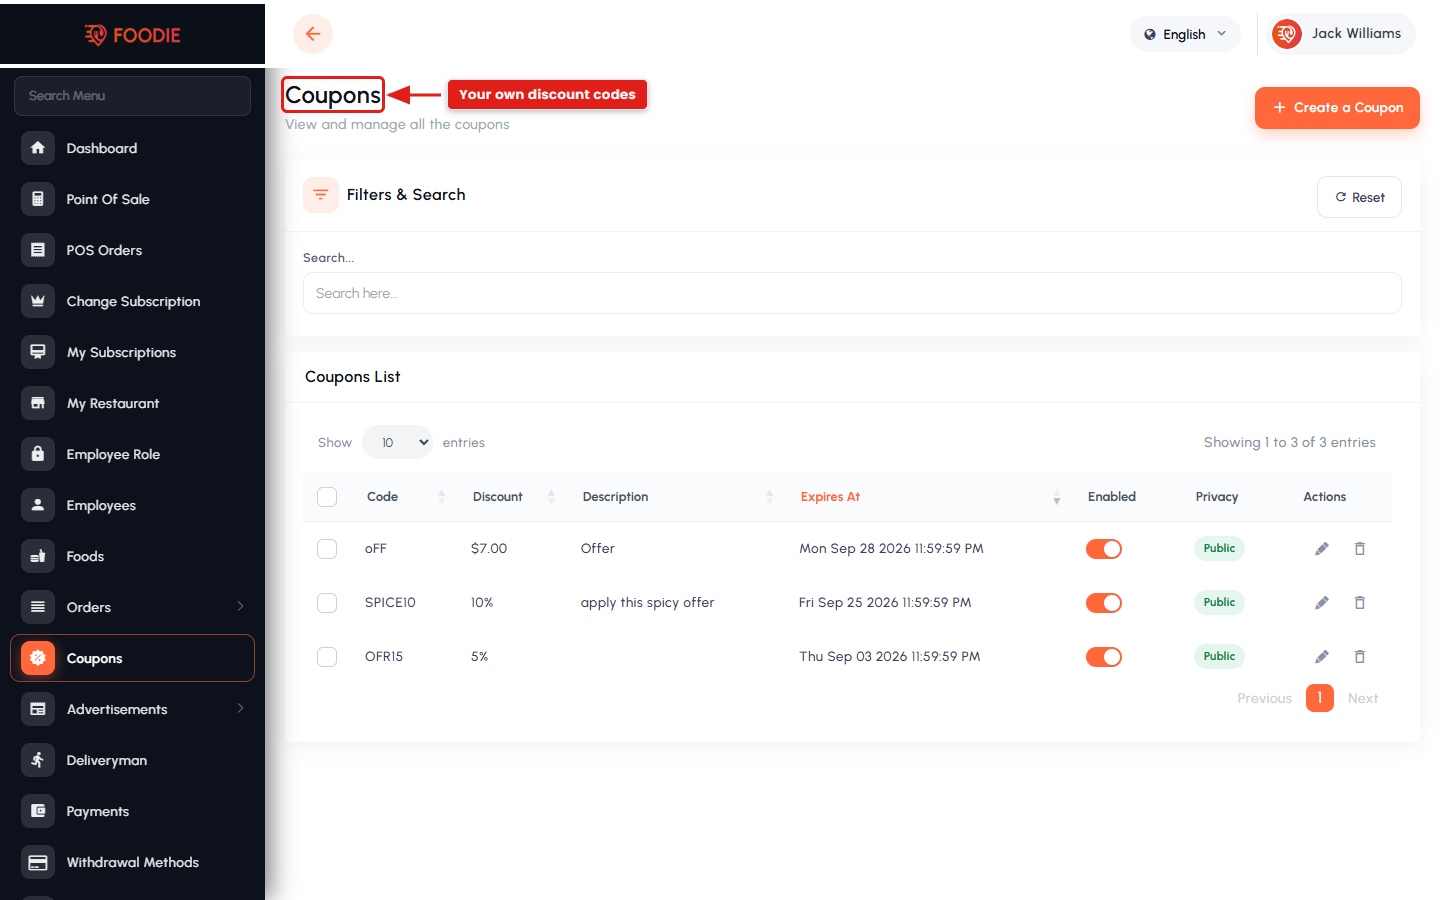
23.12. Coupons
Discount codes the restaurant runs itself — code, discount type (percentage or fixed), minimum order value, validity period and usage limits, applied to specific items or the whole restaurant. Validation happens automatically at checkout.
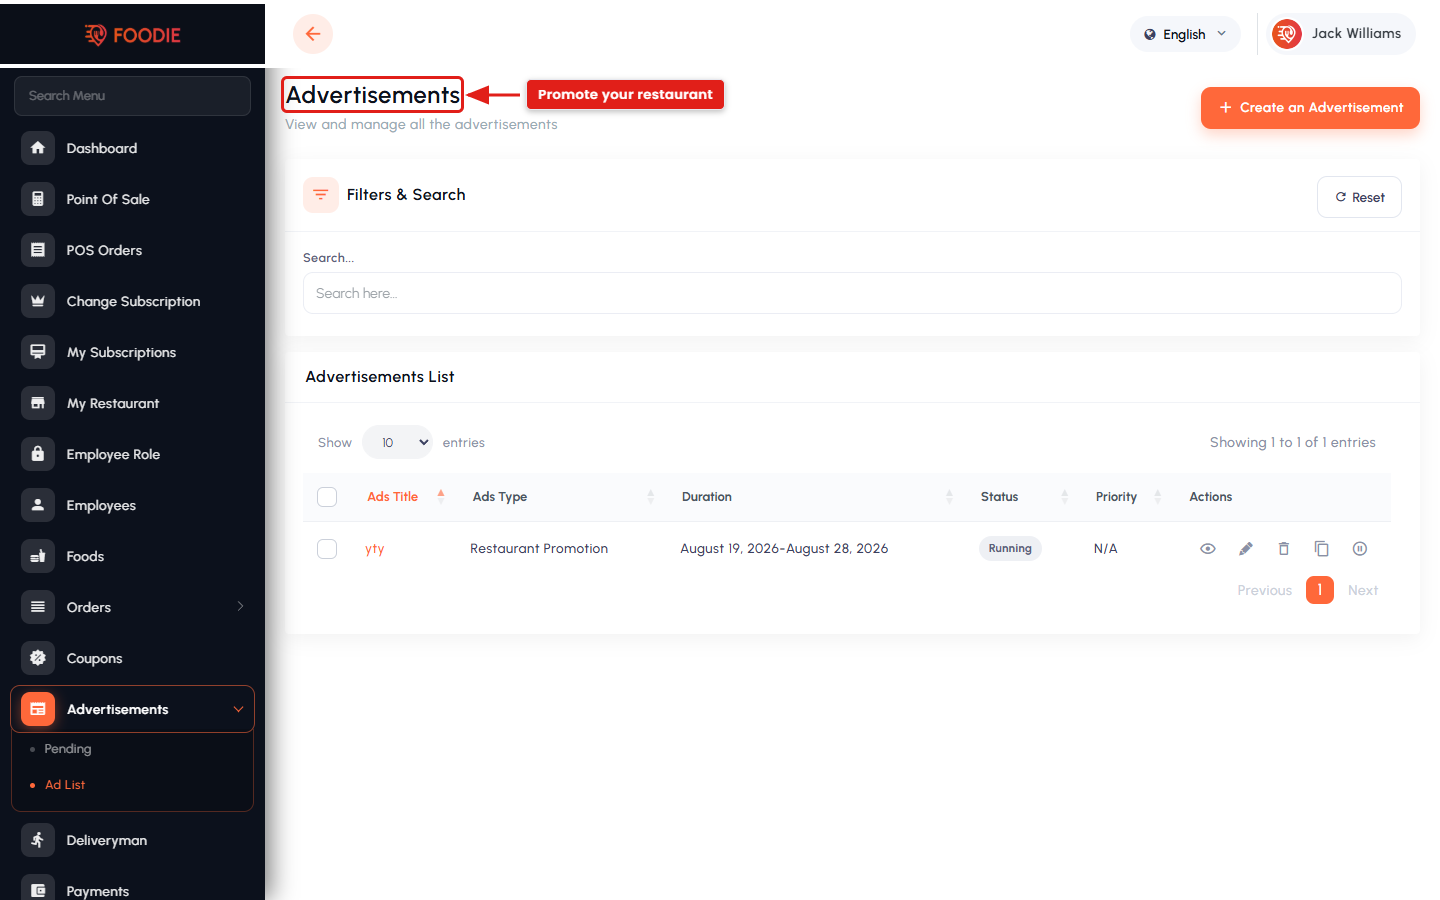
23.13. Advertisements
Create promotional slots for the restaurant or a specific dish — banner, title, link, placement and duration — and submit them to the admin for approval. Shown when the advertisement feature is enabled.
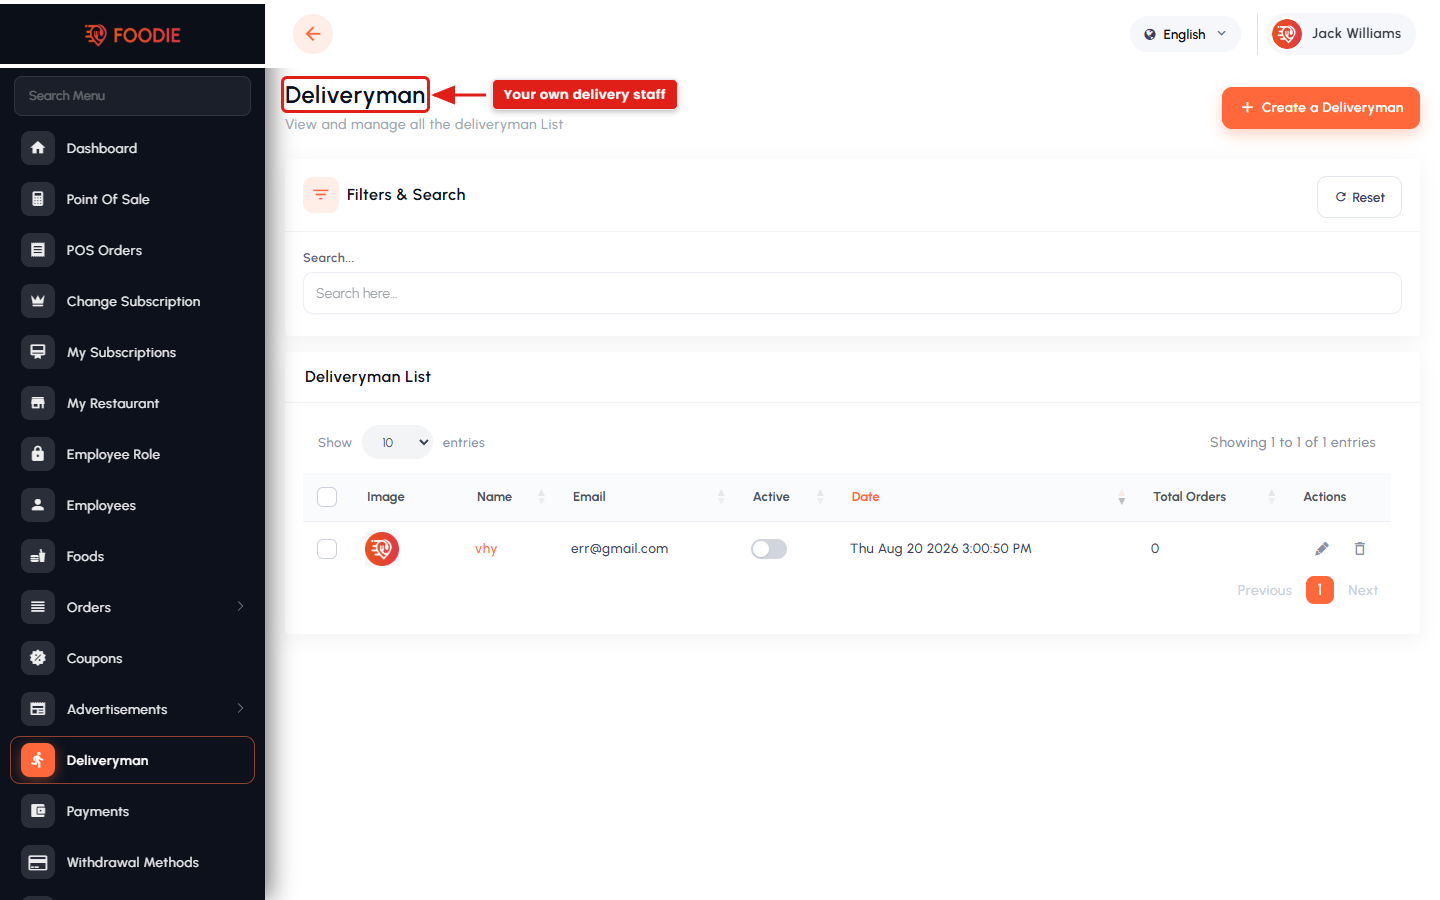
23.14. Deliveryman
The restaurant's own delivery staff under the self delivery feature. Add, edit or remove deliverymen, see who is available or busy, and assign them to orders. Shown when self delivery is enabled.
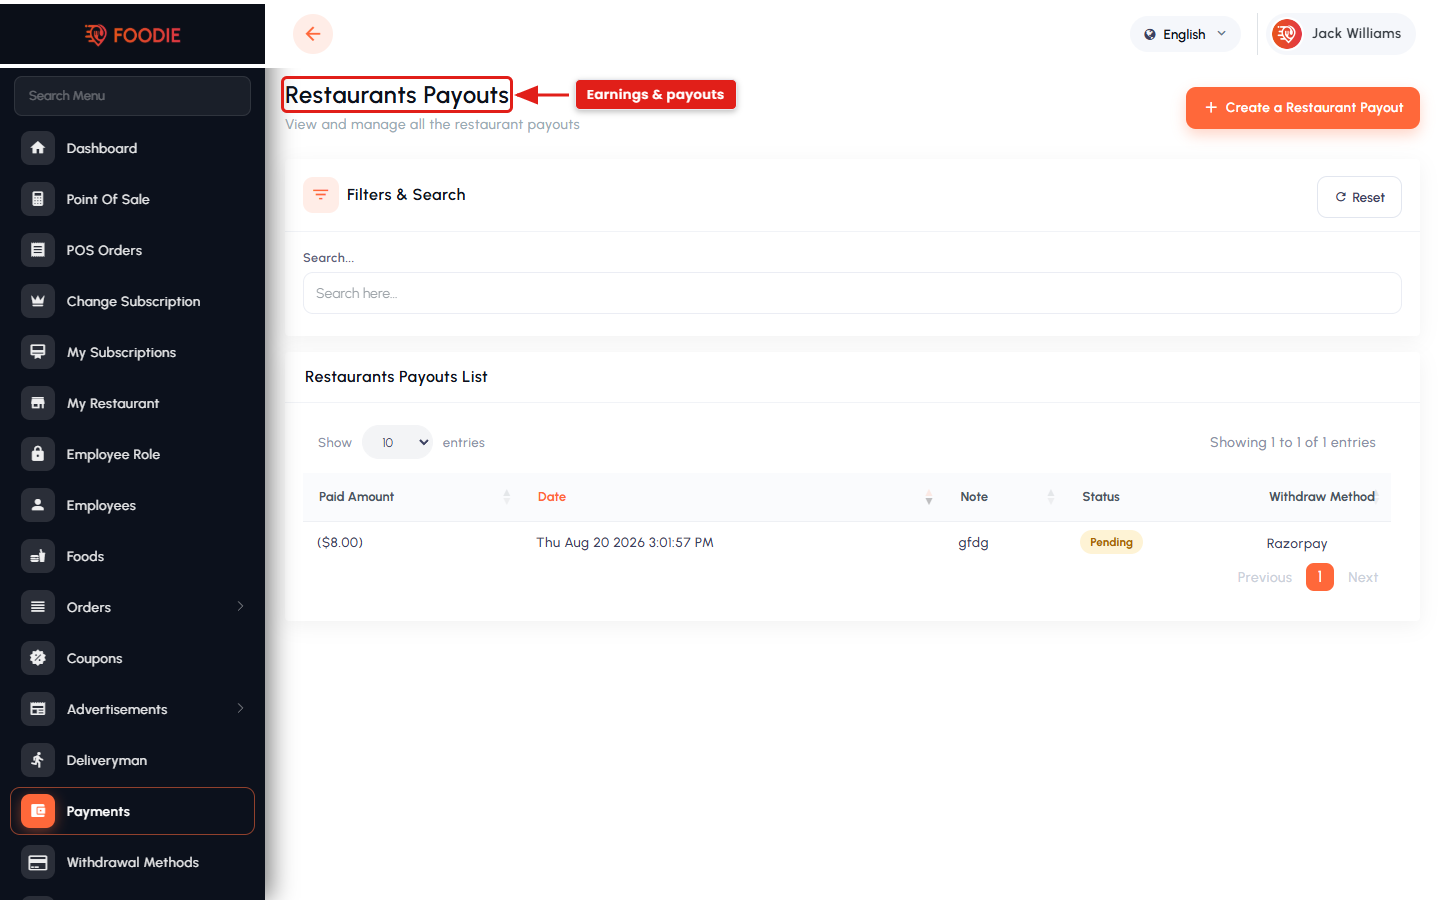
23.15. Payments
Earnings and payout history — total revenue, commission deducted, completed payouts and the pending balance, with the transaction detail behind each line. Payout requests are raised from here when manual payouts are in use.
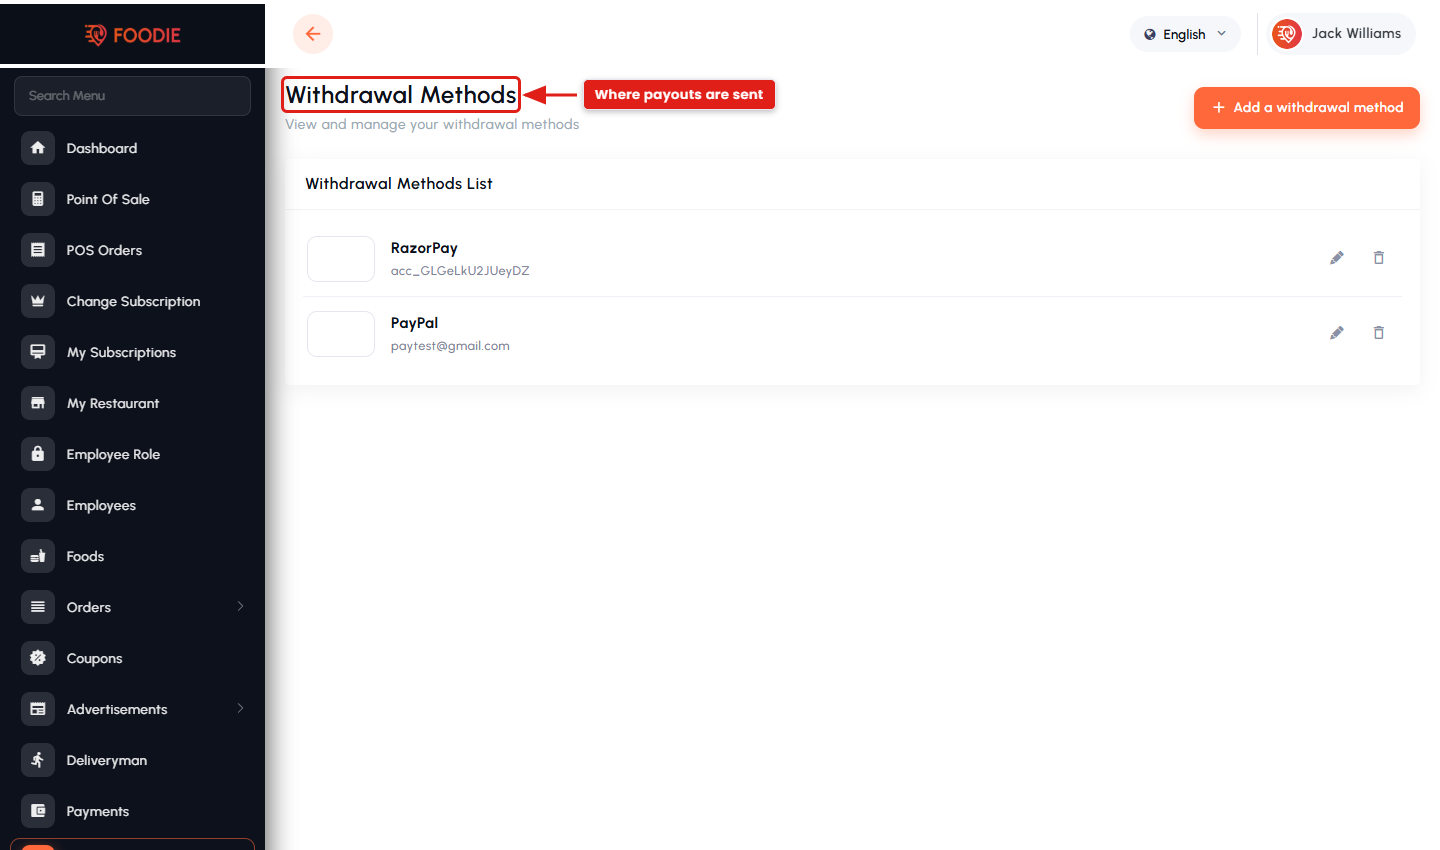
23.16. Withdrawal Methods
The accounts the owner wants to be paid into — bank transfer, PayPal or another supported method. The admin may review these before approving a payout.
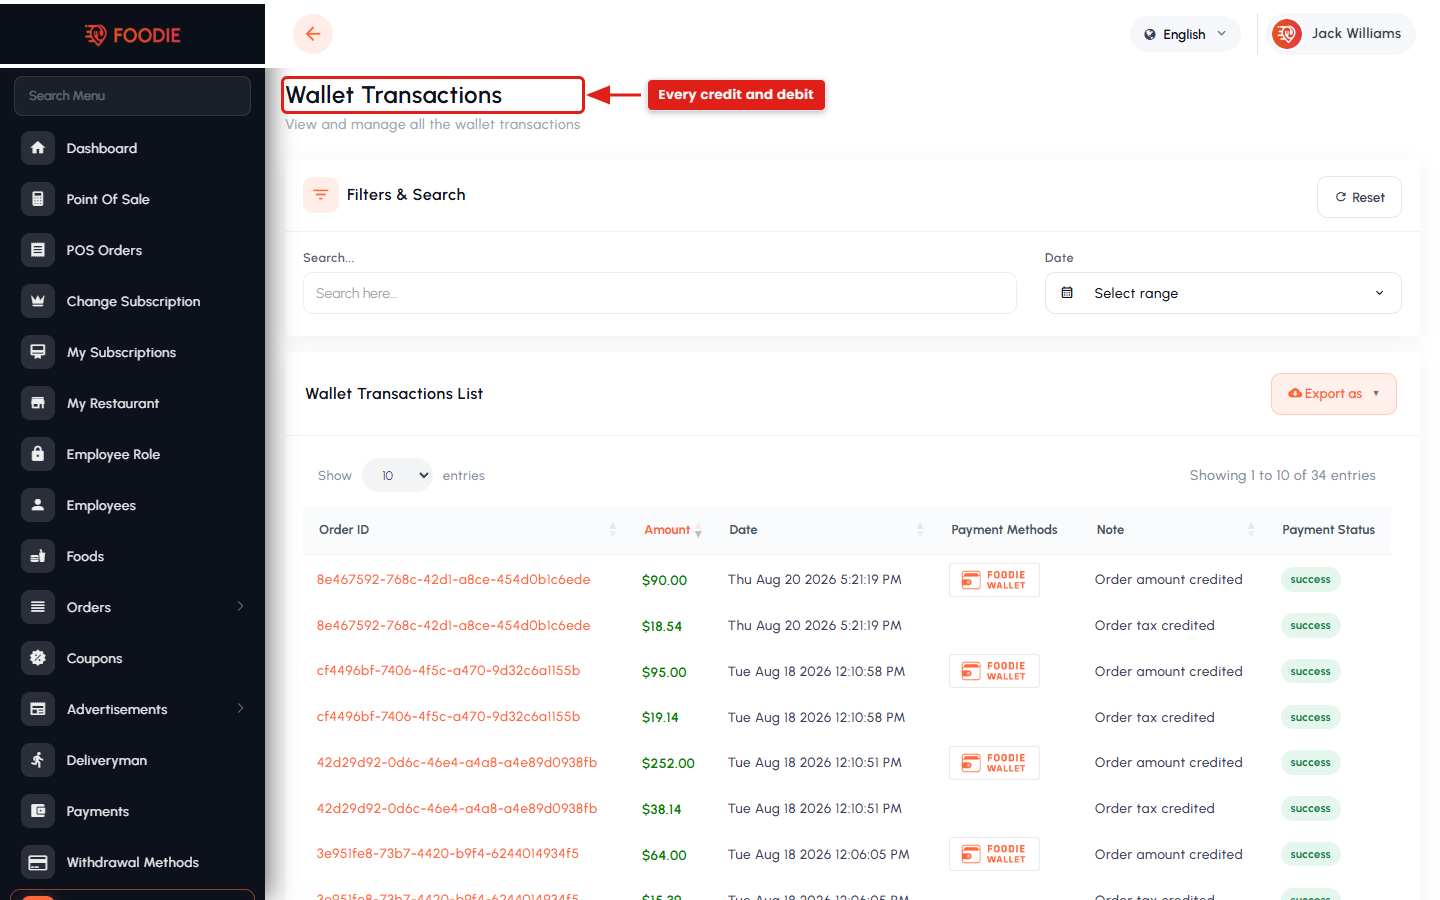
23.17. Wallet Transactions
Every credit and debit on the restaurant's wallet — received payments, cashback, order adjustments and withdrawals — each with date, description, amount and resulting balance.
24. Website Panel Setup
The Website Panel is the customer-facing ordering site — a Laravel 12 application that reads and writes Firestore through the Firebase JS SDK. Upload it to your main domain (recommended) and extract it.
24.1. Upload the files
24.1.1. Connect over FTP/SFTP using your server IP, username and password — port 21 for FTP, port 22 for SFTP.
24.1.2. Transfer the ZIP file to the server, for example /var/www/html.
24.1.3. Extract it from the terminal or the cPanel File Manager:
unzip your-application.zip
24.1.4. Point the domain's document root at the project's public/
folder.
24.2. Configure the panel
24.2.1. Install the dependencies and generate the application key:
composer install
cp .env.example .env
php artisan key:generate
24.2.2. Create a MySQL database for this panel and import the
.sql file supplied with the Website Panel package — through
phpMyAdmin → Import, or from the command line:
mysql -u your_db_user -p your_database < website_panel.sql
There is no php artisan migrate step; the .sql file already contains the
tables and default data.
24.2.3. Add the same Firebase credentials used by the other panels:
APP_NAME=Foodie
APP_URL=https://yourdomain.com

DB_DATABASE=your_database
DB_USERNAME=your_db_user
DB_PASSWORD=your_db_password

FIREBASE_PROJECT_DB=(default)
FIREBASE_APIKEY=
FIREBASE_AUTH_DOMAIN=
FIREBASE_DATABASE_URL=
FIREBASE_PROJECT_ID=
FIREBASE_STORAGE_BUCKET=
FIREBASE_MESSAAGING_SENDER_ID=
FIREBASE_APP_ID=
FIREBASE_MEASUREMENT_ID=

# Required for "Sign in with Google"
GOOGLE_CLIENT_ID=
24.3. Google login
Add your Google Client ID exactly as described for the Restaurant Panel:
- Firebase Console → Authentication → Sign-in method → Google.
- Expand Web SDK configuration and copy the Web client ID.
- Paste it into
GOOGLE_CLIENT_IDin this panel's.env. - In Google Cloud Console → APIs & Services → Credentials, add your
website domain to the OAuth client's Authorized JavaScript origins and add
https://yourdomain.com/__/auth/handlerto the Authorized redirect URIs. - Add the domain under Firebase Authentication → Settings → Authorized domains.
Notes: use the same Firebase credentials here that you set for the
Admin and Restaurant panels, including FIREBASE_PROJECT_DB. All three panels and the
mobile apps must point at one Firebase project and one Firestore database.
24.4. Go live
The site is now ready at your domain, for example https://yourdomain.com/. Its home banners, footer and content pages are all driven from the Admin Panel — see Customizing Branding.
25. Create Google Map API Key
Foodie uses Google Maps for restaurant search, address selection, delivery-distance calculation and live driver tracking. One key can serve the panels and the apps, but restricting it per platform is safer.
25.1. Go to the Google Maps Platform and click Get started.
25.2. Open the Google Cloud Console, go to Billing, and confirm your billing details are up to date — Google Maps returns a grey map or a watermark without an active billing account.
25.3. Go to APIs & Services → Credentials and select or create a project.
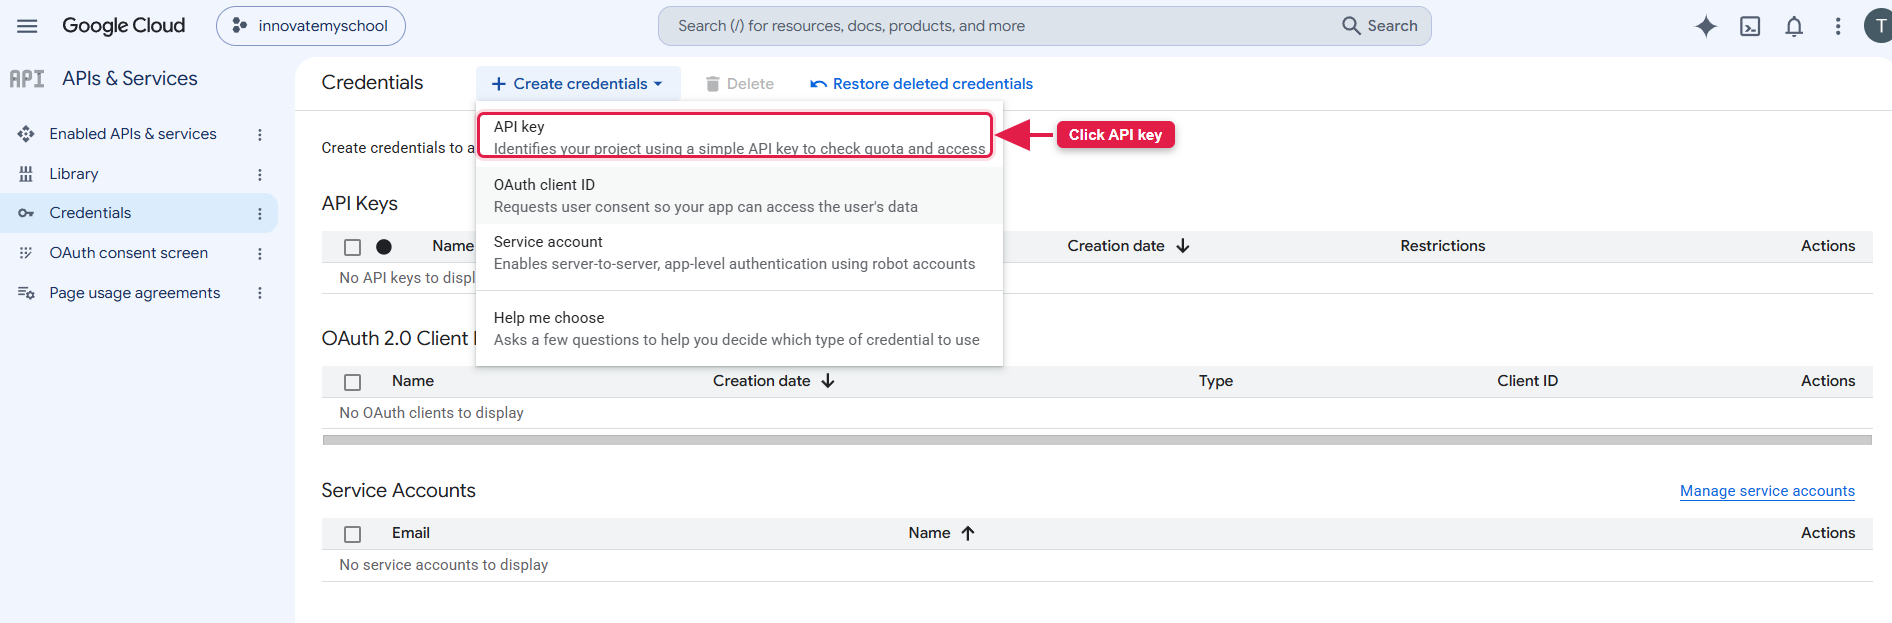
25.4. Click Create credentials → API key. Copy the key that is displayed.
25.5. Enable the APIs Foodie uses under APIs & Services → Library:
- Maps JavaScript API — the maps rendered in the web panels.
- Maps SDK for Android and Maps SDK for iOS — the maps in the mobile apps.
- Places API — address autocomplete and restaurant search.
- Geocoding API — converting between addresses and coordinates.
- Directions API and Distance Matrix API — delivery routes, distance and ETA.
25.6. Restrict the key to your domains (HTTP referrers) for web use, and to your package name + SHA-1 for Android, then save.
25.7. Add the key in the admin panel under Settings → Map Settings, and in each mobile app — see Google Maps API Key (Flutter).
26. Laravel Directory Structure
All three panels follow the standard Laravel 12 layout. If you plan to customise the code, these are the folders that matter.
foodie-admin/  (also foodie-restaurant/ and foodie-web/)
├── app/                 Application code
│   ├── Console/         Artisan commands + the scheduled tasks
│   │   └── Commands/    AutoCancelOrder, SendScheduledOrderNotification
│   ├── Helpers/         Shared helper functions
│   ├── Http/
│   │   ├── Controllers/ Request handlers (thin — data is read from Firestore)
│   │   └── Middleware/  Auth & the per-menu permission gate
│   ├── Mail/            Mailables for the email templates
│   ├── Models/          Eloquent models (panel auth: User, Role, Permission)
│   └── Providers/       Service providers (incl. the Firebase service)
├── Modules/
│   └── AI/              The OpenAI food-listing module (admin & restaurant panels)
├── bootstrap/           Framework bootstrap + cache
├── config/              Configuration files (app, database, firebase, …)
├── database/
│   ├── migrations/      MySQL schema reference (you import the shipped .sql)
│   └── seeders/         Base data
├── public/              Web root — index.php, css/, js/, images/
├── resources/
│   ├── views/           Blade templates (pages, layouts, partials)
│   ├── css/             Panel stylesheets
│   └── lang/            Translations (en/, ar/)
├── routes/
│   ├── web.php          All web routes (route names double as permission keys)
│   └── api.php          API routes
├── storage/
│   └── app/firebase/    credentials.json + the scheduled Node scripts
├── vendor/              Composer dependencies (generated — not edited)
├── .env                 Environment config (DB + Firebase credentials)
├── artisan              Laravel command-line entry point
└── composer.json        PHP dependencies
Note: vendor/ and node_modules/ are generated by
composer install / npm install and should not be edited by hand. Your
configuration lives in .env; your Firebase service account lives in
storage/app/firebase/credentials.json. Neither should ever be committed to Git or
placed under public/.
27. API & Integration Points
This section maps the external services Foodie integrates with and where each one is configured, so developers can extend or replace them. Every client — the mobile apps, the Admin Panel, the Restaurant Panel and the Website Panel — talks to the same Google Firebase backend.
27.1. Architecture at a glance
- Flutter apps → Firebase directly (Firestore, Auth, Storage, FCM, Realtime Database for live tracking).
- Website Panel → Firebase JS SDK in the browser, with Laravel verifying the Firebase ID token to create the server session.
- Admin & Restaurant Panels → Firebase JS SDK in the browser plus the
Firebase Admin SDK on the server (via
credentials.json) for privileged operations and push notifications. - Cloud Functions → the
deliveryDispatchFirestore trigger that assigns orders to drivers, and thedeleteUsercallable that removes an account from Firebase Authentication. - Payment gateways → handled server-side by the Laravel panels, which hold the secret keys and verify each transaction.
- Laravel scheduler → the recurring Node scripts (auto-cancel, scheduled-order reminders).
There is no separate REST API layer to configure: Firestore is the API, and every client reads and writes the same collections in real time.
27.2. Firebase Firestore (primary data store)
All platform data lives in Firestore. The main collections are:
users— customers, vendors, drivers and admins, each with a role.vendors,vendor_categories,vendor_products,vendor_attributes,vendor_filters— restaurants and their menus.restaurant_orders,order_transactions,booked_table— orders, payments and dine-in bookings.coupons,gift_cards,cashback,cashback_redeem,advertisements— promotions.subscription_plans,subscription_history,payouts,driver_payouts,withdraw_method,wallet— money movement.zone,tax,currencies,documents,documents_verify— operational configuration.settings— every configurable option, one document per settings screen.chat,notifications,dynamic_notification,email_templates— communication.cms_pages,menu_items,on_boarding,story— content.
Configured by the FIREBASE_* keys in each panel's .env. Access is governed by
the security rules you publish (see Create Firebase Project), and
multi-field queries need composite indexes (see
Deploy Firestore Indexes).
27.3. Firebase Authentication
Handles email/password, phone (OTP), Google and Apple sign-in for every client. Providers are enabled in the Firebase console; the web panels additionally need the domain listed under Authorized domains and a matching OAuth 2.0 client for Google login.
27.4. Firebase Storage
Holds every uploaded file — restaurant and food images, banners, avatars and verification
documents. Upload quality is controlled by IMAGE_COMPRESSOR_QUALITY in each panel's
.env.
27.5. Cloud Messaging (FCM — push notifications)
Delivers order, chat and status notifications to customers, restaurants and drivers. Configured by uploading the service-account JSON and Sender ID under Settings → Notification Settings; the notification text itself comes from Dynamic Notifications.
27.6. Firebase Realtime Database
Used for live driver location, which changes far more often than order state. It powers the customer's tracking map and the admin's God's Eye view.
27.7. Payment gateways
18 gateways plus COD and the wallet. Public keys are read by the clients; secret-key operations run server-side in the Laravel panels, which read the credentials from the settings document the Admin Panel manages. See Payment Gateway Setup.
27.8. Google Maps
Restaurant search, address selection, zone drawing, delivery distance and live tracking. One key, configured in Settings → Map Settings and in each mobile app.
27.9. OpenAI
The Modules/AI module in the Admin and Restaurant panels. Given a food image, title and
short description it drafts the full listing — description, specifications, variations and
attributes. Configured under Settings → AI Settings; billed by OpenAI per
request.
27.10. Email (SMTP)
Order receipts, password resets, vendor approvals and campaign mail. Set the SMTP host, port, username,
password and encryption in .env (or under Settings → Email
Settings); the message bodies come from Email Templates.
27.11. Where each integration is configured
.env(each panel) — database, allFIREBASE_*keys,FIREBASE_PROJECT_DB,GOOGLE_CLIENT_ID,NODE_PATH, SMTP.storage/app/firebase/credentials.json— the Firebase service account.- Admin Panel → Settings — branding, map key, notifications, AI key, delivery charge, business model, feature toggles, taxes and payment gateways.
- Firebase console — auth providers, authorised domains, security rules, indexes and Cloud Functions.
- Google Cloud console — Maps APIs, the API key restrictions and the OAuth 2.0 client.
27.12. Extending Foodie (developer guide)
- Add a settings screen. The settings pages are data-driven: most are a short Blade
file declaring a Firestore document name and a field list, rendered by a shared form partial. Add
your screen, then add one line to the settings hub array in
resources/views/settings/index.blade.php. - Add a menu item. Add the route in
routes/web.phpwrapped in thepermission:middleware, add the entry toresources/views/layouts/menu.blade.php, and grant the permission to the roles that need it. Route names double as permission keys, so keep them stable. - Add a language. Copy
resources/lang/ento a new locale folder, translatelang.php, and register the language under Languages in the admin panel. - Add a payment gateway. Follow an existing gateway end to end: its tab under Payment Methods, its keys in the settings document, and its init/return routes plus the server-side handler in each panel's checkout controller.
- Change business rules. Prefer the admin settings over code edits — commission, delivery charge, radius, taxes, order assignment and the feature toggles are all configurable, so upgrades stay painless.
28. Deploying the Web Panels (Shared Hosting vs VPS)
All three panels are Laravel applications and can run on shared hosting (cPanel) or on a VPS/dedicated server. Choose the approach that matches your hosting.
28.1. Shared hosting (cPanel)
Best for getting started quickly when you do not have SSH/root access.
- Create a MySQL database and user (see Admin Panel Setup).
- Upload each panel's ZIP to its domain/subdomain folder and extract it. Point the document root at
the panel's
public/directory (or use the supplied.htaccess). - Shared hosting usually has no Composer, so run
composer installon your own machine first and upload the project with itsvendor/folder already installed. - Configure
.env(database + Firebase credentials) and placecredentials.jsoninstorage/app/firebase/. - Set writable permissions (typically
755) onstorage/andbootstrap/cache/. - Import that panel's supplied
.sqlfile into its database through phpMyAdmin → Import in cPanel. No Artisan or shell access is needed for this step. - Add the Laravel scheduler as a cron entry under Cron Jobs — see Cron & Scheduled Tasks.
Note: make sure your host runs PHP 8.2+ with the required
extensions and that mod_rewrite is enabled. The Admin Panel's scheduled jobs need
Node.js, which basic shared plans often lack — choose a plan that offers it,
or use a VPS.
28.2. VPS / dedicated server
Recommended for production — you get SSH access, Composer, Node.js and full control.
- Install the stack: PHP 8.2+, Composer, MySQL/MariaDB, Node.js and a web server (Nginx or Apache).
- Upload or clone each project, then run
composer install(andnpm installfor the Admin Panel). - Copy
.env.exampleto.env, set the database and Firebase credentials, then runphp artisan key:generate. - Import that panel's supplied
.sqlfile:mysql -u user -p database < panel.sql. - Point each server block's document root at that project's
public/directory. - Set ownership/permissions so the web server can write to
storage/andbootstrap/cache/. - Add the scheduler to the system crontab
(
* * * * * php /path/artisan schedule:run) — see Cron & Scheduled Tasks. - For production, run
php artisan config:cacheandphp artisan route:cache, and serve everything over HTTPS.
28.3. Common deployment pitfalls (.htaccess & shared hosting)
- Only the home page works; every other route returns 404.
mod_rewriteis disabled orAllowOverrideis notAll, so Laravel'spublic/.htaccessis ignored. - App installed in a sub-folder. Add a
RewriteBasetopublic/.htaccess, e.g.RewriteBase /foodie/. - Document root points at the project root instead of
public/. Point the domain atpublic/, or add a root.htaccessthat rewrites into it. Never serve the project root — it makes.envandstorage/app/firebase/credentials.jsonreachable from the internet. - 404 on uploaded images / assets. Run
php artisan storage:link(or create thepublic/storagelink manually if symlinks are blocked). - 500 error after upload. Usually permissions — set
755onstorage/andbootstrap/cache/, and confirm PHP is 8.2+. - "No input file specified". A PHP handler / CGI mismatch on some cPanel hosts —
add the host's recommended handler line (or
Options -MultiViews) to.htaccess. - Mixed-content warnings over HTTPS. Set
APP_URLto yourhttps://domain and force HTTPS in.htaccess.
28.4. SSL / HTTPS configuration (production)
Always serve all three panels over HTTPS. Firebase Authentication, payment-gateway callbacks and secure cookies all require it, and browsers block mixed content on pages that are not fully secure.
Shared hosting (cPanel). Most hosts issue a free certificate automatically. Open cPanel → Security → SSL/TLS Status (or Let's Encrypt / AutoSSL), select your domains, and click Run AutoSSL.
VPS / dedicated server. Install a free Let's Encrypt certificate with Certbot:
# Nginx
sudo apt install certbot python3-certbot-nginx
sudo certbot --nginx -d yourdomain.com -d admin.yourdomain.com -d restaurant.yourdomain.com

# Apache
sudo apt install certbot python3-certbot-apache
sudo certbot --apache -d yourdomain.com
Certbot installs the certificate and adds an automatic renewal timer.
Force HTTPS. Add this at the top of each panel's public/.htaccess, just
inside <IfModule mod_rewrite.c> and before Laravel's front-controller rules:
RewriteEngine On
RewriteCond %{HTTPS} off
RewriteRule ^ https://%{HTTP_HOST}%{REQUEST_URI} [L,R=301]
Then finish up:
- Set
APP_URL=https://…in every panel's.env. - In Firebase console → Authentication → Settings → Authorized domains, add all three HTTPS domains so sign-in works.
- Update the OAuth 2.0 client's authorised origins and redirect URIs to the HTTPS versions.
- Re-cache the config:
php artisan config:cache.
29. How Foodie Works
This section walks through the platform from each side — customer, restaurant, driver and admin — so you can see how the pieces you configured fit together.
Ordering as a Customer
1. Sign up / log in
- Customers register or log in with email & password, phone number (OTP) or Google.
- New social/phone users complete a short profile (name, email, phone).
- On the website, the browser sends the Firebase ID token to the server, which verifies it and creates the logged-in session.
2. Set a location
- The customer picks a delivery address from the map or the saved address book.
- The address decides which zone applies, and only restaurants that serve that zone and fall within the configured radius are shown.
3. Browse & search
- The home page shows banners, categories, trending items and offers, all configured from the admin panel.
- Customers browse by category and cuisine, apply filters, or search for a dish or a restaurant.
- Each restaurant page lists its menu with prices, add-ons, ratings and reviews.
Key screens (website). The customer journey — the home page with the location picker and search, the restaurant listing, a restaurant's menu page, the search results with filters, and the offers page:
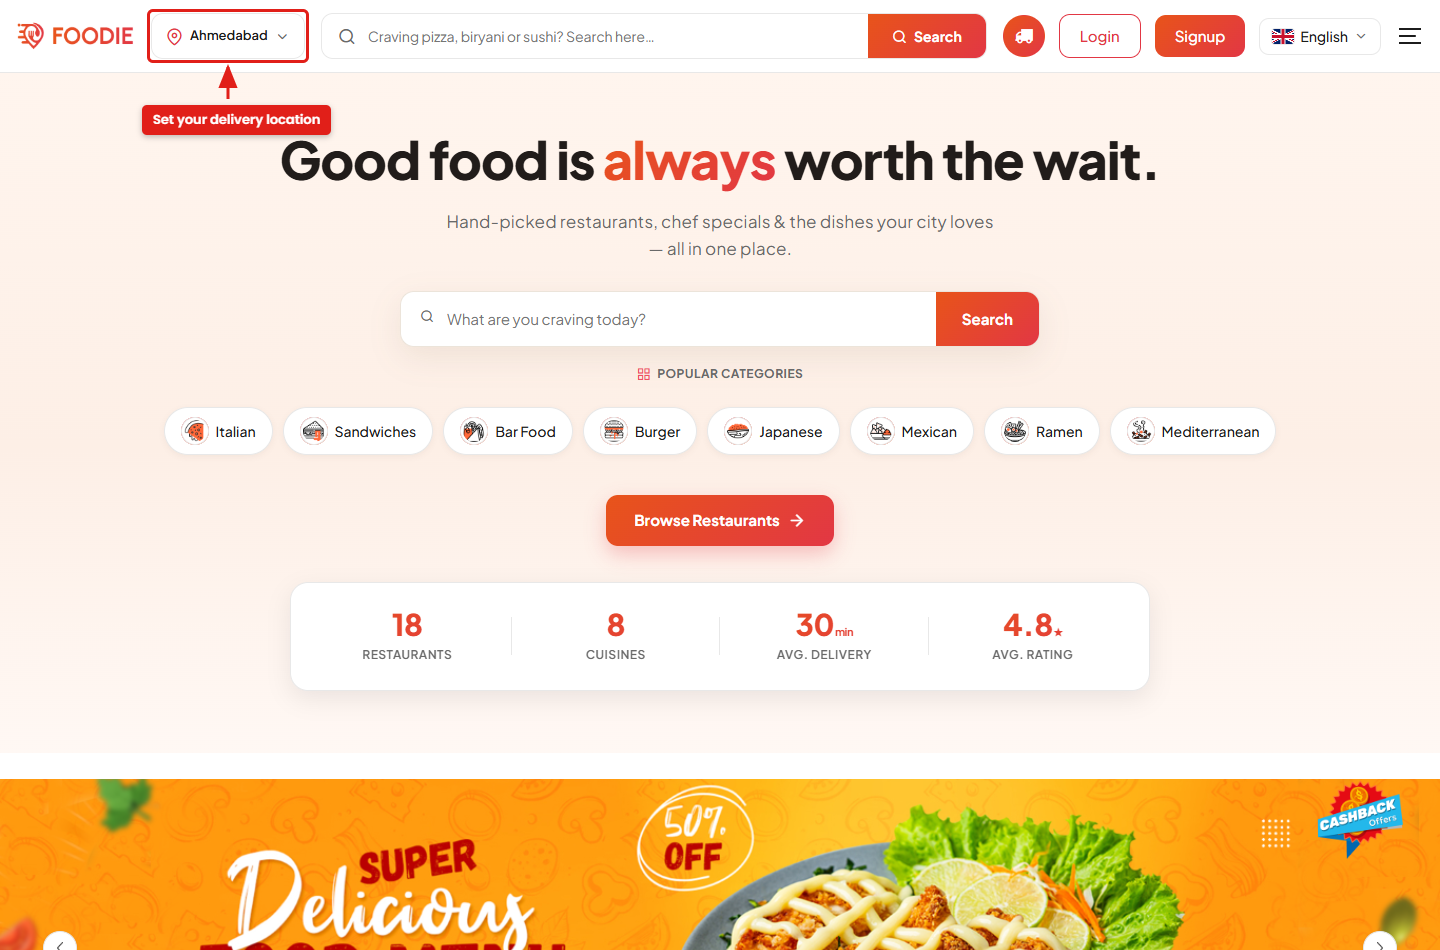
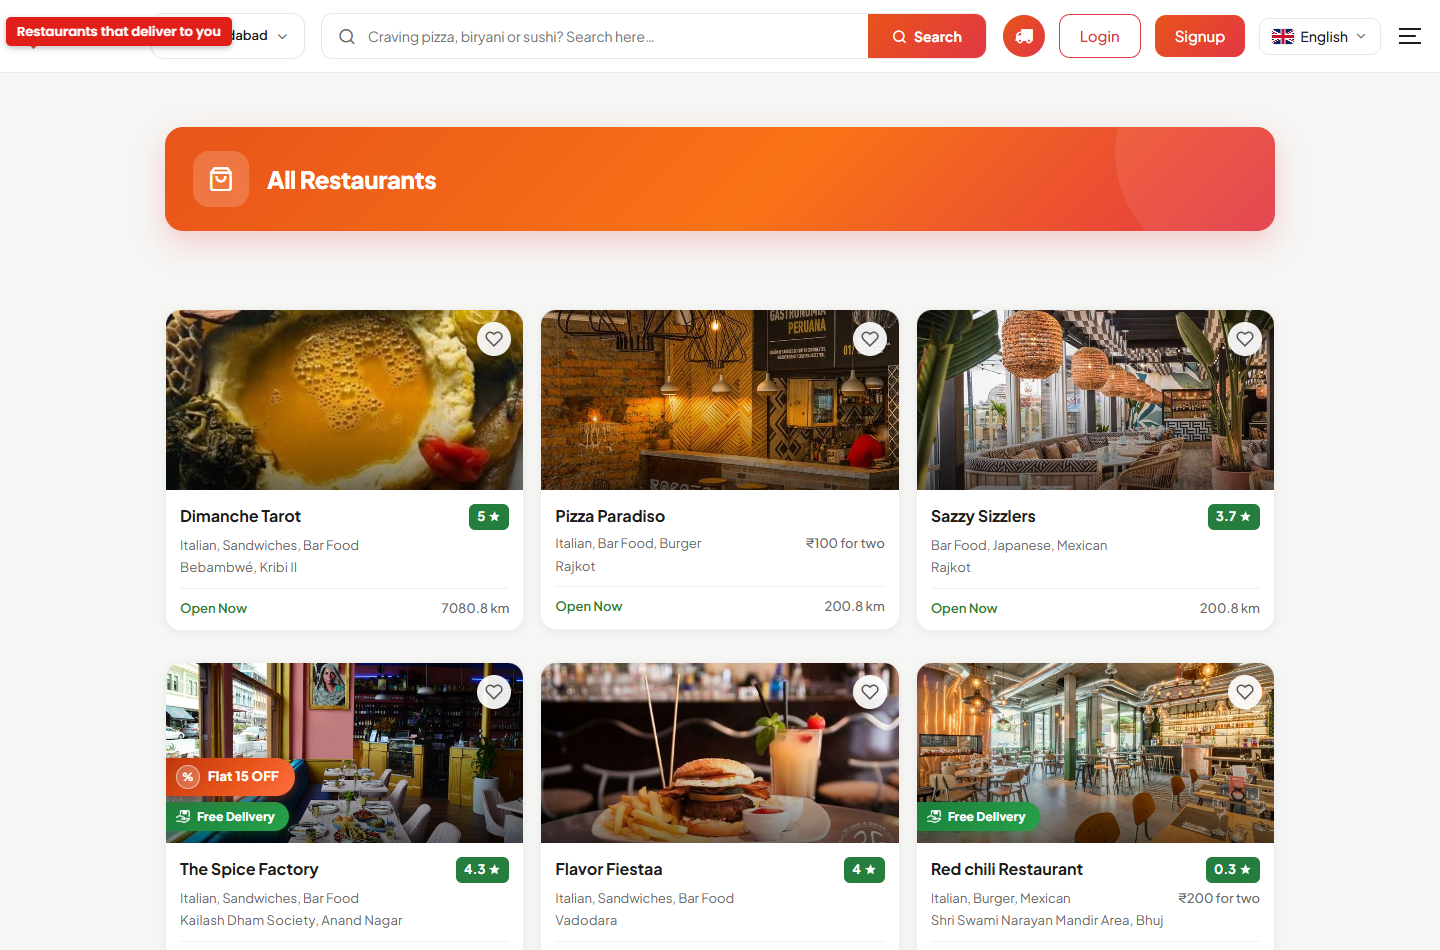
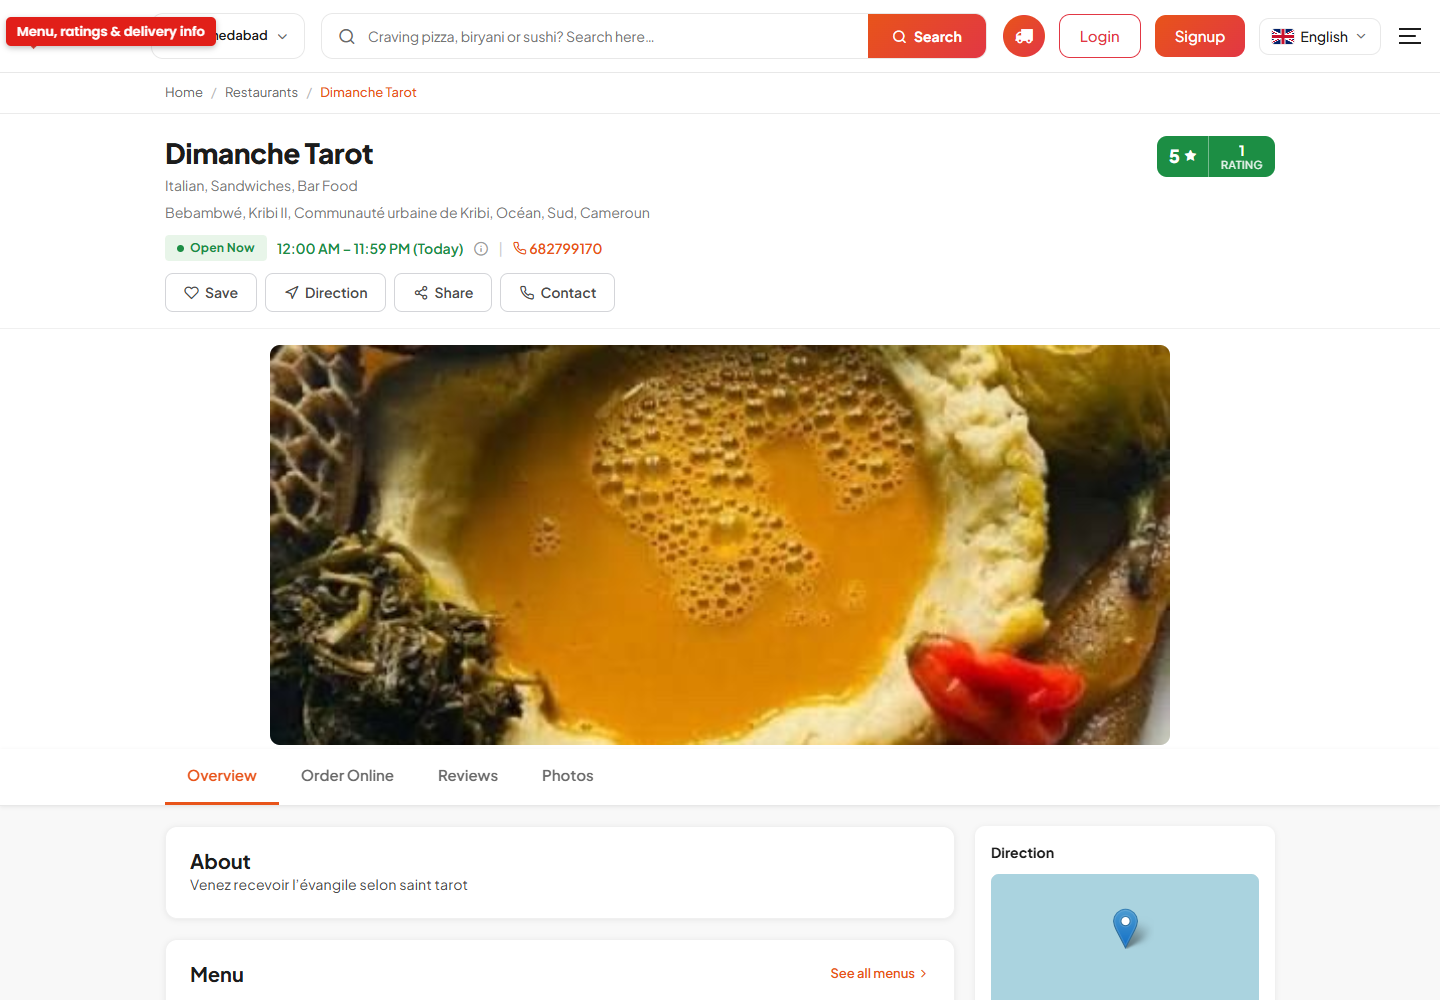
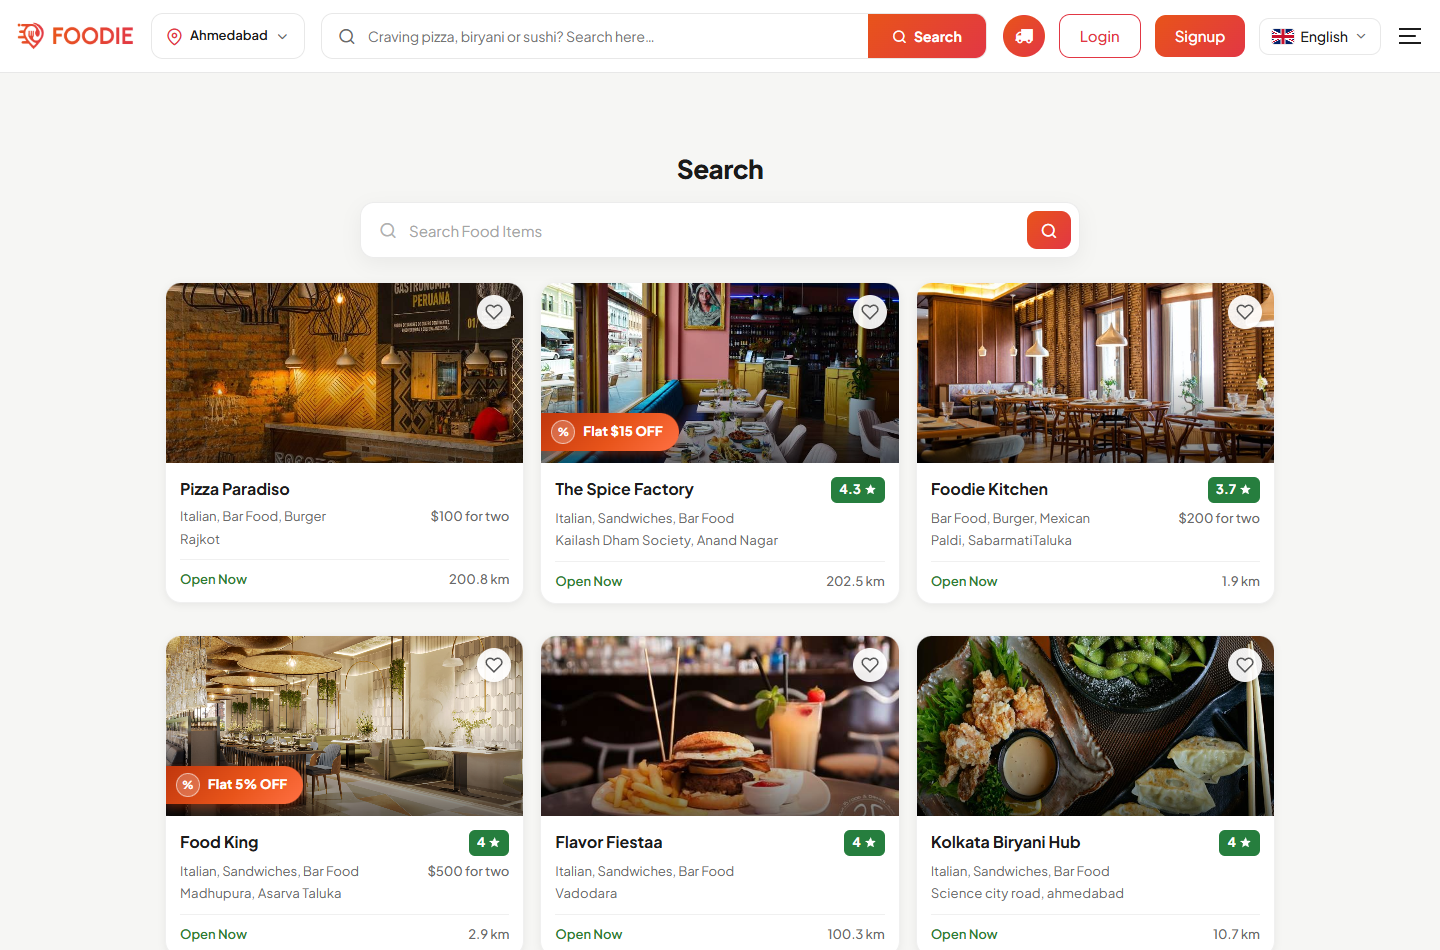
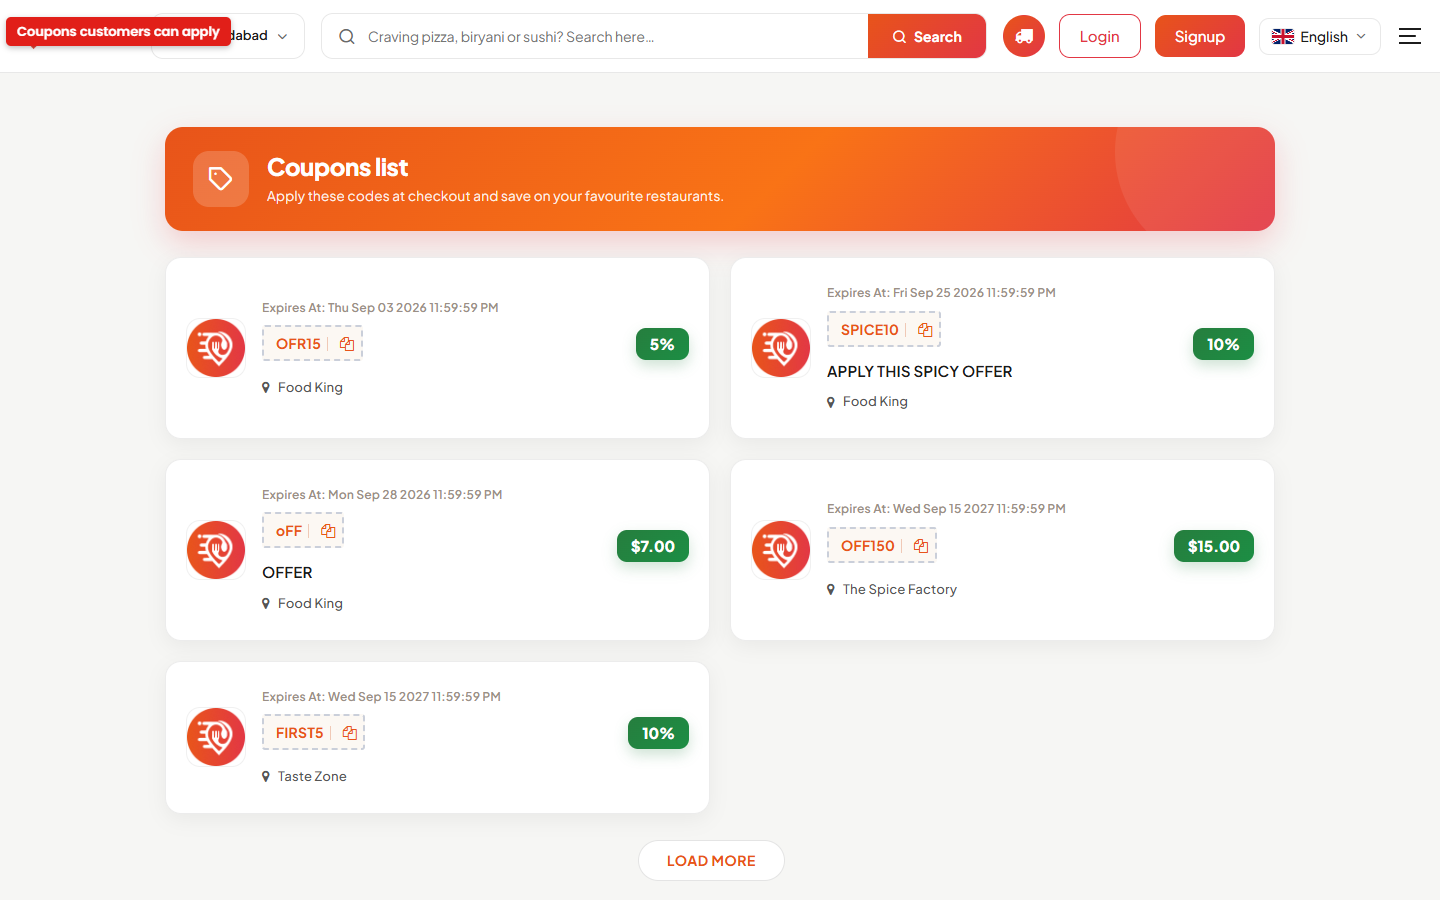
4. Build the cart and check out
- Items are added with their variants and add-ons; the customer can attach a note to an item or to the whole order.
- The cart totals item prices, taxes, the delivery charge, the packaging charge and the platform fee — each of which follows the rules you set in the admin panel.
- Coupons, gift cards, cashback and wallet balance are applied at checkout.
- The customer chooses Delivery, Takeaway or Dine-In, optionally schedules the order for later, adds a driver tip, and pays with any enabled gateway, the wallet, or Cash on Delivery.
5. Track the order
- The order moves through placed → accepted → preparing → ready → picked up → on the way → delivered, with a push notification at each step.
- Once a driver picks the order up, the customer follows them live on the map.
- After delivery the customer rates the food and the driver against the review attributes you configured.
6. Manage the account
- Order history and re-order, favourites, saved addresses, wallet and transactions, gift cards, cashback and support chat.
Running a Restaurant
- The owner registers on the Restaurant Panel, uploads the required documents, and waits for admin approval (or is approved automatically if you enabled auto-approve).
- They set up the restaurant — address, opening hours, delivery radius, photos — then build the menu by hand, by importing from the admin's global menu, by bulk CSV import, or with the AI assistant.
- New orders arrive in real time with an audible alert. The owner accepts, prepares, and marks the order ready.
- Walk-in customers are served through the POS; dine-in bookings arrive in the Book Table screen.
- Earnings accumulate net of commission; the owner adds a withdrawal method and requests a payout.
Delivering as a Driver
- The driver registers in the Delivery Man / Driver App, uploads their documents and waits for approval.
- Once online, they receive order offers — either broadcast to every nearby driver or sequential, one driver at a time — depending on the assignment mode you chose.
- They accept, collect from the restaurant, and deliver, with their location streaming to the customer's tracking map and the admin's God's Eye view.
- Earnings and tips land in the driver wallet; payouts are requested from the app and approved by the admin.
Administering the Platform
- Approve vendors, restaurants and drivers, and review their documents.
- Watch live operations on the God's Eye map, and step in on any order when needed.
- Run promotions — coupons, cashback, gift cards and paid advertisements.
- Settle disbursements to restaurants and drivers.
- Track performance with the sales and tax reports, and export them for accounting.
30. Customizing Branding (Logo & Colours)
Foodie is fully white-label — the application name, logos, favicon and brand colours can all be changed from the Admin Panel without editing any code. Branding is stored in Firebase, so a change made once is reflected across the Admin Panel, the Restaurant Panel, the website and the mobile apps.
30.1. App name, logo & favicon
Log in to the Admin Panel and open Settings → Branding. From this screen you can update:
- Application Name — the name shown in the panel header, the browser tab and across the platform.
- Logo — your logo (a transparent PNG or SVG is recommended). It appears in the sidebar and on the login screen.
- Favicon — the small icon shown in the browser tab (use a square image, e.g. 32×32 or 64×64 px).
Click Save. The new logo and name appear as soon as the page reloads.
30.2. Panel & app colours
Still under Settings → Branding, set:
- Admin Panel Colour — the primary accent of the admin interface (buttons, active
menu items, highlights). Pick a colour or paste a hex value such as
#F85A40. - App Colour — the primary colour used by the mobile apps.
30.3. Website appearance
The customer website is driven from the admin panel too:
- Footer Template (Settings → Footer Template) — footer links, contact details, social icons and copyright text.
- Banner Items — the promotional banners on the home and category screens.
- CMS Pages — About, Privacy, Terms, FAQ and any other static page.
Note: use the same Firebase project for all panels and the mobile apps so branding changes propagate everywhere. Clear your browser cache if an updated logo or colour does not appear right away.
30.4. Mobile app branding
Some mobile branding is baked into the build rather than read from Firebase, so it is set separately in each of the three app projects:
- App Name — see Changing the App Name.
- Launcher Icon — see Changing the Launcher Icon.
- Package Name / Bundle ID — see Changing the Package Name. Each app keeps its own identifier.
The App Colour set under Settings → Branding is read from Firebase, so it applies to all three apps at once.
30.5. Languages
Add or edit languages under Languages in the admin sidebar. English and Arabic (RTL) ship by
default; new languages are added by copying resources/lang/en and translating
lang.php.
31. Troubleshooting
This section lists the errors most often seen while setting up Foodie, with their causes and fixes. Also see the FAQ for the Flutter "Missing project_info object" error.
31.1. "Missing or insufficient permissions" (PERMISSION_DENIED)
Firestore reads/writes are being blocked by your security rules.
- Confirm you published rules in Firestore Database → Rules → Publish — see Create Firebase Project.
- Check the Storage → Rules tab too — image uploads use a separate ruleset from Firestore.
- Confirm every panel points at the correct database — see
FIREBASE_PROJECT_DBbelow.
31.2. "The query requires an index" (FAILED_PRECONDITION)
A Firestore composite index is missing for a filter/sort query.
- Deploy the supplied indexes — see Deploy Firestore Indexes.
- Or open the link in the error message: it opens the Firebase console with the required index pre-filled. Click Create index and wait for it to finish building.
31.3. Data loads on one panel but not the other / "client is offline"
This almost always means the panels point at different Firestore databases.
- Ensure
FIREBASE_PROJECT_DBis identical in the Admin, Restaurant and panels'.envfiles —(default)in a normal installation. - Verify every
FIREBASE_*credential belongs to the same Firebase project.
31.4. Panels open but every list is empty
The demo Firestore collections were never imported.
- Run the import described in Firestore Database Collection Import /
Export. The
settingscollection in particular must exist — without it the panels have no configuration to read.
31.5. "auth/unauthorized-domain" on login
- In the Firebase console go to Authentication → Settings → Authorized domains and add your website and restaurant-panel domains.
- For Google login, also confirm the OAuth 2.0 client's authorised origins and redirect URIs — see Restaurant Panel Setup.
31.6. "auth/operation-not-allowed"
The sign-in provider you are using is not enabled. Enable Email/Password, Phone, Google (and Apple if used) under Authentication → Sign-in method.
31.7. Push notifications are not received
- Upload the Firebase service-account JSON and set the Sender ID under Settings → Notification Settings — see Admin Panel Setup.
- Confirm the service-account file exists at
storage/app/firebase/credentials.json. - On mobile, verify
google-services.json/GoogleService-Info.plistare present and match the package name. - For iOS, upload the APNs authentication key under Project Settings → Cloud Messaging.
31.8. Orders are never auto-cancelled and scheduled reminders never arrive
- The cron entry is missing — add it as described in Cron & Scheduled Tasks.
NODE_PATHin the Admin Panel's.envis empty or wrong. Runwhich nodeand paste the absolute path.npm installwas never run in the Admin Panel root, so the scripts have no dependencies.
31.9. A payment starts but never completes
- Re-check the gateway's credentials under Payment Methods — a secret key pasted with a trailing space is the most common cause.
- Confirm you are in the right mode: sandbox keys fail against the live endpoint and vice versa.
- Check the gateway's Return / Cancel / Notify URLs in both the admin panel and the provider's dashboard. They must point at your live HTTPS domain and match on both sides.
- Make sure the panel is served over HTTPS — most providers refuse to redirect back to a plain HTTP callback.
- Read
storage/logs/laravel.login the panel that started the payment; the provider's rejection reason is recorded there.
31.10. Images fail to upload
- Make sure Firebase Storage is enabled and its rules are published.
- Check the file size and type, and the PHP limits
upload_max_filesizeandpost_max_size.
31.11. Google Maps shows a "For development purposes only" watermark or a grey map
- Enable Billing on your Google Cloud project and make sure the key is set — see Create Google Map API Key.
- Enable every required API (Maps JavaScript, Maps SDK for Android/iOS, Places, Geocoding, Directions) and relax overly strict key restrictions while testing.
31.12. No restaurants show for a customer address
- No zone covers that address — draw one under Live Monitoring → Zone.
- The search radius is too small — raise it under Settings → Radius Configuration.
- The restaurants are not approved, or their address falls outside the zone polygon.
31.13. "Missing project_info object" (Flutter / Android build)
The google-services.json file is missing or in the wrong place. See the detailed fix in the
FAQ.
32. Glossary
A quick reference for the terms used throughout this documentation.
- Firebase — Google's app-development platform. Foodie uses it as its primary backend (database, file storage, authentication and push notifications).
- Firestore (Cloud Firestore) — Firebase's NoSQL cloud database. It stores all platform data (restaurants, foods, orders, users, chat, settings) as documents grouped into collections.
- Realtime Database — a second Firebase database used for live driver location, which updates far more often than order state.
- Named database /
FIREBASE_PROJECT_DB— Firestore can host more than one database per project.(default)is the standard one. Whatever you use, every panel and the Cloud Functions package must target the same name. - Firebase Storage — cloud file storage for images and documents (food photos, banners, avatars, verification files).
- Firebase Authentication — Firebase's sign-in service, supporting email/password, phone (OTP), Google and Apple.
- FCM (Firebase Cloud Messaging) — Firebase's push-notification service, used for order, chat and status notifications.
- Sender ID — the numeric identifier of your FCM project, entered in the admin Notification Settings.
- Cloud Functions — server-side code that runs inside Firebase. Foodie uses it for order triggers, notification fan-out and every secret-key payment operation.
- Blaze plan — Firebase's pay-as-you-go tier. Required for Cloud Functions and for any outbound call to an external API such as a payment gateway.
- Security Rules — the access-control rules deciding who may read or write Firestore documents and Storage files. They must be published in the Firebase console.
- Composite Index — a Firestore index that lets a query filter and sort on multiple fields. Missing indexes cause a "query requires an index" error.
- Service Account /
credentials.json— a private key file that lets the server act on behalf of your Firebase project (verify tokens, send push, run scripts). Kept instorage/app/firebase/and never exposed publicly. google-services.json/GoogleService-Info.plist— the Firebase configuration files added to the Android and iOS apps respectively.- Zone — a map polygon defining where the platform operates. Restaurants, drivers and customer addresses are matched to the zone they fall inside.
- Vendor / Owner — the account that owns one or more restaurants and logs into the Restaurant Panel.
- Deliveryman — delivery staff belonging to a single restaurant under the self delivery feature, as opposed to a platform-wide driver.
- Self delivery — the option that lets a restaurant deliver its own orders instead of using the platform driver pool.
- Broadcast vs sequential assignment — the two dispatch modes: offer an order to every nearby driver at once, or to one driver at a time in order.
- Business model — how the platform earns: commission (a cut of each order), subscription (vendors pay a recurring fee) or hybrid (both).
- Platform fee / packaging charge — optional per-order charges, each of which can carry its own tax.
- Tax scope — whether tax is calculated per product or per order, and whether it also applies to the delivery fee, packing charge and platform fee.
- Disbursement / payout — money paid out to a restaurant or driver, net of commission.
- POS (Point of Sale) — the in-panel screen for taking counter and walk-in orders.
- Dine-in / Book Table — the table-reservation flow for eating at the restaurant.
- Global menu — food items created by the admin that vendors can import into their own restaurant instead of typing them again.
- Laravel — the PHP web framework powering all three panels.
- Blade — Laravel's templating engine used to build the page views.
- Composer — the dependency manager for PHP (
composer install). .env— the environment configuration file holding database and Firebase credentials for each panel.- Artisan — Laravel's command-line tool (e.g.
php artisan key:generate). - Cron / Scheduler — a server task runner. One cron entry triggers Laravel's scheduler, which runs the auto-cancel and scheduled-notification jobs.
NODE_PATH— the absolute path to the Node binary, used by those scheduled scripts.- cPanel — a common web-hosting control panel, used here to create the MySQL database and the cron job.
- SHA-1 / SHA-256 — cryptographic fingerprints of your Android signing key, registered in Firebase to enable Google and Phone sign-in.
- API Key — a credential authorising use of a service, such as the Google Maps API key.
- OAuth 2.0 Client ID — the credential Google uses to authorise "Sign in with Google" for your websites.
- User App — the customer-facing Flutter app: browse restaurants, order, pay and track delivery.
- Restaurant App — the Flutter app restaurant owners use to accept and manage orders away from the panel.
- Delivery Man / Driver App — the Flutter app drivers use to receive, pick up and deliver orders, and which streams their live location.
- Flutter — Google's framework used to build all three Android & iOS apps.
- APK / AAB / IPA — mobile build outputs: APK/AAB for Android, IPA for iOS.
- Keystore (
.jks) — the file holding your Android signing key. Losing it means you can no longer update the app on Google Play. - CodeCanyon — the Envato marketplace where the Foodie source code is distributed.
33. Admin, Restaurant & Website Panel Update
To update the Admin, Restaurant and Website panels, upload the latest source package to the root directory of each respective panel and extract it.
If your project includes custom modifications, we strongly recommend updating with Git so your customisations are preserved while the latest changes are merged in.
Check for a database update first. Every panel package includes its own
.sql file. When a release adds or changes tables, that .sql file is
updated too — and the new code will not work against the old tables. Read the
Changelog for the version you are moving to:
- If the release mentions database or schema changes — back up your
current database, then import the
.sqlfile from the new package into that panel's database (phpMyAdmin → Import, ormysql -u user -p database < panel.sql). - If it does not — leave your database alone; only the source files need replacing.
There is no php artisan migrate step in Foodie, on a fresh install or
an update — the .sql file is always the source of truth for MySQL.
33.1. Updating via Git (recommended)
- Commit and push your existing changes to a dedicated Git branch.
- Download the latest source package from CodeCanyon.
- Replace the source files in your working copy with the new version.
- Review the diff, resolve any conflicts, and confirm your customisations survived.
- Import the new
.sqlfile if the release changed the database (see the note above). - Commit and deploy.
33.2. Replacing the source code
- Back up your current panel folder and your database.
- Keep a copy of
.envandstorage/app/firebase/credentials.json— they are not part of the package. - Upload the new package and extract it over the existing installation.
- Restore
.envandcredentials.json, then compare.envagainst the new.env.exampleand add any new keys. - Import the updated
.sqlfile from the new package if the release changed the database. Back up your existing database first — importing replaces the tables it contains. - Run the post-update commands:
composer install
php artisan config:clear
php artisan cache:clear
php artisan view:clear
Before you update: take a full backup of the panel folder, the MySQL database and your Firestore data (use the export command in Firestore Database Collection Import / Export). If a release adds new Firestore documents or indexes, re-run the import and index deployment afterwards.
34. Mobile Application Update
To update the User App, Restaurant App or Delivery Man / Driver App, download the latest source package and replace that app's project source. Each app updates independently, so you can ship one without rebuilding the others — but keep them on the same release when a version changes shared Firestore fields. As with the panels, Git is the safer route if you have customised the code.
34.1. Updating via Git (recommended)
- Commit and push your existing changes to a dedicated Git branch.
- Download the latest source package from CodeCanyon.
- Replace the source files with the new version.
- Review the diff, resolve conflicts, and keep your customisations.
34.2. Replacing the source code
- Back up your current project, and keep your
google-services.json,GoogleService-Info.plist,android/key.propertiesand release keystore — none of them ship in the package. - Extract the new source and restore those files.
- Re-apply your branding changes (app name, launcher icon, package name, Maps API key).
- Rebuild and test:
flutter clean
flutter pub get
flutter run
Then increment version: in pubspec.yaml and publish the new build — see
Signing, Building & Publishing the Apps. Update the version number
and store links under Settings → Version in the admin panel so existing users are
prompted to upgrade.
35. Changelog
Version 9.2 — Aug 24, 2026
- Enhanced the mobile application UI with minor design improvements and a refreshed look.
- Completely redesigned the front-end website with a new and improved look.
- Completely redesigned the admin panel with a new and improved look.
- Completely redesigned the restaurant panel with a new and improved look.
- Updated all web panels to Laravel 12 for improved compatibility and performance.
- Added a new delivery boy order assignment system with Sequential Assignment, where orders are offered to delivery boys one by one, and Broadcast Assignment, where orders are offered to multiple nearby delivery boys simultaneously.
- Added detailed restaurant statistics for better tracking of orders, earnings, and overall performance.
- Added detailed driver statistics for better tracking of deliveries, earnings, and overall performance.
- Upgraded the mobile applications to the latest Flutter v3.47.1.
- Enhanced web panels and mobile applications with various improvements and optimizations.
- Fixed minor bugs and issues to improve overall stability and performance.
Version 9.1 — Jun 05, 2026
- Auto Verify Feature implemented in both Driver and Restaurant applications.
- New Payment Gateways Added — Integrated support for PhonePe, Instamojo, Cashfree, Foloosi, MTN Momo, and PayMongo.
- Various Bug Fixes and Performance Improvements implemented across the platform.
- Support for Flutter version 3.41.6 added.
Version 9.0 — Feb 27, 2026
- Fixed multiple payment loader issues across Stripe, Xendit, and Midtrans gateways.
- Corrected refund calculation errors when discounts and special discounts are applied.
- Resolved advertisement chat and admin inbox issues, including end-to-end messaging fixes.
- Fixed multiple UI and flow issues, including white screen on stories, POS address display, multiple order handling, bottom sheet visibility, and improved camera permission messaging across all apps.
- Made the Flutter apps compatible with Flutter v3.41.2.
Version 8.10 — Feb 17, 2026
- Fixed issue with cloud function deployment to ensure smooth updates.
- Resolved address search autocomplete problem in the web panel for accurate results.
Note: No changes in apps.
Version 8.9 — Feb 11, 2026
- Platform Fee Feature implemented.
- Maintenance Mode added with dynamic control from the Admin Panel.
- Change Password After Login feature enabled in the application.
- Live Streaming Optimization for smooth driver and customer tracking.
- Product Bulk Import functionality added in the Admin Panel.
- Product-wise Tax implementation supported.
- Packaging Charge feature implemented.
- Tax Applied on Delivery Charges.
- Tax Reports available in the Admin Panel.
- POS (Point of Sale) Feature implemented in both Admin and Restaurant panels.
- Employees management in restaurants web panel / application.
- Manually order assigned from admin panel.
- All Dependencies Updated to their latest compatible versions.
- Minor bug fixes and optimizations throughout the app and web to improve reliability and performance.
- Flutter version supported 3.38.9.
Version 8.8 — Nov 19, 2025
- All Dependencies Updated to their latest compatible versions.
Version 8.7 — Nov 14, 2025
- AI Integration added for smarter automation and improved user experience.
- Live Chat Support Redesigned with a modern UI and better real-time interaction.
- Closed Restaurants are now displayed at the bottom of the list and appear greyed out for better visibility.
- Voice-to-Text Search lets users find restaurants instantly by speaking instead of typing.
- Resolved Google Play's 16 KB page size requirements in all apps.
- Latest Flutter Version Support implemented for enhanced performance and stability.
- All Dependencies Updated to their latest compatible versions.
- Minor bug fixes and optimizations throughout the app to improve reliability and performance.
- Made the Flutter apps compatible with Flutter v3.39.1.
Version 8.6 — Jul 31, 2025
- Resolved the Stripe payment integration issue.
- No updates or changes were made to the mobile apps.
Version 8.5 — Jul 18, 2025
- Integrated Help & Support module enabling customers, restaurants, and drivers to communicate directly with the admin.
- Performance and compatibility improvements.
- Fixed some issues to ensure improved stability and performance.
- Made the Flutter apps compatible with Flutter v3.32.7.
Version 8.4 — Jul 04, 2025
- Introduced a new Cashback Offer feature to enhance user rewards and increase engagement during purchases or bookings.
- Resolved performance issues and optimized the OpenStreetMap (OSM) implementation for a smoother and more responsive map experience.
- Performance and compatibility improvements.
- Fixed some issues to ensure improved stability and performance.
- Made the Flutter apps compatible with Flutter v3.32.4.
Version 8.3 — Apr 18, 2025
- Restaurants can handle self-deliveries using their own delivery personnel.
- A notification bell will continue ringing until the order is accepted by the restaurant or the delivery person.
- Restaurants can request advertisements directly. Ads will be displayed in the "Highlights for you" section in app and web.
- Restaurants have the option to cancel orders if needed.
- If no restaurants are available under a specific category, that category will not be displayed.
- Restaurants and admin can communicate regarding advertisement requests.
- During registration, restaurants can select multiple categories, allowing them to appear under all chosen categories.
- If a restaurant does not accept an order, it will be automatically canceled. If the restaurant accepts
the order but no nearby driver is available, the order will also be automatically canceled after a
certain period. If a driver does not accept an order, it is handled by the
driverOrderAcceptRejectsetting, which finds another nearby driver after a waiting period. - For scheduled orders, we've added a setting in the admin panel to define a reminder time (e.g., 1 hour). A notification will be sent to the restaurant accordingly, and restaurants can now accept scheduled orders up to 1 hour in advance.
- Fixed some issues to ensure improved stability and performance.
- Made the Flutter apps compatible with Flutter SDK 3.29.2.
Version 8.2 — Mar 07, 2025
- Upgraded to the latest Flutter version 3.29.0.
- Resolved iOS payment gateway issue.
Version 8.1 — Feb 07, 2025
- Fixed minor issue with the subscription module in web panel.
- Many other minor fixes.
Version 8.0 — Jan 24, 2025
- Upgraded to the latest Flutter version (3.27.2).
- Updated PayPal payment gateway dependencies.
- Implemented a subscription module for restaurants, offering the flexibility to choose between a subscription model or a commission-based model.
- Added support for restaurant-specific admin commissions.
- Added a feature for bulk admin commission updates to the restaurants.
- Made significant UI enhancements in the admin panel.
- Added filters for managing subscriptions.
- Resolved minor bugs and implemented many other changes.
Version 7.3 — Oct 22, 2024
- Compatible the app with latest OSM SDK.
- Fixed minor bugs, and enhanced performance.
- Support Flutter version 3.24.3.
Version 7.1.0 — Sep 20, 2024
- Resolved OSM map loading issues.
- Upgrade the dependencies to align with iOS 18.
- Fixed minor bugs, and enhanced performance.
- Support Flutter version 3.24.3.
Version 7.0 — Sep 11, 2024
- Redesign the entire application with a modern, updated look.
- Ensure full compatibility of the application with the GetX framework.
- Payment Gateways (OrangeMoney, Xendit and MidTrans).
- Open Street Map (OSM) Integration.
- Upgrade dependencies.
- Fix minor bugs.
- Support Flutter version 3.22.3.
Version 6.0 — Aug 24, 2024
- Just fix the minor issue to create a user and select location.
Version 6.0 — Jun 24, 2024
- Implement automatic admin commission in the customer application.
- Integrate verification documents for restaurants and drivers.
- Add zone feature for restaurants and drivers.
- Switching from Firebase Cloud Messaging API (Legacy) to Firebase Cloud Messaging API (V1).
- Enable payouts for restaurants and drivers using payment gateways (Flutterwave, Stripe, Razorpay, PayPal).
- Add Withdrawal Payment Methods.
- Upgrade dependencies.
- Fix minor bugs.
- Support Flutter version 3.22.2.
Version 5.4.1 — Mar 07, 2024
- Dependency upgrade.
- Migrate Deprecated imperative apply of Flutter's Gradle plugins.
- Minor Bug Fixing.
- Compatible to Flutter 3.19.2.
Version 5.4.0 — Jan 05, 2024
- Location permission screen implement.
- Location issue fixed.
- Dependency upgrade.
- Minor Bug Fixing.
- Compatible to Flutter 3.16.5.
Version 5.3.0 — Dec 01, 2023
- Upgrading Laravel 8 to Version 10.
- Gift Card Implementation.
- Support for Multiple Delivery Addresses.
- User Roles and Permissions Integration.
- Admin can create multiple admin/Roles as well as give the specific access levels.
- Compatible to Flutter 3.13.9.
- Minor Bug Fixing.
Minor — Version 5.2.1 — Sep 20, 2023
- Users and Restaurants are having an option to reset their password.
Version 5.2 — Sep 16, 2023
- Updated to the latest version of Flutter — 3.13.4.
- Driver can receive Single or Multiple Orders in the Driver application with admin panel setting.
- We've implemented a distance-based update setting in Firebase calls. This means that when a user moves a certain distance, it triggers a Firebase call request. This intelligent feature allows us to optimize the usage of API requests and enhance efficiency.
- Multiple Live tracking maps with external app options (Google Map, GoogleGo Map, Waze Map, MapswithMe Map, YandexNavi, Yandex Map) and In-app tracking which we already have into the app.
- Minor Bug Fixing.
Version 5.1 — Sep 6, 2023
- Multiple themes available for the user app homepage.
- Updated to the latest version of Flutter — 3.13.0.
- Upgraded Firebase dependencies.
- Fixed other known issues.
Version 5.0 — 29 July 2023
- Flutter SDK version upgrade in latest version on 3.10.6.
- Implemented Eye of God feature for admin panel.
- If the driver puts the app in the background or locks the phone, they will still receive a notification for the ride.
- Resolved Google Map issue in the driver application.
- Introduced Schedule Order functionality.
- Implemented support for multiple taxes when placing an order and manage it from admin panel.
- Show sales report from admin panel.
- Implemented Public / Private Coupons.
- Dynamic Notification implementation.
- Added preparation time setting when accepting an order.
- Properly set all notifications with dynamic text from the admin panel.
- Numerous improvement on app, web and admin panel.
- Fixed QR code scanning issue.
- Added Vendor Order Tracking history.
- Admin commission now visible in Vendor Tracking history.
- Resolved currency dynamic display issue with left and right side symbols.
- Updated Delivery Tracking Functionality.
- Redesigned Order Details screen.
- Created an Email template for improved communication.
- Get sound notification for store's new chat in client app.
- Send Emails to users follow by email templates from admin panel.
- Implement order's accept reject duration for drivers.
- Fixed other known issues.
Version 4.2 — 22 May 2023
- Firebase dependency upgrade on latest version.
- Flutter SDK version upgrade in latest version on 3.10.1.
- Fixed other known issues.
Version 4.1 — 01 May 2023
- Compatible to flutter version to 3.7.12.
- Referral system with back-end settings — both web and app.
- Wallet top-up on driver application — Driver app.
- Min. amount to receive order for drivers — Driver app.
- Min. amount to withdrawal for drivers — Driver app.
- Back-end settings to set both above limits — Admin panel.
- Sign up with phone (For store & user) — Web Panels.
- New vendors menu at admin panel to approve before login.
- Numerous improvement on app, web and admin panel.
- Fixed other known issues.
Version 4.0 — 23 February 2023
- Compatible to latest flutter version 3.7.3.
- Restaurants can add their own stories.
- Food attribute variant.
- Rating attributes while placing a rate an order. Even a user can place a rate to specific food of the order.
- Advanced newer version of the website with fully dynamic landing page.
- Advanced admin panel.
- Content Management system to add multiple contents.
- Dynamic footer management.
- List out the restaurants of specific category on the homepage.
- Dark mode / Light mode switch in the app.
- Messaging INBOX.
- Solve the issue to display coupons in the specific radius.
- Banner management system for Customer App.
- Numerous improvement on app, web and admin panel.
- Fixed other known issues.
Version 3.2.4 — 14 September 2022
- Day — Time wise special discount for Customers. Managed by restaurants.
- Driver auto assigned for the new order — i.e. the idea is if I have 10 drivers, and there are 20 orders, 10 orders are accepted by all 10 drivers, remaining 10 orders will automatically assign one by one according to distance once any of the drivers finished the delivery.
- Cloning feature to create a Restaurant clone with categories, products, images, addons etc.
- Put the print option in order listing and order detail screen on Admin and Store Panel with Thermal Printer integration.
- MercadoPago Payment gateway.
- Order Sound in Restaurant app and Driver app.
- Update Place API package.
- Banner management system for Customer App.
- Optimized homepage of the Customer app.
- Numerous improvement on app and admin panel.
Version 3.2.3 — 24 August 2022
- Ease in access through QR Scanner.
- Mobile Friendly Login for Restaurant Panel and Website.
- RTL along with Multilingual Support.
- Restaurant web panel equipped to add bank details for Restaurant and Driver app.
- Wallet withdrawal option from app and web panel.
- Additional option for admin to accept and decline wallet withdrawal.
- Get perfectly optimized images without compromising the quality of the image.
- Numerous minor improvements.
Version 3.2.1 — 08 July 2022
- KM(s) wise delivery charge. Admin and Restaurants can set delivery charges per Km.
- Customer and Restaurant can chat with each other after order placed.
- Customer can see restaurant's address in the map rather than his/her own location for take-away orders.
- Dynamic Contact Us details managed through back-end.
- Back button issue resolved.
- Tip select-deselect issue has been resolved.
- Many minor improvements.
Version 3.2.0 — 29 June 2022
- Compatible to Flutter 3.1.
- Dine-In / Book a Table Feature with Push notifications, Booking History, Booking confirmation.
- Users can see the restaurants without login.
- Dynamic color picker for website and app to match with your LOGO's color.
- New Payment Gateways Flutterwave, PayFast and PayStack payment gateway.
- Admin can send the notifications to Customers, restaurants and Driver.
- Add TAX and Note field while placing an order.
- Performance Improvement.
- Fixed minor issues.
Version 3.1 — 12 May 2022
- Add category option to admin panel.
- Fixed Order Total issue in restaurant and admin dashboard.
- Admin commission settings changes.
- Order not showing in Restaurant APP when order is placed from Website — Fixed.
- Coupon image not showing when coupon is created from restaurant app.
- If order type is takeaway then order shipping and tip amount field should not display, and place holder image should display if item doesn't have image in "View order" page.
- Place holder image not showing in Order details page in Admin panel, Restaurant Panel.
- Newest entry of the order should display at first position of list (Completed, On progress, cancelled) in My Orders page.
- Coupon code is not showing in order details page.
- Added "Add to Favorite" functions.
- Fixed some other small issues.
- Optimize the code to improve the performance.
Version 3.0 — 22 April 2022
New features:
- Advanced Homepage.
- Website.
- Wallet integration.
- Refund to wallet.
- Top-up your Wallet.
- Payment through your Wallet.
- One Page Landing Page.
- Added new payment gateways.
- Restaurant wise promos.
- Delivery / Take-away Options.
- Admin commission.
- Food Addons.
- Tip to the driver.
Version 2.0.1 — 11 January 2022
New features:
- Add to cart button disabled for Food items of Closed Restaurants.
- User authentication import script (see Documentation).
Bug fixes:
- Solve Dynamic category issue.
- Fixed OTP login issue.
Version 2.0 — 06 January 2022
New features:
- Added Veg food menu green light icon.
- Login/Signup with Phone number.
- Open and closed badge for restaurant in customer app and setting at restaurant app.
- Added Audio recording in chat.
Bug fixes:
- Fix crashes.
- Orders are not displaying Order by date DESC.
- Sharing and Rating issue is fixed.
- Add real-time tracking system into the customer app.
- Photos are not displaying after clicking on PHOTO icon — Fixed.
- Delivery address saving issue is fixed.